Learn how to get the most of Paint Shop Pro with these tutorials and user guides found only on Bright Hub’s Digital Photography Channel.
Paint Shop Pro Tutorial Topics
Have you just recently purchased a copy of Corel Paint Shop Pro Photo X2 Ultimate and aren’t sure where to start? Or are you looking for information on how to use some of the more advanced tools in the digital photo editing application? Bright Hub’s Digital Photography Channel has a number of Paint Shop Pro tutorials for enthusiasts of all levels. Here’s a sampling of some of the topics covered in these user guides.
Changing Colors – If you’ve ever wondered what you would look like with green eyes or wanted some help with choosing a new color to paint your house, Paint Shop Pro’s color changer tool can help. For a more advanced color-changing tool, you may also want to
look into trying out certain plugins like AKVIS Coloriage .
Fix Minor Technical Problems – Even with the best-planned shot, things can sometimes go wrong. Instead of throwing your hands up in disgust, you can correct most of these problems in Paint Shop Pro by using features such as the straightening tool and crop tool .
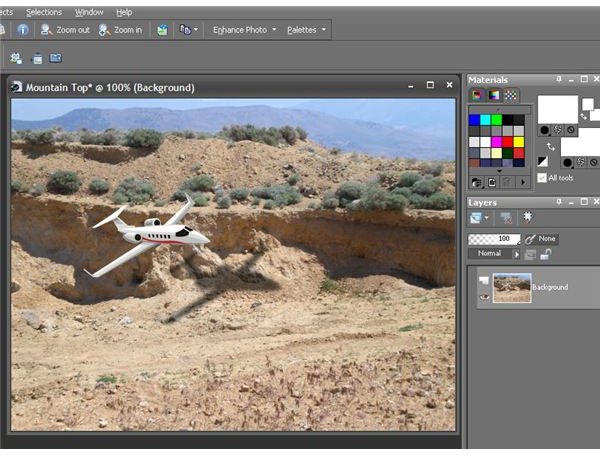
Get Rid of Distracting Backgrounds – There are times when a distracting background can take away the spotlight from the real object you want to focus on in a digital photo. One way to solve this problem is to apply a depth of field effect that will blur out any unnecessary scenery or people in the background of the photograph. If that’s not enough, you can get rid of the distraction completely using the new background remover tool that comes packaged with Corel Paint Shop Pro Photo X2 Ultimate.
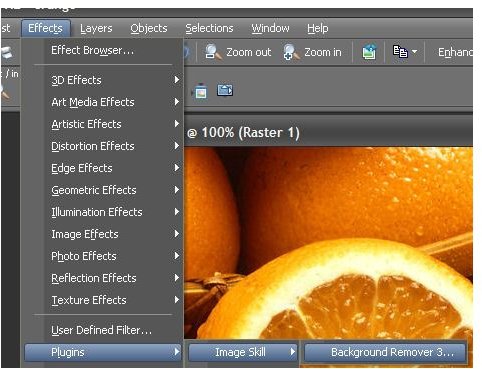
Installing Plugins – A great feature in Paint Shop Pro is that you’re not just limited to the tools that come with the software. There are a number of add-on applications that are compatible with the application, and many of these plugins are free ! However, sometimes these plugins can be a little difficult to install. If you’re having trouble with this issue, check out these tips for loading third-party plugins in Paint Shop Pro.
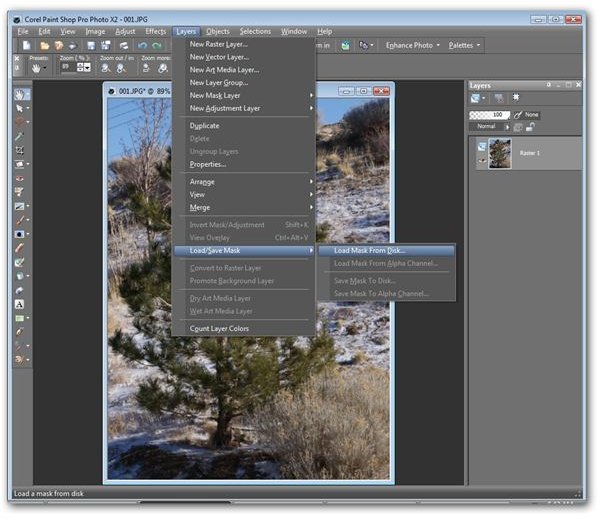
Layers – Image layers are one of the most powerful tools found in any photo editing application, and Paint Shop Pro supports nine different layer types . To find out more about what makes these objects so special, see this tutorial on how to use layers when editing digital photographs in Paint Shop Pro.
Makeover Tools – Not too thrilled about how you look in that last family photograph? The makeover tools in Paint Shop Pro can do everything from whiten teeth to remove skin blemishes . You can even give yourself a suntan or make yourself look thinner .
Photo Compression – With today’s high resolution digital cameras, individual photos can be quite large in size. In fact, they may be so large that emailing them or uploading them to the internet can take a while One way to speed up this process is to compress the JPEG images in Paint Shop Pro before sharing them with others. (However, if you want to compress these images for storage reasons, you may want to consider a lossless form of compression like that found in WinZip 12.) It’s important to note, though, that JPEG compression can cause some noise problems to appear in the photos. To get rid of this noise, you may want to try a special noise removal plugin such as Topaz DeNoise .
More Paint Shop Pro Tutorials

Picture Tubes – A neat feature in Paint Shop Pro is the picture tube tool that allows you to add all types of decorations and designs to your digital photos. In addition to the collection that comes packaged with Paint Shop Pro, there are a number of free picture tubes available for download from various web sites. For those who are even more creative, you can design your own picture tubes and save them for future projects or share them with others.
Removing Objects and Flaws in Photos – Ever looked at a digital photo and thought, “How did that thing get in there?” Paint Shop Pro contains a number of tools, such as the object remover tool , that can be used to get rid of unwanted items in photos. If the flaw in your photo is small enough, like a smudge caused by a speck of dust on the lens, you may even be able to remove it in one click with the blemish fixer . If there are a number of flaws in the photo or you are working on a restoration project, the tools found in AKVIS Retoucher may help simplify your work immensely. Or, if you want to extract the object so that you can use it in other digital photo editing projects, you may want to check out AKVIS SmartMask .
Special Effects – There are a number of special effects that you can apply to digital photos in Paint Shop Pro, such as adding a drop shadow to objects or creating a rollover image for use in a web page. You can even give a photo a more artistic look by using plugins like Topaz Adjust and AKIVIS ArtWork . If you want to stick with the tools that are part of Paint Shop Pro’s basic collection, try applying a mask layer or something as simple as adding a texture . It’s even possible to use Paint Shop Pro to see what you would look like with a tattoo !
Watermarks – There are a lot of benefits that can be gained from using watermarks to “sign” your digital photographs. With Paint Shop Pro, you can easily create a custom watermark that incorporates your signature, logo, or any other design. You can then save and apply this watermark to any image using the photo editing software.
Additional Paint Shop Pro tutorials are being added to the Digital Photography Channel all the time, so make sure to bookmark this page and check back often.


