
Now that we know how to create a watermark, we’ll look at how to add watermarks to our images using Corel Paint Shop Pro Photo X2.
Adding your watermark to an image - Step 1
Creating your watermark was the “hard” part, now it’s time to add your watermark your photos.
First, open the picture that you would like to add your watermark to, by selecting File and Open…. Navigate to where your photo is located on your computer and double-click on the image to open it in Paint Shop Pro Photo X2.
You can also open your image from the Organizer at the bottom of the screen.
(Click on images to enlarge)
Step 2
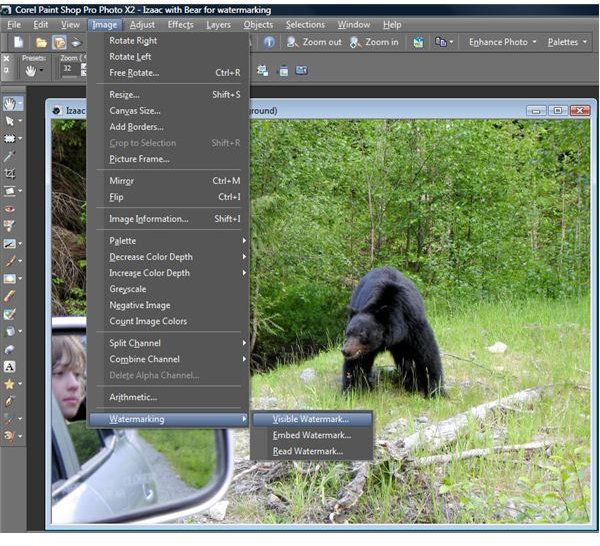
Select Image>Watermarking>Visible Watermark…
A window will open called Visible Watermark.
Click on Browse and navigate to where you saved your watermark to open it.
Step 3
Now it’s time to decide where you’d like your watermark placed and what style you’d like your watermark to have. The preview windows make it easy to see what your photo will look like before saving your changes.
Select whether you’d like to have your watermark placed in the center of your photo, tiled or in a corner.
Play around with the Size, Opacity and Emboss features until you have the watermark to your liking.
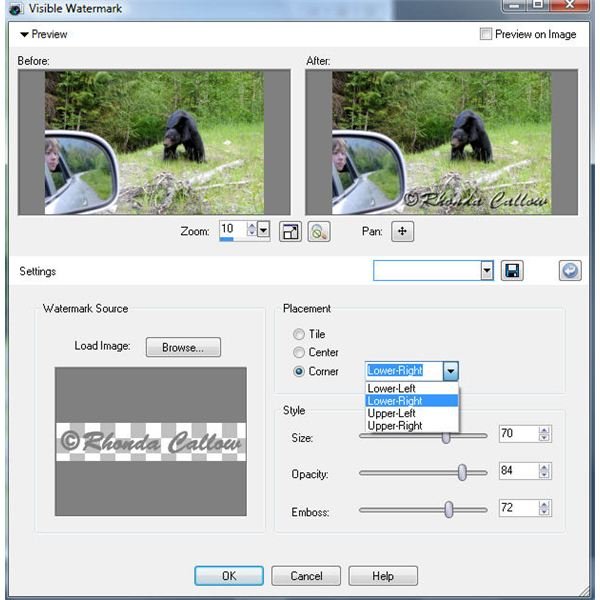
Click Okay when you think you’ve got it. The window will close and you’ll see your photo with your watermark added. If you don’t like the looks of it, simply click on the blue Undo arrow at the top of the window (keyboard shortcuts: Alt + Backspace or Ctrl + Z), and repeat the steps above.

Step 4
Save your photo and you’re done!
Note: Paint Shop Pro Photo X2 may have remembered your “save as” format settings from when you saved your watermark as a PNG, so you might need to change the file format back to JPEG (or whichever format you’d like your photo saved as) before saving your photo.

Additional Tutorials
If you found this tutorial helpful, check out the other Paint Shop Pro tutorials and resources found in Bright Hub’s Digital Photography channel.
This post is part of the series: Watermarks and Corel Paint Shop Pro Photo X2
Creating and adding a watermark to your digital photos is really quite simple. This tutorial series will teach you how using Corel Paint Shop Pro Photo X2.


