
One easy way to quickly turn a digital photograph into a work of art is to use the built-in texture effects found in Corel Paint Shop Pro Photo X2.
What is a Texture?
In general, a texture is a type of effect that can be applied to a digital photograph or other image in Paint Shop Pro that makes the graphic look like it was printed on some special type of material. Some common textures used when editing photos are effects that resemble crumpled paper, fur, and granite.
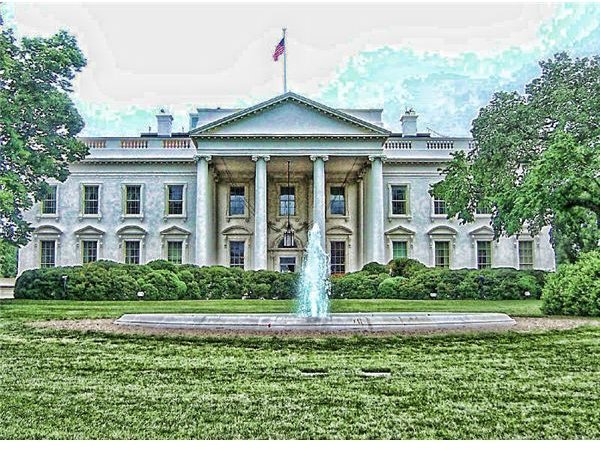
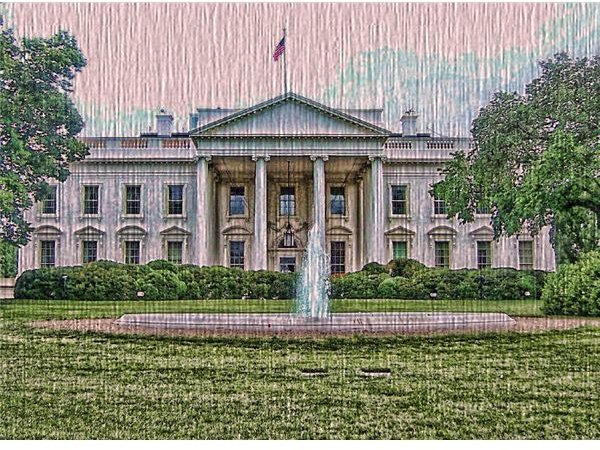
When applying textures, you can obtain a number of interesting results. Certain “materials” will give a three-dimensional, or illusion of depth, to digital photos. Others can make your image look more like a painting or a sketch, like the one shown below. Textures can even be used to highlight the details in specific items in a photo and de-emphasize others. The possibilities are almost endless.
(Click any image for a larger view.)
How to Apply a Texture to a Photo
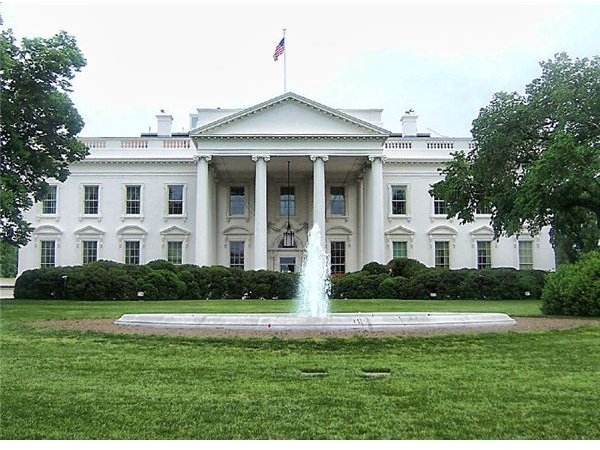
Step 1: Open the photo you want to use in Paint Shop Pro. In this example, I’ll use a public domain image of the United States White House.
Step 2 (Optional): Apply any other effects to the photo. This step isn’t necessary, but since the particular original photo that I’m working with in this example is a little drab and dreary, I want to spice up the color a bit. There are a number of tools that you can use in Paint Shop Pro to do this, but I chose to use the pre-defined “psychedelic” effect from the Topaz Adjust plugin . (This really is a great plugin that expands the creative potential of Paint Shop Pro, and the developers offer a 30-day free trial so you can try it out for yourself.)
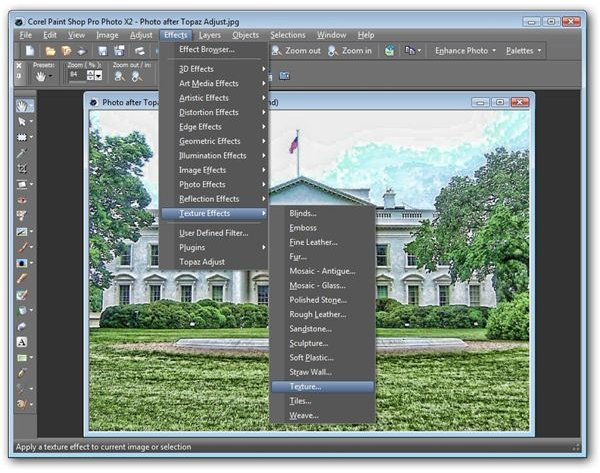
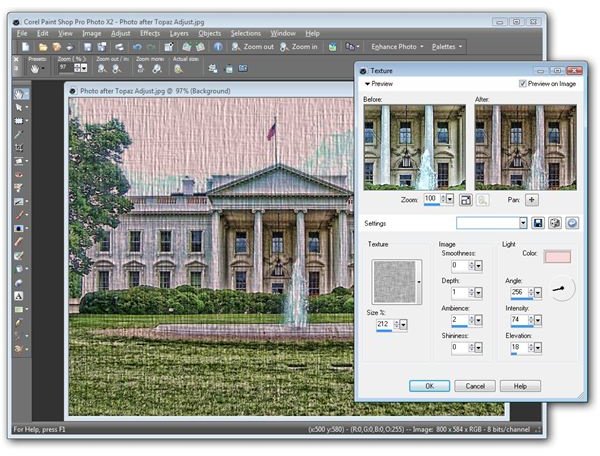
Step 3: Now it’s time to apply the texture. From the Effects menu on Paint Shop Pro’s main toolbar, select Texture Effects and then Texture.
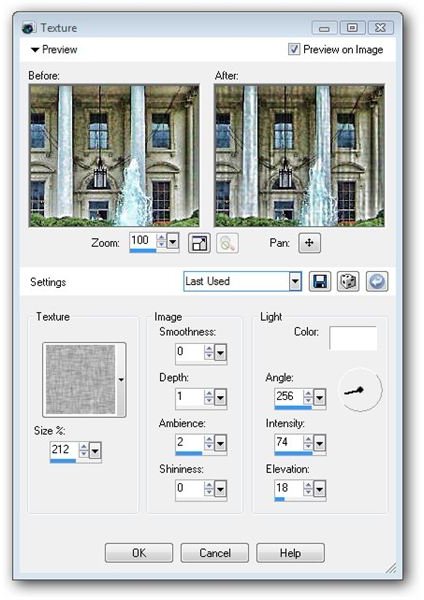
Step 4: In the Texture window that opens on your screen, there are several different characteristics you can modify. Although not necessary, the first thing I like to do is put a check in the box next to Preview on Image that’s located in the upper right corner of the window. This way, I can see how the modifications will appear in the photo before actually applying them.
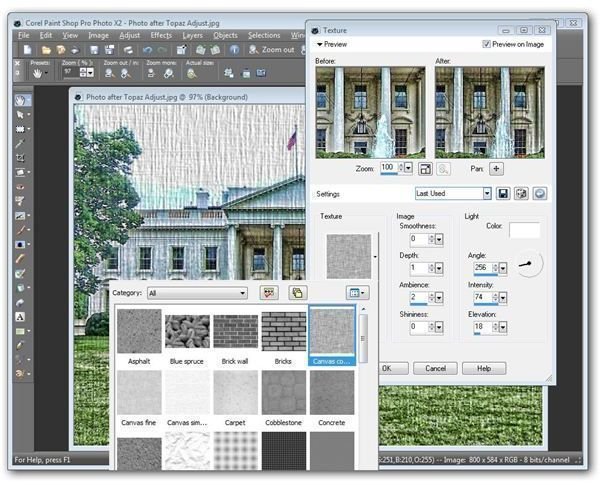
Clicking on the image under Texture in this window will open up another panel showing a thumbnail preview of all the texture swatches you currently have available in Paint Shop Pro. (It is possible to add other textures or even to create your own. To find out how, see Create Textures from Digital Photos using Paint Shop Pro .) Try a few of these out and see how they change the look and feel of your image. For this example, I’ll pick the texture labeled Canvas course.
Next: Continue to page 2 of this article to find out more about the different controls available in the Texture dialog box and how adjusting them will affect your final image.
How to Apply a Texture to a Photo (Continued)
Step 5: Depending on the chosen texture and your particular photograph, the effect may seem too strong or too weak. This can be modified using the other settings in the Texture dialog box.
Here’s a brief description that explains what each setting does.
- Size – This control changes the size of the texture swatch itself. Basically, a smaller percentage here will decrease the size of the original swatch, causing more copies of the tile to be needed when filling your photo. A larger percentage does just the opposite.
Image Settings
-
Smoothness – The Smoothness setting is used to change the sharpness of the edges in the texture swatch. Increasing this value gives a more blurred look to your chosen texture.
Advertisement -
Depth – This setting can be used to modify the strength of the details in the texture. Higher values will cause the texture to have a more “raised” appearance. If your texture seems to be so dominating that it’s hiding the original photograph, try adjusting the depth to a lower value first.
-
Ambience – With the Ambience control, you can adjust the brightness of the image with the texture applied. A value of 0 will yield the same brightness as the original image. Positive values will brighten the photo, and negative values will darken it.
Advertisement -
Shininess – This setting modifies the surface reflection of the image, and it can be a fun one to play around with! When using certain textures, high values of this control will give your image a more sketch-like appearance.
Light Settings
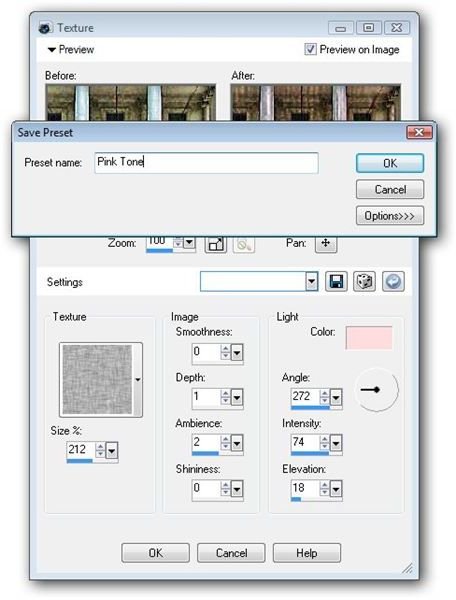
- Color – This control changes the shade of the light in the image, and it can also be used to create some stunning effects. In the screenshot below, I modified the light color from white to a pale shade of pink just to show how a very minor change here can make a huge difference.
-
Angle – With the Angle setting, you can choose which edges in the texture swatch are more emphasized. Basically, this control is used to define the position from which the light is “hitting” the texture, causing different edges in the texture swatch to become darker or shadowed in appearance.
Advertisement -
Intensity – This control is used in conjunction with the Ambience setting to adjust the brightness. Ambience will change the brightness of the entire image, but Intensity modifies the brightness of the directional light based on the values chosen for the Angle control.
-
Elevation – The Elevation control is also used to modify brightness properties in the image. Values for this setting correspond to the angle of elevation of the light that is being directed at the photo.
Advertisement
The best way to see how all these different settings will affect your digital photo is to experiment with them until you find one (or more) that you like. If you do discover a particular combination and want to save it for later photo editing projects, click on the Save Preset button (this is the button with a floppy disk icon) and you’ll be prompted for a name for your new settings. From now on, you’ll be able to access this preset configuration from the Settings drop down box.
Step 6: When finished making all of your modifications, click OK and the results will be applied to your photo.
Though the description of this process may have seemed a little long-winded, it actually doesn’t take much time at all. Just remember, if you discover a custom configuration that you really like, take that extra second or two and save it as a preset. That way, you won’t have to spend hours later on trying to recreate the same effect.
If you’re looking for additional ways to “dress up” your digital photographs using Paint Shop Pro, check out some of the other tutorials found here on Bright Hub’s Digital Photography Chanel, including how to apply depth of field , tips and tricks for working with layers , and how to get rid of the background in a photo. Also, take a look at this tutorial describing how to create a custom watermark in Paint Shop Pro , so you can make sure that your new designs are protected before sharing them with the world.


