A great new feature of WinZip 12 is the ability to compress JPEG files an appreciable amount without losing any of the original image quality. This guide will lead you through the steps required to get the most benefit from this new JPEG compression tool.
With the release of WinZip 12 , there’s finally a way to get noticeable results when compressing JPEG files without losing image quality. However, if you haven’t used WinZip before or if you usually use the WinZip Wizard, it can be a little tricky finding the options that allow you to utilize this new feature. The following step-by-step guide will walk you right through the process.
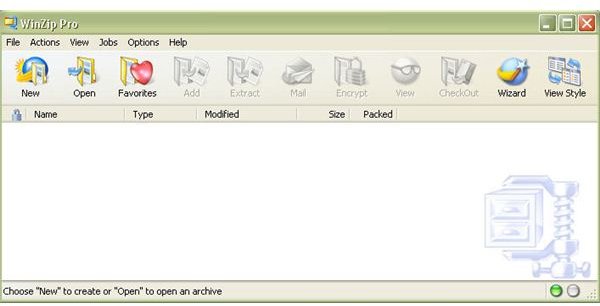
1. Open WinZip 12 in WinZip Classic Mode.
To use the JPEG compression feature of WinZip 12, first make sure you’re working in WinZip Classic mode. If your default configuration for the software starts the application in WinZip Wizard mode, click on the WinZip Classic button to switch back to classic mode.
2. Open a new archive.

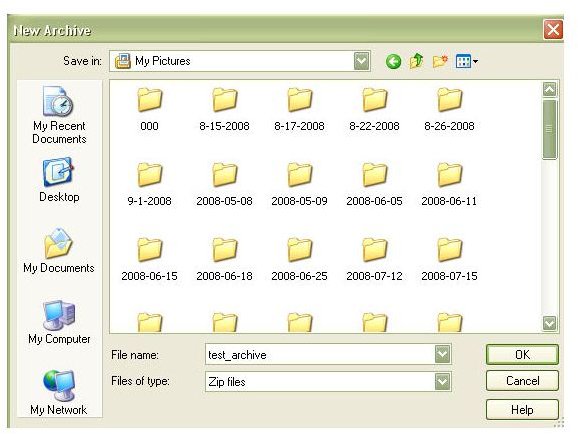
Click the New button to start a new archive. This will open the New Archive window where you can give a name for the zip file you want to create and choose a directory to store it in. Once you’ve done this, click OK to continue.
3. Select the file(s) that you want to compress and the compression method.
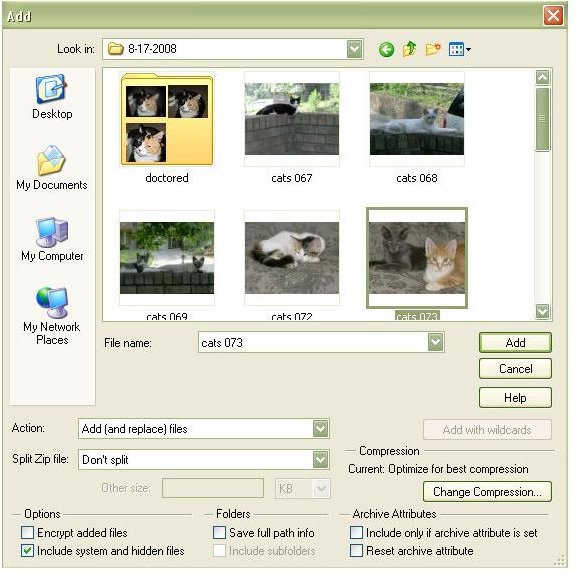
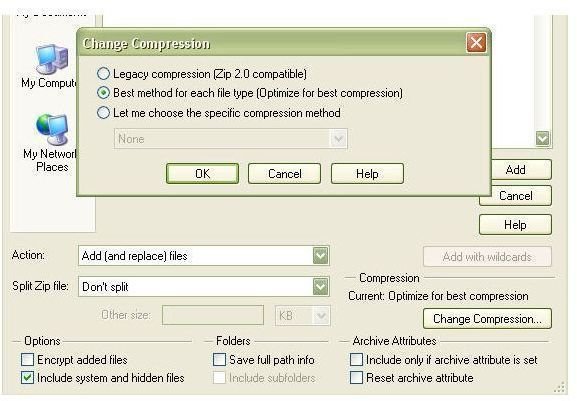
The next thing that will pop up on your screen is the Add window. Here, you can navigate to any directory and choose the JPEG files that you want to compress. There’s also another very important thing to check in this window. The new JPEG compression tool in WinZip 12 is only functional if you’ve selected the “Best method for each file type” method of compression. You can make sure that this option has been chosen by clicking on the Change Compression button in the lower right-hand corner of the Add window.
After you’ve selected all of the photos you want to include in the zip file and verified the compression method, click the Add button to start the actual compression. This may take a few moments depending upon the size of the files you are compressing.
Comparing Results of JPEG compression with Standard Compression
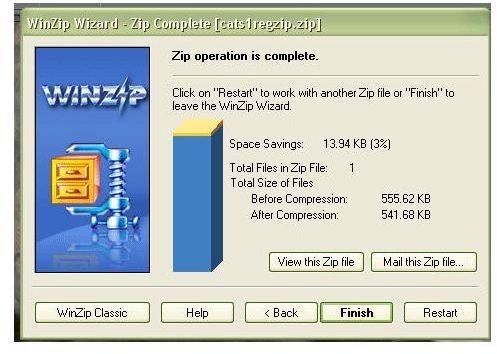
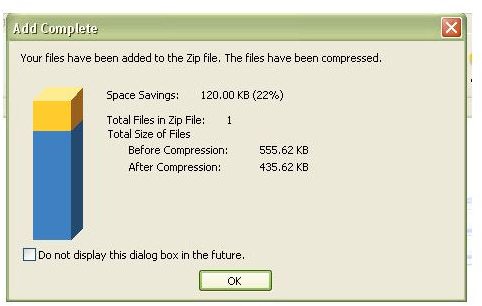
To give an example of the improvement that JPEG compression is over standard compression for photos, I took one photograph and compressed it using each of the two methods. With the standard compression method, I was only able to gain a 3% reduction in file size. However, the JPEG compression method resulted in a 22% improvement. Now, that’s a big difference!


