Using the Color Changer tool in Paint Shop Pro can change your shirt from red to blue, the dog from brown to pink or the paint on your walls from white to orange. Any color you’d like to change in your digital photos is possible, and the best part? It takes no time at all and is very easy to do!
Enhance Your Digital Photos Easily
There are several reasons why you might like to change the colors in your photos. Perhaps you simply don’t like the color of clothing you were wearing in a photo; or maybe your teenage daughter would like to see how she would look in a bright purple shirt before spending a generous amount of your money buying the one on “sale” at the mall (yeah right). Maybe you’d just like to have fun creating images that are totally outrageous and amusing, like turning the family pet into massive, furry pink and green thing on four legs; or perhaps you’d like to see how the walls in your bedroom would look painted a burnt orange. Another plus? Images containing high color contrast can help draw the eye to the subject and are brilliantly vibrant. We’re not always presented with bright contrasting colors out in the “real world”, so it’s a good thing we’ve got photo editing programs, like Corel Paint Shop Pro Photo , to help us out!
How to Use the Color Changer Tool
Step 1: Open the photo you wish to edit. When deciding on a photo to edit, keep in mind that when you change the color, everything within the photo that contains the same color will also be changed without taking further steps. The tolerance settings can be changed so the edits aren’t ridiculously sensitive and you can select specific areas to be recolored, but we’ll get to that in a moment.
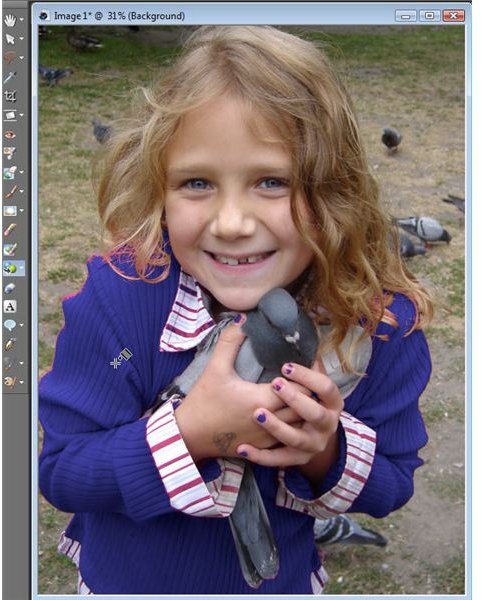
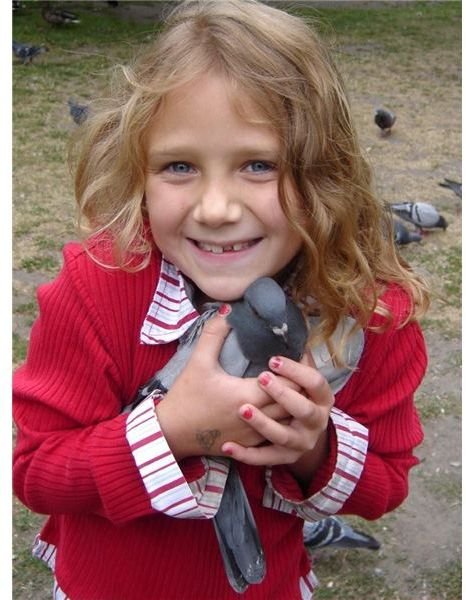
For this tutorial, I’ll be changing the color of my niece’s shirt. You’ll also notice that when I do make the changes, because her fingernails are painted the same color as her shirt, these too, will also change.
(Click on images to enlarge)
Step 2: Make sure your Tools toolbar is visible, as well as the Tool Options palette. To do this, click on View>Toolbars>Tools and View>Palettes>Tool Options and make sure they are checked off.
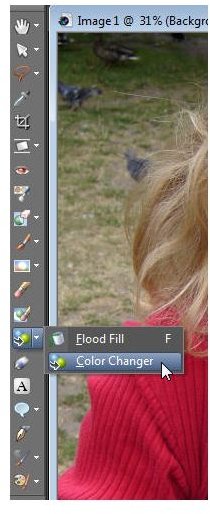
Select the Color Changer tool on the left, as shown in the screenshot below. The Color Changer tool is grouped together with the Flood Fill tool, so if you can’t see it within the toolbar, click on the arrow beside the active tool to select the Color Changer.
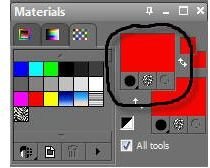
Step 3: From the Materials palette, click on the foreground swatch to open the Materials Property box. (The Materials palette should be visible on the right, press F6 on your keyboard if you don’t see it.)
Please continue on to the next page of this tutorial to learn the final steps you need to take to change the colors in your photos.
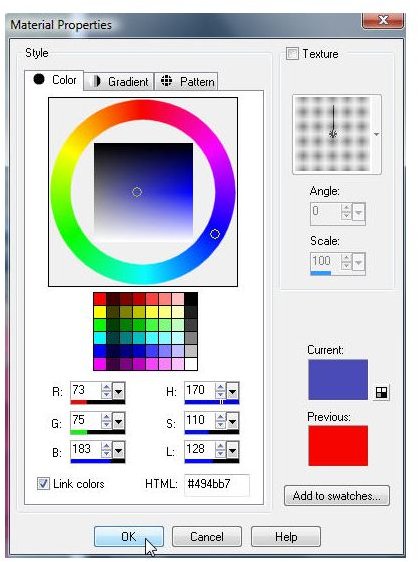
Step 4: Choose the new color you wish to use. You’ll notice that the color you’ve chosen will be shown on the right in a box called Current.
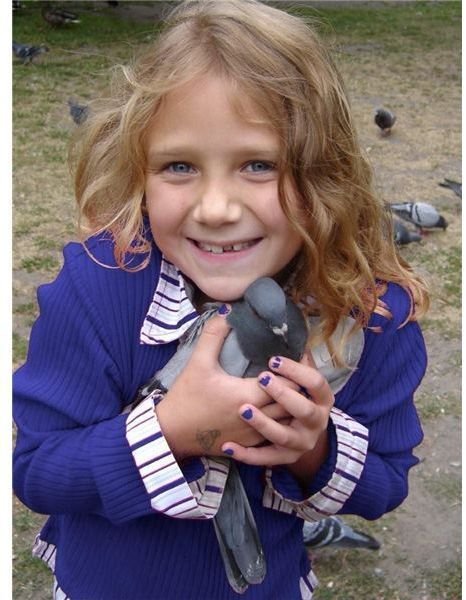
If you’d like the color to be toned down for a more realistic look, change the saturation to a lower number (the box labelled “S”). I’m going to change the shirt to blue and adjust the saturation number to 110.
When you have the color you want and have set the saturation, click OK.
Step 5: If your photo has other elements within it that contain similar colors to the object you wish to change, you have two options:
- Change the tolerance settings located in the Tool Options palette. The higher the number is, the more like-colors will be changed. Conversely, the lower you set the tolerance, the more “picky” the Color Changer will be, changing only the colors which closest match the color you select to change.
- Use the selection tool. If your photo has a lot of similar colors, but you only want one area to change, click on the Freehand Selection Tool and “draw” around the area that you would like to change. For example, in my photo, my niece’s lips are closely matched to the color of her shirt, and so, without making the tolerance level extremely low, her lips will also change to blue.
For now, I’m not going to use the Selection Tool. I’ve set the Tolerance to 50, let’s see what happens…
Step 6: Simply click on the area that you’d like changed. If ever you aren’t happy with the results, pressing Ctrl + Z on your keyboard will undo the changes.
You’ll notice that the majority of her shirt has changed color, but there is still some red remaining on the stripes of her shirt, around the edges and on her fingernails. This is because I don’t have the tolerance control set too high; as mentioned above, if I did, her lips would also change to blue.
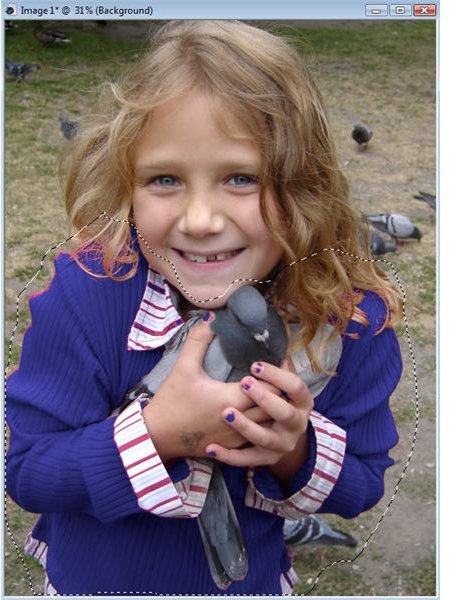
So, what do I do now? Taking the Freehand Selection Tool…
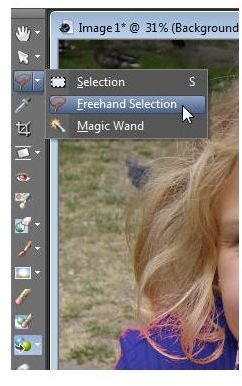
… I’m going to draw around the shirt to exclude the face. If necessary, zoom in to get a more accurate selection.
Step 7: Once the area is selected, click on the Color Changer tool and apply as you did in step 6. Even with the lips excluded, when I clicked on the remaining red, the hands also changed to blue. The simple fix is to adjust the tolerance to a lower number (I adjusted it to 30) and play around until you are satisfied with the results.
Additional Tip: Edge Softness, located beside Tolerance in the Tool Options palette, influences the outlining pixels of the area you are recoloring. Corel explains in their help files that “Higher settings cause more ‘bleeding’ of the recoloring”.
Before & After
Additional Resources
Did you find this tutorial helpful? Bright Hub’s Digital Photography channel has several Paint Shop Pro tutorials ideal for beginners and advanced users! You’ll find resources on everything from using layers to reviews of the best free plugins compatible with Paint Shop Pro by visiting our master list of Paint Shop Pro tutorials and resources .


