If you are looking for a sleeker design with a cool metallic feel, these steel web buttons are a lot easier to create than you may think! Learn how in this Adobe Illustrator tutorial.
Steps for Creating the Buttons
In this Adobe Illustrator tutorial we will be creating a blue steel 3D slanted button. This button is created using a 3D effect in the graphics library. I applied a gradient to it to give it a shiny look. Open your Illustrator program and create a new document to work on.
Drawing the Rectangle and Applying the 3D Effect
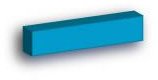
We will need to start off by drawing the rectangle for the button. So, grab the rectangle tool from the toolbar and draw a rectangle on your document. Then go to the top of your Illustrator window and click Window > Graphic Libraries > 3D Effect. When the box opens, you will need to click the first icon in the box. It is called 3D Effect 1. Click that effect and apply it to the rectangle. Your button should look like the one below.
Breaking the Link to the Symbol
Now we will edit the button. In order to edit the button, you will need to break the link on it. Click the button to select it and right click on it. In the menu that drops down you will see the Break Link to Symbol link. Click that link to break it. Now you can edit your button.
Applying the Gradient to the Button
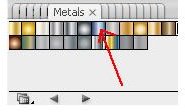
Next, you will need to apply the gradient to the button. You will need to open the Metals gradient box. To open the box, go to the top of your window and click Window > Graphics Libraries > Gradients > Metals. Find the Blue Steel gradient in the box. Placing your mouse over the gradients will display the names of the gradients. Once you find the gradient, click it to apply it to the button.
Changing the Stroke Color of the Button
The last step is to change the stroke color of the button. Click the button and double click the stroke color box in the toolbar. When the box opens, paste the following in the Hex field, # 7AA6D8. Click OK on the box to close it.
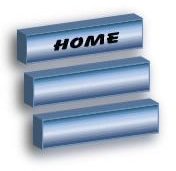
Now you can add the text to your button. Adding the text will see a little tricky but it’s not. When you type your text, drag it to your button. Then grab the transform tool from the toolbar and rotate the text until it fits on the button.
Once you have created your first button, you can duplicate the other buttons that you will need. You can duplicate the other buttons by copy the original button and pasting the other buttons.
This post is part of the series: Adobe Illustrator CS3 Buttons
This series will show you how to create buttons in Adobe Illustrator.
- Introduction to Creating Web Buttons in Adobe Illustrator CS3
- Adobe Illustrator CS3 Buttons: Rose Faded Drop Shadow Button
- Applying a Chrome Effect to Web Buttons in Adobe Illustrator
- Adobe Illustrator CS3 Buttons: Pink Gradient Leaf Buttons
- Adobe Illustrator CS3 Buttons: Green Gradient Cross Buttons
- Creating Glass Buttons With Illustrator
- Adobe Illustrator CS3 Buttons: Pink and Silver Bullet Button
- Adobe Illustrators CS3 Buttons: Water Blue and Yellow Buttons
- Adobe Illustrator CS3 Buttons: Black and Silver Chrome Pill Button
- Creating Slanted Gold Web Buttons in Illustrator
- Adobe Illustrator CS3 Buttons: Blue Steel 3D Slanted Button
- Adobe Illustrator CS3 Buttons: Silver Plastic Pill Button with Spirals
- Adobe Illustrator CS3 Buttons: Silver Bullet Buttons


