The good news is it involves inserting four screws; the bad news is you are inserting them into something that weighs ten pounds and is shaped like squid.
Big Stuff Goes In First
A principle that applies to everything from packing a suitcase to warehousing is to put big things in first and stuff little things around it. A PC is no different; it is better to get the single biggest piece, the Power Supply Unit (PSU), in first. You will have more room to work, and won’t have to worry about dropping or bumping that big heavy brick into your delicate components.
When working in a smaller case though, the PSU can block access to other components, and those have to go in first. People replacing a PSU in an existing machine also face this slight complication. We will do it in a smaller case, with the motherboard and CPU already in place. If you are working in an empty tower, the procedure is largely identical but easier to execute and you can skip to the next section.
If you have a smaller case or equipment is already installed in the PC for whatever reason, look carefully at where the PSU will go before you start screwing it in. Make sure it isn’t going to block access to any connectors or such you will need to reach later in the build (or upgrade) process.
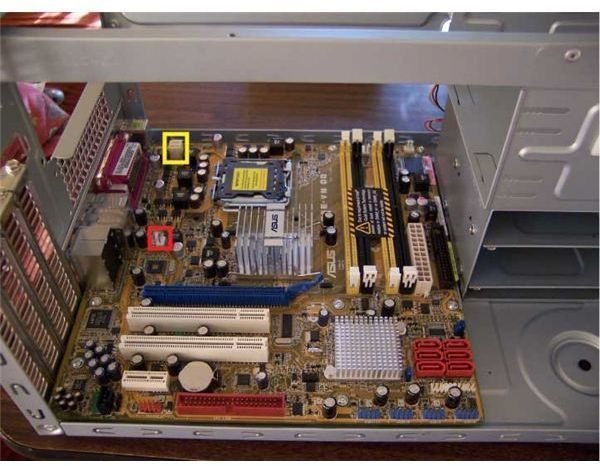
For example, in our SUGO-SG02-F case from Silverstone, as pictured, the PSU will go over the upper left corner of the motherboard. That
is why we installed the CPU and its cooler already. Also, the PSU will be above the 4-pin ATX connector and a chassis fan connector that we plan on using (in yellow and red squares, respectively in our picture) for an extra fan later. The 4-pin can be reached with the PSU in place since it is right on the edge of the board.
Dealing with the fan connector can be done in two ways. We can plug the fan in and do our best to keep it out of the way until the bracket where it goes is finally available in the penultimate step of the system build, or we can use small pliers for the rather finicky step of connecting the fan under the PSU. It boils down to preference and your access to tools. I have dozens of wee pliers about, and I had to keep moving the system around to get pictures, so I chose the latter.
Of course, you can’t figure out if the PSU will block anything until you answer one important question…
Where Does It Go?
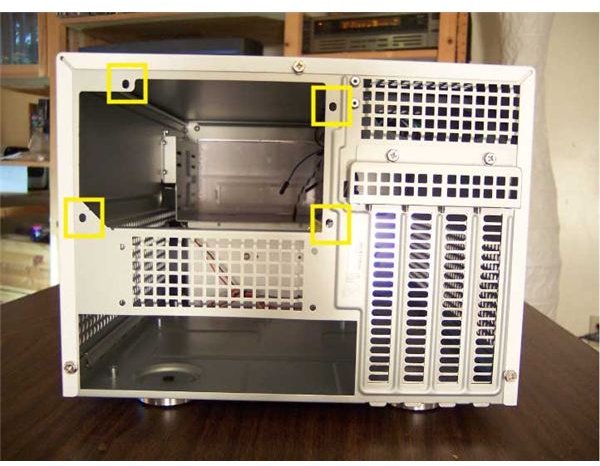
Power Supplies are almost universally located along the back panel of the machine. In a tower, this will be at the top or bottom of the back panel. In an SFF, the PSU can be anywhere along the back panel. The picture indicates (with yellow squares) the four screw-holes we will use to hold the power supply in place.
If your PSU came with screws, use those. If not, they are almost always case screws (hex head with Phillips screw) anyways. There should be enough included with your case to spare.
Note that the holes are not symmetrical and your PSU will only go in one way. Some cases have three holes top and bottom; you still only use four, but it allows you to mount the power supply in the direction you prefer, this can be important if the PSU has a fan on the top or bottom which will obviously not do much good if it is up against a panel.
Simply screw in the four screws while supporting the unit from the inside. Even if you don’t have anything delicate in the case yet, the
PSU is plenty heavy enough to break plastic and dent metal panels if dislodged.
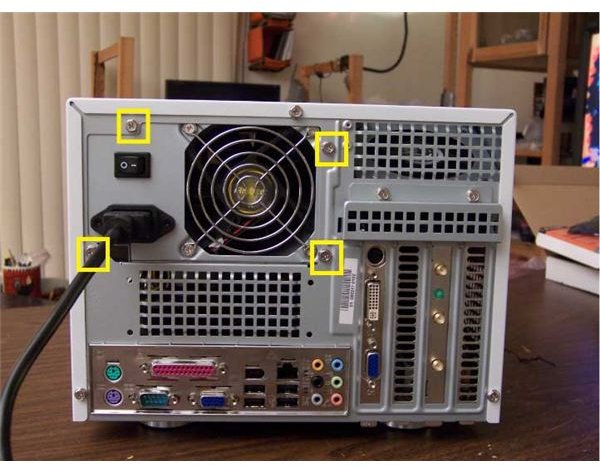
The second picture shows the PC later on in the build, where we can see the screws attached (yellow squares) and the power cable connected.
Are We Done?
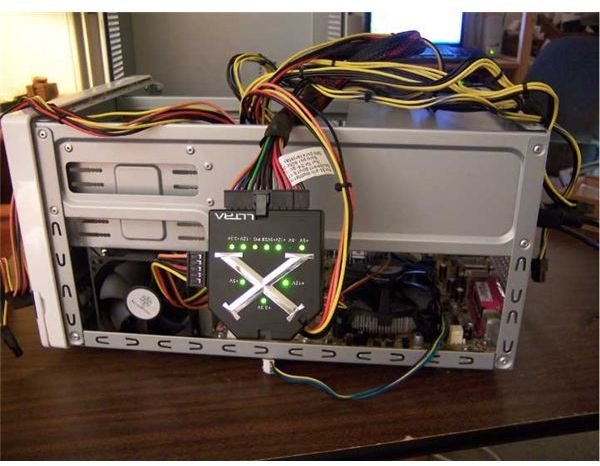
Not exactly; the Power Supply is screwed into the case, but there are still all those wires to deal with. In the picture they are all spread out because I am in the process of testing them. The tester pictured is great if you work with PC hardware often or want to confirm that the problem with your PC is the PSU before you put the time and money into a replacement.
We look at how to wire the PSU in a later article, once all the components are in the machine. For now, do your best to get all the wires out of the way so you have some room to work. If your build is just starting and you now need to install the motherboard and CPU, head to part 2, and we will get you looked after.
If you have been performing the steps in the order of the articles, congratulations! The core components, at least from a physical perspective, are all in the case. All we need to do now is toss in a few more things, hook it all together, and close it up. In the next article we put in our DVD/CD drive.
This post is part of the series: Building a PC
We show you how to build PC, step by step, with pictures.
- Building a PC: Open Your Case and Get to Work!
- Building a PC: Time to Install the Motherboard
- Building a PC: Installing a Core 2 CPU
- Building a PC: How to Install a Power Supply Unit
- Building a PC: Installing Memory
- Building a PC: Installing an Optical Device
- Building a PC: Installing a Hard Drive
- Building a PC: Installing Graphics and Other Expansion Cards
- Building a PC: Installing Fans
- Building a PC: Power Connections for the Motherboard and Fans
- Building a PC: Connecting the Hard Disk and Burner
- Building a PC: Connecting the Case’s Switches and Audio
- Building a PC: Connecting the Case’s Front Panel Ports – USB, Firewire, and eSATA
- Building a PC: Closing the Case
- Building a PC: Connecting Peripherals


