Finally, the end is in sight as we begin to wire everything together: it is time to get your motherboard some juice!
Why Are We Doing All the Power Stuff Before we Do the Data Stuff?
Well, we certainly don’t have to. Waiting until the end and doing all the cabling at once makes it a lot easier to put the system together since the cables would really get in the way. It also allows you to route cables together which is less messy and improves airflow.
The only reason I do power first is that a (quality) power supply unit (PSU) will fail far less frequently than I will decide to perform an upgrade.
Having the power wires under, to some extent, the data cables makes it easier to swap out any one component. Of course, if the PSU ever does need replacing, my work is certainly cut out for me. Pick whichever you feel is the lesser of two evils and read the articles in the appropriate sequence.
Powering the Motherboard
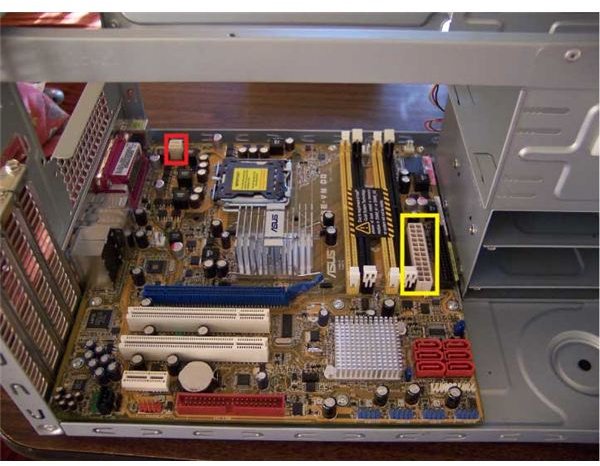
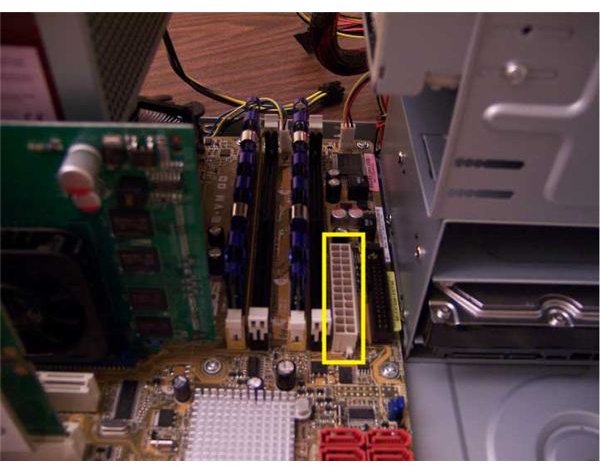
The most important power connections to get right are those between the motherboard and PSU. There are usually two; refer to your motherboard manual for their locations. On the ASUS P5E-VM DO pictured there are two, the ones most consistently used for a modern desktop PC (those required by the ATX12V2.2 standard). They are the 24-pin connector (in the yellow rectangle) and the 4-pin ATX 12V connector (in red).
Your PSU will only have one 24-pin connector (or a 20+4-pin, which can be used with older motherboards that use 20 pin connectors or the newer ones). In all likelihood it will only have one 4-pin connector as well, though it might have an 8-pin or 4+4 pin also, again allowing it to work with older motherboards.
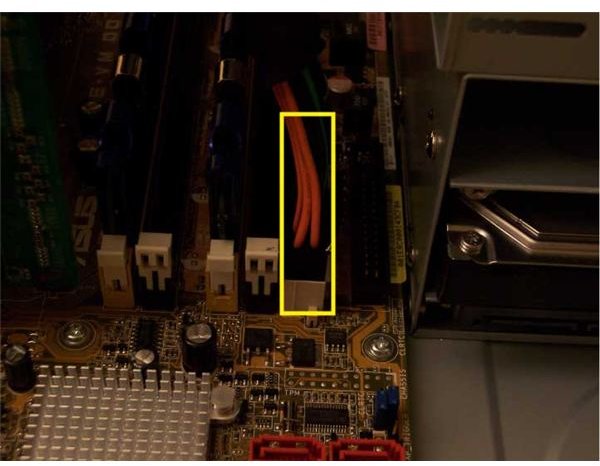
Simply make the appropriate connections as shown below. The connectors only go in one way, but they can take a bit of shoving. Make sure they are oriented correctly before you lean on them. The little tabs will catch, as shown in the pictures of the 4-pin connections.
Images
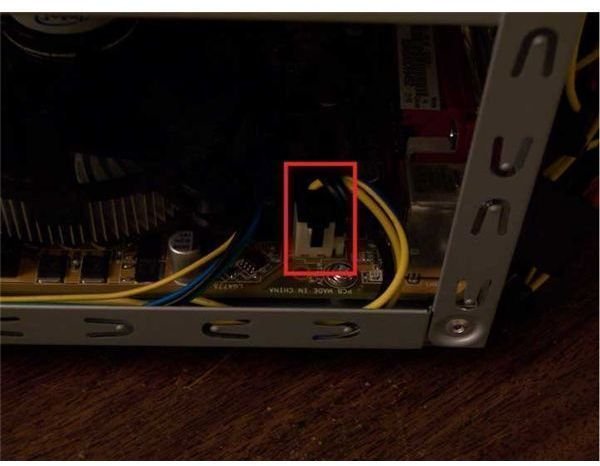
Power from the Motherboard
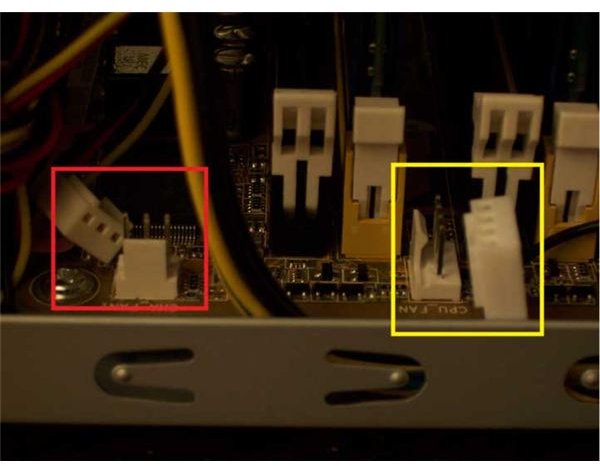
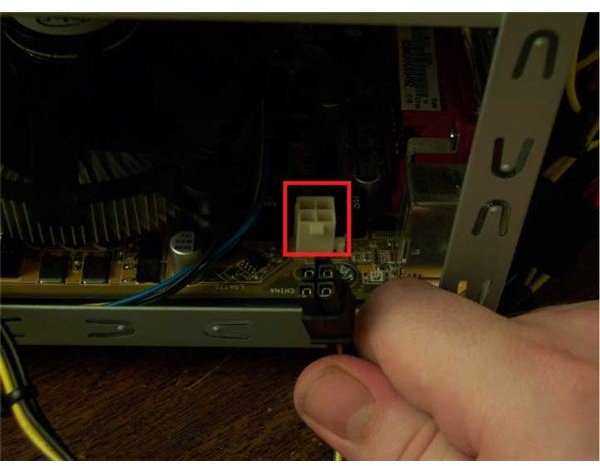
The motherboard delivers power to the components directly installed on it (CPU, expansion cards) and has connectors for fans. These come in 4-pin (in yellow in the pictures) for the CPU fan and 3-pin (in red) varieties for case (called chassis) fans.
Like other power connectors, they only go on one way. Note that it will be very hard to reach one of the connectors because it will be hidden under the PSU. We discussed how to handle this in the article on installing a PSU.
The next article shows us how to connect the drives.
This post is part of the series: Building a PC
We show you how to build PC, step by step, with pictures.
- Building a PC: Open Your Case and Get to Work!
- Building a PC: Time to Install the Motherboard
- Building a PC: Installing a Core 2 CPU
- Building a PC: How to Install a Power Supply Unit
- Building a PC: Installing Memory
- Building a PC: Installing an Optical Device
- Building a PC: Installing a Hard Drive
- Building a PC: Installing Graphics and Other Expansion Cards
- Building a PC: Installing Fans
- Building a PC: Power Connections for the Motherboard and Fans
- Building a PC: Connecting the Hard Disk and Burner
- Building a PC: Connecting the Case’s Switches and Audio
- Building a PC: Connecting the Case’s Front Panel Ports – USB, Firewire, and eSATA
- Building a PC: Closing the Case
- Building a PC: Connecting Peripherals


