With everything inside the and hooked up, we can close our brand new PC.
Almost Done!
We’ve covered a lot of ground; make sure you haven’t forgotten anything. Fans that connect directly to the power supply and other remaining elements should be hooked up now. Bundle and tuck loose any unused cables. Check the computer for foreign objects.
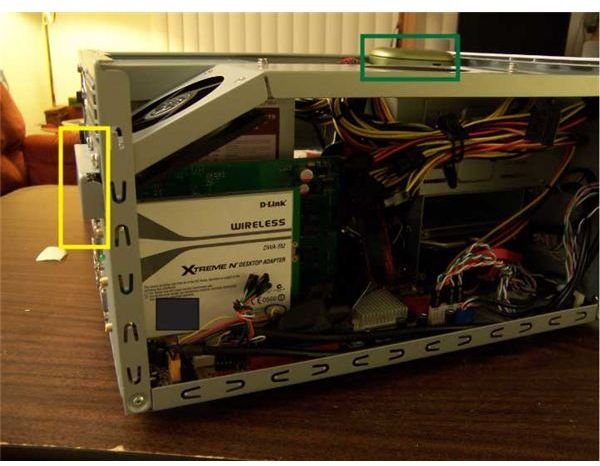
The last one is only half joking; a single screw fallen into the wrong place can cause a short circuit. Leave your screwdriver or something in there and it could do a lot of damage rattling around when you move the case. The green rectangle in the picture shows where I left my phone after receiving an inconveniently timed call. Having forgotten that in the PC could have caused rattling damage and would have been creating all kinds of electro-magnetic interference. At least the problem would identify itself: Imagine hearing your muffled phone ringing and realizing you had to take your PC apart to answer it.
Make sure all of the wires are out of the way - you don’t want something to get pulled loose, or worse yet, broken; especially this late in the game.
Do the First Step Backwards
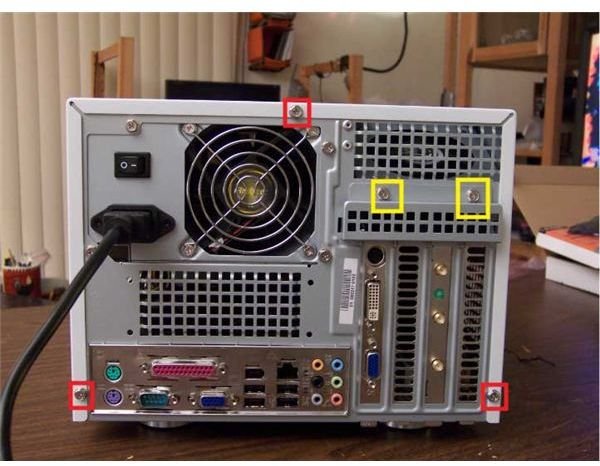
Recall what you did when you opened up the case and removed any brackets or braces . Now we reverse the procedure. In our case, we first replace the fan bracket. Remember that one screw on it was different, and the others were case screws. Don’t forget that the screws (in yellow rectangles in the pictures to the left) holding the rear of the fan bracket also hold in the little cage that protects the expansion card brackets (in a yellow rectangle in the picture above).
Of course your case may be quite different; your manual and memory of how you got the system open will tell you how to get it closed again. Our Silverstone SUGO SG02-F has a single three sided panel that slides over the whole machine from the rear. Do this slowly and make absolutely sure you aren’t dislodging any wires. With the cover in place, secure it using case screws; in our case three (in red squares in the picture). Some cases secure with latches instead of screws for easier access to the PC’s internals. Other cases use thumbscrews instead of normal case screws. If your case has normal screws and you plan on working in it a lot, you can replace the case screws with thumbscrews (less than 2 bucks a ten pack in different colours at newegg) .
References
Author’s photos and experience.
This post is part of the series: Building a PC
We show you how to build PC, step by step, with pictures.
- Building a PC: Open Your Case and Get to Work!
- Building a PC: Time to Install the Motherboard
- Building a PC: Installing a Core 2 CPU
- Building a PC: How to Install a Power Supply Unit
- Building a PC: Installing Memory
- Building a PC: Installing an Optical Device
- Building a PC: Installing a Hard Drive
- Building a PC: Installing Graphics and Other Expansion Cards
- Building a PC: Installing Fans
- Building a PC: Power Connections for the Motherboard and Fans
- Building a PC: Connecting the Hard Disk and Burner
- Building a PC: Connecting the Case’s Switches and Audio
- Building a PC: Connecting the Case’s Front Panel Ports – USB, Firewire, and eSATA
- Building a PC: Closing the Case
- Building a PC: Connecting Peripherals


