Hard Drive installation; ironically, not that hard.
SATA or PATA
As discussed in the previous article, today’s PC should be equipped with a hard drive that uses SATA (Serial Advanced Technology Attachment) connectors. They are much faster than the older PATA connections and have largely replaced PATA for desktop hard drives. Both types of drive are held in the case the same way, but they use different cables for data and power.
You Need to Install a Hard Drive
Unless you are into some seriously vintage computing, your desktop PC needs a hard drive. Whether you went for something cutting
edge that holds a terabyte, something modest that holds one tenth that much, or something that might be small but is very fast, it will install the same way.
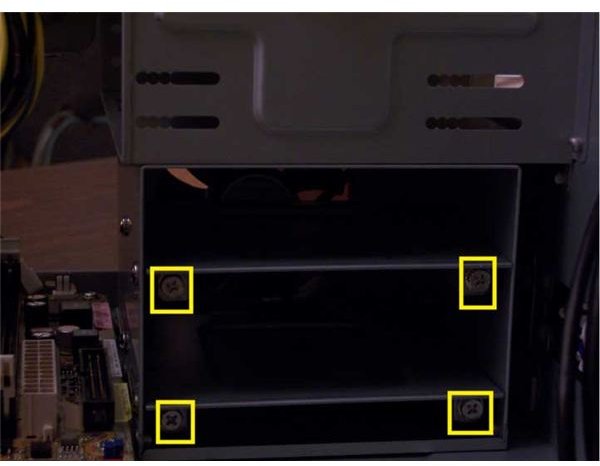
Like the optical drive we just installed in the previous article, hard drives go in a cage. This can require screws or be tool free; again, your case’s manual will have information on any special procedures you need to tackle. The cage in our Silverstone Sugo case uses screws. It is located under the larger cage where we put the optical drive (see picture at right).
This cage uses drive trays, a not uncommon method of holding drives. The drives trays are held in with the case screws (in yellow rectangles). Take out a tray (or one for every hard drive you plan on installing if more than one).
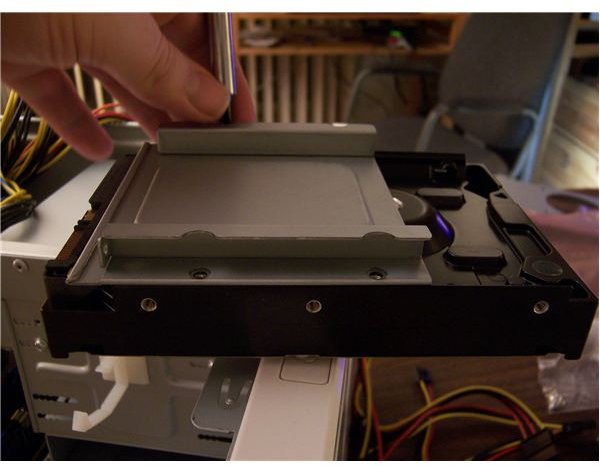
Using the very small, flat-headed, slotted screws that came with the case, attach the tray to the bottom of the hard drive. Use all four holes as shown in the picture to the left. If the drive has six holes in the bottom, use the four towards the rear (the end with the connectors).
Replace the tray and screws. Congratulations, your hard drive is in.
Are We Done?
Not quite. We still need to hook up data and power cables to the drive. As we have said before, we could do that right away, but it is better to leave all the cabling until the end. The next thing we are going to do, which we describe in the following article, is how to install graphics and other expansion cards. If you are using onboard graphics and don’t have any other cards (sound, network, etc.), skip to the subsequent article, because you can start wiring.
This post is part of the series: Building a PC
We show you how to build PC, step by step, with pictures.
- Building a PC: Open Your Case and Get to Work!
- Building a PC: Time to Install the Motherboard
- Building a PC: Installing a Core 2 CPU
- Building a PC: How to Install a Power Supply Unit
- Building a PC: Installing Memory
- Building a PC: Installing an Optical Device
- Building a PC: Installing a Hard Drive
- Building a PC: Installing Graphics and Other Expansion Cards
- Building a PC: Installing Fans
- Building a PC: Power Connections for the Motherboard and Fans
- Building a PC: Connecting the Hard Disk and Burner
- Building a PC: Connecting the Case’s Switches and Audio
- Building a PC: Connecting the Case’s Front Panel Ports – USB, Firewire, and eSATA
- Building a PC: Closing the Case
- Building a PC: Connecting Peripherals


