Apple Compressor, which is the video compression and conversion component of the Final Cut Studio, is a professional-level program that has a very welcoming interface. Here are some complete tutorials that are going to help you learn the software, and how to perform specific tasks within it.
Format to Format
The Final Cut Studio has been one of the most successful non-linear editing and post-production software packages in history, both in the professional and personal markets. Part of its popularity has come from its ability to make working with codec conversion and compression easy enough for most people to make sense of, as well as stable enough to run a professional system on. Apple Compressor, which is its signature program for video compression, links together Final Cut Pro and DVD Studio Pro, as well as allows the files to be converted into just about any format that you can think of. This holds an incredible power for people trying to make their content accessible, as long as they know how to work with the program. In these Apple Compressor tutorials, you will learn whether or not the program is fit for your needs, how to begin working with it, and how to compress to specific formats and from different types of source media.
Starting Out
Conversion and compression are just a fact of using a computer as part of the digital video production world, and you have to deal with a number of different formats for storage and display methods. Apple Compressor is one of the top options, but deciding whether or not to use it can be tricky since it is part of a specific post-production workflow and there are a lot of options on the market. Take a look at a few of the basic things you should consider, including how to begin with keyboard shortcuts.
- Apple Compressor Review
- Why You Should Choose Compressor
- Basic Apple Compressor Keyboard Shortcuts
- Free Alternatives to Apple Compressor
Basic Functions
Once you have settled on Apple Compressor, you will need to know how to run through the basic tasks that the program is built for. This can take the form
of running several projects at once, monitoring your project as it is taking place, applying even more extensive keyboard shortcuts, and how to deal with issues when they do arise. In the following tutorials, you can begin to learn how to control the program for practical use.
- How to Batch Multiple Video Files
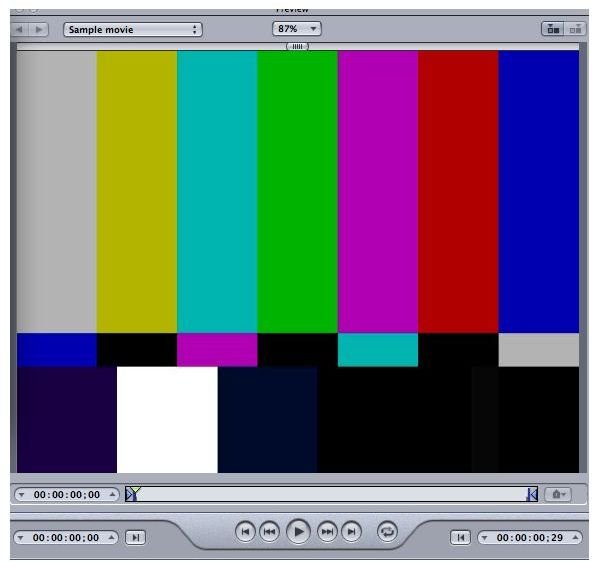
- How to Look at the Progress of Your Project
- The Workflow for DVD Authoring
- Using Keyboard Shortcuts for Preview
- Common Problems With Apple Compressor
Specific Types of Compression
Apple Compressor handles each codec or format you want to deal with slightly differently as they have their own codecs, file specifics, and
preset options. The most common of these are known by most people working in digital post-production, and they will be your immediate go-to options when you have finished editing your project or are ready to convert one file for another use. In the following tutorials, you will see specific formats targeted that you will want to be able to employ right from the start.
- Standard Definition Compression
- Compressing for Blu-ray Disc Authoring
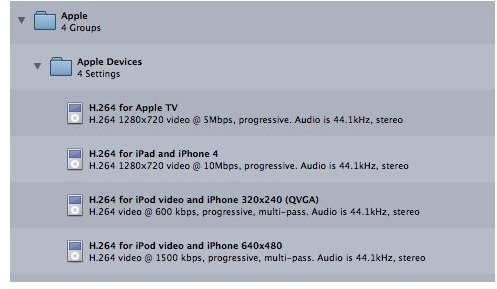
- Compressing Videos for the iPhone
- Exporting for Streaming Video
- QuickTime Film Compression and Conversion
Alternative Formats
One thing that is great about this software, that is often left out from competing programs, is that it targets not only the most relevant formats, but

also ones that are less used or that you would not always consider a video compression program for. Animation, audio podcasting, and still images can all be dealt with perfectly through Apple Compressor, as long as you know what workflow to go through.
- Converting Video for Audio Podcasting
- Converting Videos for Apple TV
- Compressing for Motion Graphics
- Dealing With Animation
- For Still Photo JPEG Files
Never Perfect
Knowing what your project is and how you want it to be seen may not allow for the perfect compression choices, which is why there are times you should look beyond the preset options and make choices based specifically on the details of your project. This is more difficult than most Apple Compressor users are ready to deal with, and may require a bit more research on your end about the specifics of each codec and the type of media that you are working with. In these cases, you have to go beyond the available tutorials and become a semi-expert about the technology you are working with in your production and post-production materials. The best way to know this is to do tests in Compressor to see how your project comes out, and from there you can determine if you need to make changes to the settings or choose a different codec. There is really no answer that is universal to this, unless you are going for a specific storage medium like a DVD.
References
- All screenshots captured by author.


