Here is a look at how you should use Apple’s Compressor on animation.
Animation Compression
Different video types are going to need different types of video compression that are specifics to the type of video that is in need of compression and codec transfer. Different videos are not always the same, and this is seen very specifically when you need to compress HD video, for different types of DVD authoring , and for motion graphics . Animation is a very specific form of video in the post-production and applying compression for animation should be done with very specific settings so that its specific format is addressed. Apple’s Compressor uses codec presets for animation compression so that you can ensure that your animated video project gets the appropriate compression. Here is a Compressor tutorial that outlines the step by step process for compressing animation.
The Compression Process
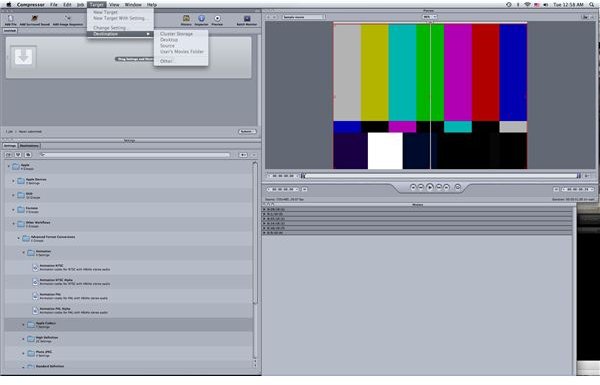
When you are looking for animation compression you will want to begin by opening your project in Apple Compressor, either sending it over from a program like Final Cut Pro or just having it fully exported from your animation software and then opening it in Apple Compressor directly. Once it is up and open in the project menu you will want to start by going to Target in the upper task bar, going to Destination, and setting where you want the

compressed video to go.
Once these beginning structural things have been done in Apple Compressor, go down to the lower menu and to the Settings tab. Go to the Apple folder, and from there select the Other Workflows folder. Once in here you are going to choose the Advance Format Conversions, and from the given options within this folder you will choose the Animation folder at the top of the list.
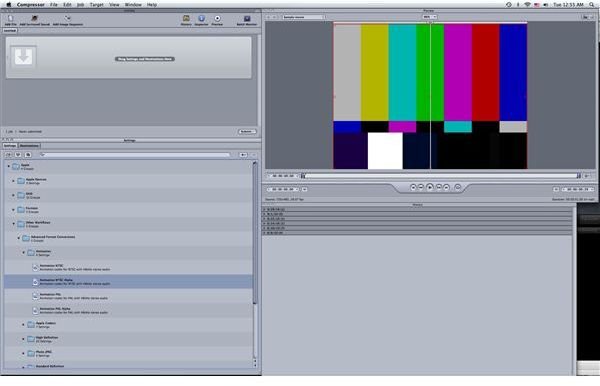
Inside the Animation folder you are going to be given four video codec options: Animation NTSC, Animation NTSC Alpha, Animation PAL, Animation PAL Alpha. The United States has been standard in using the NTSC video format in traditional broadcast standard definition video, and PAL is for Europe. For the majority of the animation in the United States that is in the standard definition format then you will want to just apply the Animation NTSC option. Go ahead and drag and drop the codec preset into the project menu and then select the Submit button. From here you can watch project in Apple Compressor or move over to the Batch Monitor to watch the progress.
Codec Choices
Animation does not often work the same as with video codecs for live action video and you may not even want to choose this animation preset for compression, and if you are looking for standard HD formats then you may want to use one of the HD formats. If you are new to your specific animation format then you should do several tests through different codec options before sending it out to broadcast. This is going to be especially true if you are going to be putting it out onto a physical format, such as a DVD. There are quite a few different presets in Apple Compressor , so you can easily try a few different test compressions.
This post is part of the series: Compression Types in Apple Compressor
Here is a series of Apple Compressor tutorials looking at different video compression and video codec types.


