The Lightroom white balance tools are an important feature to master in order to get the look that you want for your images. This tutorial will walk you through all that you need to know and give you some tips on how to master these basic adjustments.
Lightroom’s White Balance
White balance is something that most digital photographers start with when they are adjusting the look of their images in Lightroom , because it is a good foundation for further adjustments. The white balance adjusts the overall colors and warmth of your image, and can be used to compensate for the original camera settings, or to give an altogether more creative look to your finished photos. The Lightroom white balance tools have not changed very much since the first version of Lightroom, so this tutorial should be good for all Lightroom users.
Automatic White Balance Presets
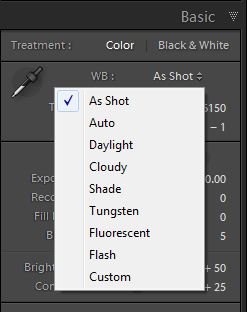
Digital cameras today are usually good enough to leave your camera set to an automatic white balance, but that will not always give you the look you had hoped for. Just like your camera, Lightroom has a variety of built-in white balance presets, and you will find these in the Basic adjustment palette. By default, Lightroom will show you the white balance that your camera was set to when you made your exposure. To select from the automatic presets, click “As Shot’ and a drop down menu will show you the automatic white balance adjustment options you have (see image on left, click to enlarge). Simply click on one to see the effect it has. If you don’t like it, choose another, and remember you can always go back to the original by clicking “As Shot”.
Temperature and Tint
If you want more control over the exact makeup of your white balance, then fear not, because Lightroom has a couple of great manual white balance options that you can use to tweak the color balance of your images. You can use one, or a combination of both to get the look you really want.
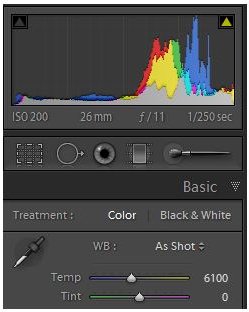
The temperature and tint sliders sit at the top of the Basic adjustment palette, and can be slid from left to right to affect the white balance in your image, as shown in the image to the right.
The temperature slider affects the warmth of your picture. Sliding it to the left makes your image cooler and more blue, while sliding it to the right adds warmth and more reds and yellows. If you are working with RAW files , the temperature slider will display a kelvin white balance value, but with other formats, the scale goes from -100 to +100.
The tint slider affects the overall color cast of your image. Sliding it to the left will give a green tint to your image, while going to the right introduces a magenta tint.
White Balance Dropper Tool
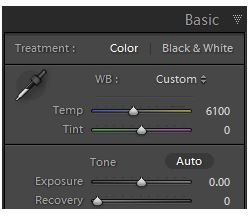
The second option you have for manually choosing your white balance is with the white balance dropper tool which can be seen in the image below. Select it by clicking on it, or pressing ‘W’ on your keyboard, and look for a neutral gray color in your image. This will likely give you the most accurate representation of the true white balance value of the original scene. If this is what you want, then you simply click on that portion of the image to set the white balance values.
If you prefer something unique, or would just like to see what the rest of your options are, then continue to hover over different parts of the image, and look for the effect that has on the live preview in the top left hand corner of the Lightroom window. As you move the dropper around, the preview changes to reflect the new white balance adjustment, but your main image will only be altered when you click the mouse to confirm the setting you want.
Remember that you can fine tune this selection further by going back to the temperature and tint sliders that were discussed on the previous page.
Lightroom White Balance Tips
Photography, like most arts, is subjective. Your finished image may reflect the original scene, or it may not, but if it looks good to you - or the client you are working with - then don’t worry about it. The Lightroom white balance tools allow you to be creative and make some unique looking images, so you should try to use that capability some time to see the effects that they can have on your images. Maybe you will love that crazy tungsten vibe, and maybe you won’t, but if you don’t give it a try, you will never know.
If you really mess up the settings and wish you could make it all go away and start again, simply double click the words ‘Temp’ and ‘Tint’, change the automatic settings to ‘As Shot’, and all Lightroom white balance values will be reset to their original camera values.
This post is part of the series: Adobe Lightroom 3
Tips and information about Adobe Photoshop Lightroom 3 and what it can do for today’s digital photographers.


