Even with a dose of color and cool effects, a plain text web site might as well be a document on your hard drive. Adding graphics helps to liven the site up. This excerpt from “Google Powered: Productivity with Online Tools,” walks you through adding graphics to your Google web page.
One final design element for web pages that’s available in Google Page Creator is the ability to insert pictures into your web pages. Graphics add a lot to a web site when they’re used properly.
One thing not to do when putting graphics into your web site is to use huge file sizes. High-resolution photos are excellent for printing, but they’re a nightmare for uploading in a web page. When you add high-resolution photos to your web site, pages load more slowly and users who want everything to appear as soon as they click a link to or within your site grow frustrated.
So, when you’re pugging phone on your site, remember to keep them at a lower resolution. Usually around 150 dpi (dots per inch) or less is adequate.
150 dpi or less should show all othe detail that’s necessary for display on a computer or laptop screen, and yet the pictures are still small enough to load quickly. If your pictures have a higher resolution than 150 dpi, you should consider using a graphics manutulation program to change the resolution.
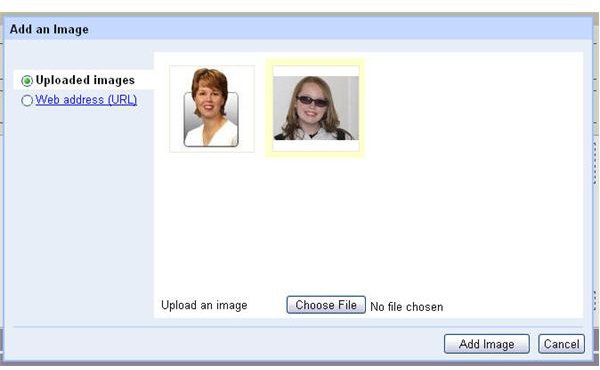
When your pictures are ready, inserting them into your Google Pages web site is easy. All you need to do is place your cursor in the page where you want the photo to appear. Then, click the Image button. An Add Image dialog box, like the one shown in Figure 1 appears.
If the image that you want to use isn’t displayed there, you can upload one. Click Choose file in the Add an image dialog box to locate the place on your hard drive where the picture is stored.
Navigate to the file location, select the image you want to upload to your web page, and click Open. You are taken back to the Add an image dialog box where a preview of your picture is available.
If you want to add additional pictures, you can repeat the process until you’ve selected all of your pictures. When you’re finished, click Add Image and the picture or pictures that you’ve chosen are inserted into your web site at the point where your cursor was located.
When the picture has finished uploading, you are returned to the editing view of your web page, and a toolbar, like the one shown in Figure 2 appears beneath your photo.
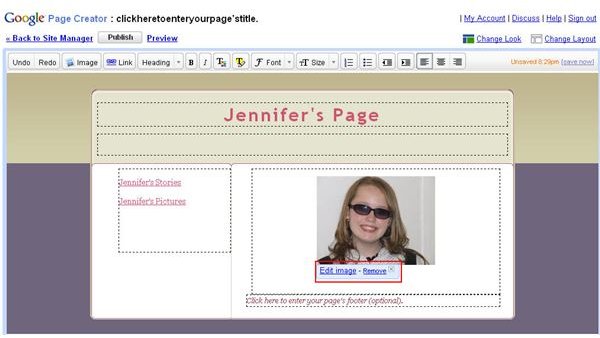
Use this toolbar to change the size, crop, or rotate your pictures (edit image). There’s also an option to Remove the pictures.
You can also add an image from a web site. To do that, place your cursor where you want the image to appear and then click the Image button. The Add an image dialog box appears.
Click the radio button next to Web Address (URL). The dialog box changes and you’re taken to a page where you can enter the URL or web address of the picture that you want to add.
When you’ve entered the correct URL and you see the image preview, then click the Add Image button to add the image to your site.
[This article is excerpted from Google Powered: Productivity with Online Tools by Jerri L. Ledford (ISBN: 978-0470109656, Wiley , Jan. 2007).]
This post is part of the series: Create Your Own Web Page Using Google Page Creator
Google Page Creator is an easy to use, web-based web page creation and editing software. Pages created using Google Page Creator can then be published in the Google Pages Community. Learn how to use Google Page Creator to start building your own web pages in no time with this article series.
- Navigating Google Page Creator
- Google Page Creator: Creating a Web Site
- Google Page Creator: Choosing a Layout
- Google Page Creator: Adding Pages
- Google Page Creator: Changing and Editing Links
- Google Page Creator: Working with Text
- Google Page Creator: Adding Color and Effects
- Google Page Creator: Adding Graphics to Your Web Site
- Google Page Creator: Publishing Your Site
- Google Page Creator: Unpublishing Your Web Site


