In this article we will see how to work with XML to build user interfaces for our applications in Google Android.
There are two ways to create user interfaces for applications in Android. We can create them using Java code and classes and on the other hand, we can create our UI using XML. In this section we will see how to create them using the last way.
If you remember Part 3 of this series of articles, when we created a new Android Project in Eclipse, automatically a structure is built. We learned that the Main Activity is the entry point of the application. But, this file is nothing by itself. It needs something to be drawn on it. So we start drawing views and groupviews over this Activity.
We will create layouts and we will add widgets to these layouts. A layout is something like a container. A layout can hold as many widgets as we want. A widget is a single element such as a Button, an Image or a CheckBox.
All this XML codes will be stored inside the res/layout folder.
Layouts
As we said before, let’s start talking about the widgets, containers or layouts.
There are lots of kinds of layouts, with different characteristics and properties. Let’s see the most important ones.
LinearLayout
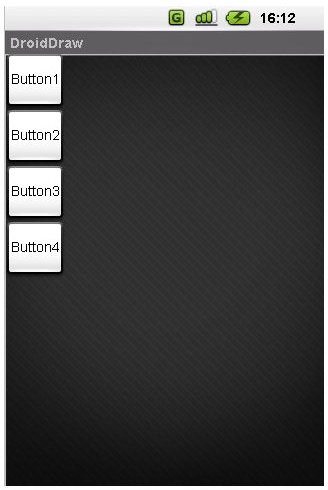
In LinearLayouts we can add children in one direction. We can add them horizontally or vertically (depending on the property we have set on the LinearLayout). The next images will show you more clearly what I was talking about.
Here we see four buttons inside a LinearLayout set vertically.
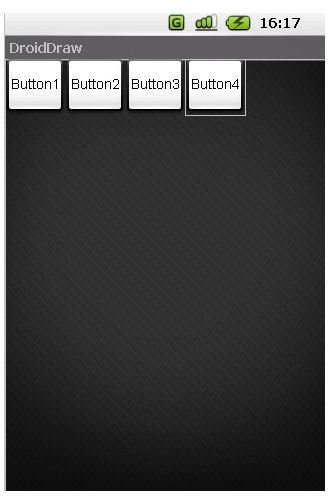
Here we can see the same four buttons but now horizontally.
This is the XML code for a LinearLayout.

Inside the tags
android:layout_width → Defines the width of the Layout. The values it can hold are:
- fill_parent → The layout fill al the parent width, if there is no parent, it will fill all the screen.
- wrap_content →Depending on the content of the layout, the width will be fixed to it.
- Xpx → Where X is a number. You can determine the width of our layout in pixels.
android:layout_height → The same as the “layout_width”, but considering the Height of the layout.
android:id → This string is considered the identifier of the layout. When we have more than one layout or widget, it’s interesting to have them identified.
android:orientation → this is the parameter we were talking about before. Here we can change the orientation of the layout: horizontal or vertical.
All layouts that are we going to see next are similar to the LinearLayout. They only change in the way of displaying the widgets.
AbsoluteLayout
With this layout, we can put the widgets wherever we want, just with the coordinates. Considering that the point (0,0) is in the top-left.
RelativeLayout
In the RelativeLayout, we set the place of the widgets in relation to others widgets or the parent. Here it is important the “android:id” parameter.
For example. If we have a button in the middle of the screen, we can add another widget 10px to the right of this initial button.
TableLayout
We can set the position of the widgets in rows and columns. The TableLayout holds TableRows elements. Each of these TableRows can hold one or more columns.
Other Layouts Parameters
To finish this article we will see some other Layouts parameters that can be used in some of the layouts shown above. Some of these parameters are used in the widgets too.
android:gravity → With this parameter specify the place of the object inside a bigger container. For example a LinearLayout inside the screen. It can have some values:
-top → Puts the object on the top of the container
-bottom → Puts the object on the bottom of the container
-center → Puts the object on the center of the container
-right → Puts the object on the right of the container
-left → Puts the object on the left of the container
android:background → You can set the background of the layout, it can be a picture (drawable resource) or a color, #FFFFFFFF
android:visibility → With this parameter we can control the visibility of the layout. It can be
-visible → visible on the screen
-invisible → not visible but It takes account in the layout disposition.
-gone → The same as if you didn’t have use this layout.
There are lots of more parameters. If you want know more about them, have a look to the Android Class Library .
Want to know more?
In the next article we will see different kinds of widgets, and learn how to combine them to create an application.
Follow up
If you want to know when new articles are released, subscribe yourself to the Google Android RSS. Otherwise, you can follow my research, articles and work in my profesional twitter: @jbeerdev.
This post is part of the series: How to- Develop Applications on Android
In this series of articles, I will explain how to develop your own application for Android, from the beginning.
- Setting the Environment: Using Eclipse and Netbeans for Developing Google Android Apps
- How to Create an Android Application: Structure I
- How Do I Develop an Android Application? Structure II
- How to Create User Interfaces (UI) Using XML : Layouts
- How to Create a User Interface (UI) Using XML : Widgets


