Here is a look at how to work with rendering in Final Cut Pro. We’ll cover the different rendering options, how Final Cut Pro works with reference files, and how to turn off rendering.
File Reference
Final Cut Pro works differently than other types of editing software like Avid. Instead of converting files into the program it just references them, and rendering is a process that gets those files ready for playback according to a number of different needs. To get your files to play you will have to set a Render Scratch and then set Final Cut Pro to render the media files in your Timeline. There are a number of different rendering options available, and her is a look at how to use these and how to turn off rendering in Final Cut Pro .
Different Final Cut Pro Rendering Options
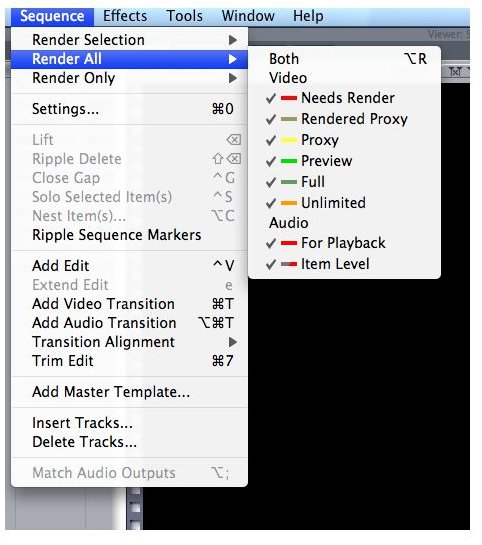
The basic method for rendering is to select the render from the Sequence heading in the upper task bar. You can choose to either render a
specific selection, which you choose in the Timeline , or you can choose to Render All. Within both you have a few different options for video rendering, as well as two for audio rendering.
In the video render options you are going to want to make sure that the first four options are selected at all times, which are Needs Render, Rendered Proxy, Proxy, and Preview. To get a full render of the footage you will select Full, and for the final selection you will have Unlimited. The difference between these is how much you want to be rendered in your file. For speed, you will usually just keep it set to Preview so that you can just render it enough to get playback in your Final Cut Pro project. Full is what you will need to actually see how the video looks completely, and this is a good option when doing online editing.
Audio works the same way as with the video render options, except here the hierarchy is relegated to only two options. You will need For Playback selected so that you can render the audio to play, but only Item Level will actually play it back at the right levels so that you can really tell what it will sound like.
Turn Off Rendering in Final Cut Pro
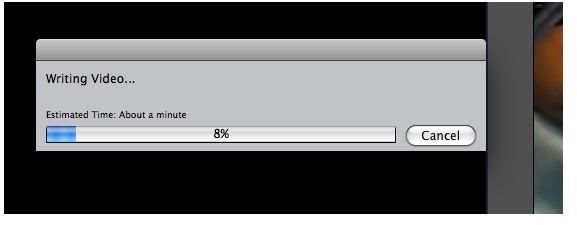
Rendering is a selected process in Final Cut Pro for the most part. This is because it will stop your project work and you will have to watch a progress bar that will show you the rendering as it is happening. You then have to set the type of render you want through the Final Cut Pro render options, and then choose to either render everything or just the files you selected.
If you want to turn off rendering in Final Cut Pro it is just as easy as hitting Cancel during the progress screen. This will not actually remove all of the render process that has happened as this is a processing event that can not be taken back. This is a positive thing, since even if you have to stop the render process you will see that for whatever time it was allowed to continue there has been audio or video rendered.
If you find that the render process is simply taking too long so you want to turn it off, you may want to simply reduce the type of render you have applied and re-initiate. For example, if you have set the video to Full and this is taking up too much time or processing power then you may want to switch it to Playback and re-initiate.
You cannot turn off the render process completely as this is what is needed to actually have playback for the video, and you will not even be able to work without setting a Render Scratch in a location that has enough storage space for it.
References
Photos: Screenshots by Shane Burley.
Source: author’s own experience.
This post is part of the series: Final Cut Pro Tools
Tips on working with different Final Cut Pro tools.


