Here is a step-by-step tutorial on how to insert a slug on Final Cut Pro.
Final Cut Pro Title Card
A title card, often called a slug, is used to support a text item so that it appears properly in front of an object in your video editing file. This slug started out in studio-based television where people had to use large character generator systems to get the titles up, but in Final Cut Pro a slug is not easy to pop in without using one of the outside programs in the Final Cut Studio. With the slug in Final Cut Pro, you can position it so that your text is positioned in front of it, framing it nicely. Here is an easy look at how to insert a slug on Final Cut Pro .
How to Insert a Slug on Final Cut Pro
If you are looking for how to insert a slug on Final Cut Pro, your best option is to use a slug-specific generator that
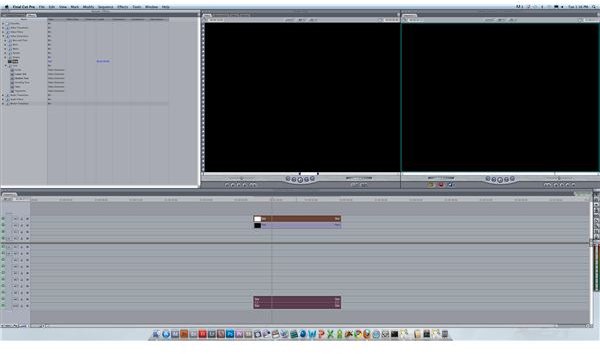
you can then put the text directly in front of. Begin by going to the Effects tab and then select Video Generators. From here you will go down and select Slug, which is above Text, below Shapes, and the only option that exists on its own without a folder.
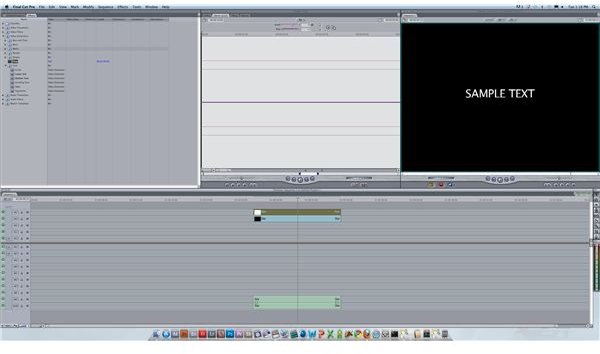
When you select the Slug and bring it into the Viewer, it will look like nothing has actually taken place. This is because the slug is essentially a black space that you will then bring down into the Timeline . Once you have set its time parameters, you can drag it down into the Timeline where it will act as a full black card, which you can use to identify changes or shifts in your video project. Now you will open up a text generator, enter in the text that you want, and then drag it down into the Timeline on top of the slug. The slug will then support the text so that it can be seen properly.
Alterations

Once you have figured out how to insert a slug on Final Cut Pro and have done it, you can alter it so that it can be more useful. If you do not want a full black slug that blacks out the video entirely, you can actually crop it in the same way that you would with a color solid . Select it from the Timeline to bring it up into the Viewer and then choose the Motion Tab. Here you can crop it from the left, right, top, and bottom if you just want to create a border for a lower third . You can also use Edge Feather to make it softer around the sides or even bring down the opacity if you just want a slight haze over the video so that the titles can be seen easier. You can also add other video effects to the slug since it acts as its own video clip.
References
Author’s own experience.
This post is part of the series: The Best Final Cut Pro Tutorials
Here is a look at even more Final Cut Pro tutorials to get you started.


