Post-production, what you do with the photos after you take them, is one of the most important processes when you are shooting a wedding. This process can be both creative and tedious at the same time. With over 1000 pictures to sort and edit, it can be very time consuming, but fun!
Importing and Sorting
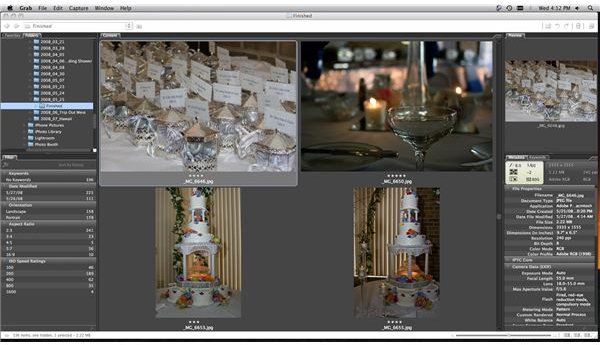
You can import your images though your camera’s proprietary software or through a memory card reader. You’ll want to use a sorting/image processing program to get organized and begin going through your photos. If it’s within your budget, you can purchase Adobe Lightroom 2 ($299) or Apple Aperture 2 ($199). Both of these programs are fantastic, and give you power and control over almost all of your post-production needs. If you can’t afford those, but have Adobe Photoshop CS3 or CS4 , then you are in luck, because along with that package, you are given Adobe Bridge, which will let you sort and organize your photos, although it doesn’t allow for much editing.
In whichever program you use, you will want to import all of you pictures and begin rating them. Your ratings will be part of the metadata for each photo. I spend some quality time looking at the photos, since I usually have many duplicates of the same things. I look for the best, and rate them with five stars. The ones that are close the best I will give four stars. If they are out of focus or poor, I’ll either not waste my time rating them or throw a quick one star on them.
Once I get through rating all of my photos, I go through and sort them according to rating, so that all of my photos that I ranked as excellent (five stars) are together. Then, I begin my editing.
Rating and Sorting
Editing
Again, using Aperture or Lightroom can help you manage your workflow and speed up your editing process. If you have Photoshop, you can double click on photos in Bridge, and they will open up Photoshop (and the RAW plug-in if you shot it RAW). In the Camera RAW screen, you can make lots of photo adjustments, such as exposure, white balance, darkness, fill light, cropping, curves, and much more.
This article isn’t going to go into the details of editing photos, although there will be an upcoming series devoted to this topic specifically.
Once you make the adjustments that you need to make, you want to look into cropping to make sure that the photo will print correctly. Otherwise, when you upload the photos to print online, you will have to modify how each photo is printed. To see more about printing and cropping, check out the article entitled How to Crop a Digital Photo Using Adobe Photoshop .
Printing
Once you get your photos edited, you will probably need to convert them from RAW to JPEG files. Most professional printers will need to have it in a universal compression format like JPEG. Don’t go through each and every photo and save them as such. Get all of you editing done, and use the image processor feature to convert all selected photos to JPEG format. It is much faster!
Once you are ready to print, you will want to put together a portfolio for the newlyweds to look at. There are a few different ways to do this:
• Online portfolio – If you have a website, you can make an online web gallery. Make sure you number the photos. Give the couple an order form and have them write down the numbers and sizes that they are interested in for 5x7 and larger.
• With most online printing websites you will be able to print a proof book with small versions of all of your photos. That is something that you can physically hand to the bride and groom and they can flip through and choose.
• Yet another alternative is to print 4x6 prints of all of the final photos and put them together in a photo album for them to keep. In this way, they have a copy of all of the photos, you can charge them for this, and they can choose which ones they want enlarged.
• Some photographers are also putting the photos on DVD and selling the couple the rights to the photos. So, you can make an agreement with the couple in which you will give over all of the finished photo files for a certain amount of money, and they will be able to print as many copies as they want of their photos. This saves you a lot of time with printing.
The two sites that I use for my printing needs are www.mpix.com and www.shutterfly.com
Both websites offer very competitive deals, excellent printing quality, and fast shipping.
Reflection
After you’ve dropped off the photos and received payment, it’s important to take some time to reflect on the experience. You’ll be aware of things that you did wrong or could have done better. Those few shots that didn’t turn out will be thorns in your mind, but overall you should feel accomplished and more confident in your photography skills. Wedding photography experience is indispensable because you learn so much, so quickly. So, take some time to reflect, make sure that you give some business cards to the happy newlyweds to give to all of their friends, and start preparing for your next wedding.
This post is part of the series: How to Shoot Your First Wedding - Wedding Photography Tips
This series of articles will cover what to do before the wedding, during the wedding, and after the wedding. This guide will equip you with useful skills, ideas, and advice to make your first wedding shoot a success.
- What to Do Before Shooting Your First Wedding – Get Organized with These Wedding Photography Tips!
- What Camera Equipment Do You Need to Shoot Your First Wedding?
- What to Shoot at Your First Wedding – Plan and Prepare
- What to Do at the First Wedding Shoot – Wedding Photography Tips and Advice
- What to Do After You Shoot Your First Wedding – Post-Production


