This tutorial is a guide to using the Develop Module with Adobe Lightroom. It explains the various tools available in the Develop Module and how to use them to modify and digitally enhance your photos.
Introduction
The Develop Module within Adobe Lightroom is the module where most of the post-processing is performed. Aside from the minimal changes made using the Library Module, all other editing is performed here.
The Develop Module has two things in common with the Library Module, namely the Navigator and the Histogram.
Tools in the Left Panel
The Left Panel in the Develop Module contains the following options
- Presets - Which contains the Lightroom presets present in Quick Develop and user defined presets if any.
- Snapshots - A very powerful feature used to save and re-apply a series of edits.
- History - Which keeps a record of the various actions performed upon each photograph
Tools in the Right Panel - Part 1
Below the histogram tool, the following 5 icons are available, which represent
- Crop Overlay (R) - Used for cropping photos
- Spot Removal (N) - Used to remove spots from pictures
- Red-Eye Correction - Used for red-eye removal
- Graduated Filter (M) - Can be used to apply a filter/gradient
- Adjustment Brush (K) - Used to make spot adjustments
Under the Basic section, the below options are available and can be adjusted using sliders as required
- White Balance
- Exposure, Highlights, Blacks
- Brightness & Contrast
- Clarity, Vibrance & Saturation
Next, the Tone Curve section has a graphical display and sliders to modify the tone of the image, by changing Highlights and Shadows.
Below that, the HSL section can be used to adjust Hue, Saturation and Luminance overall, or at an individual color level. Further, the image can be converted to a Grayscale Mix and the presence of various colors in the image can be adjusted.
Tools in the Right Panel - Part 2
The Split Toning section is used to add a Hue to the Highlights and another Hue to the Shadows present in the image.
The Detail section is used to deal with Sharpening the image, Noise Reduction and Chromatic Aberrations .
The Vignettes section can be used to modify images such that they shade off gradually (into black or white). It could be performed using the Lens-Correction option or the Post-Crop option. Sliders such as Amount, Midpoint, Feather, Roundness can be used to modify the effect.
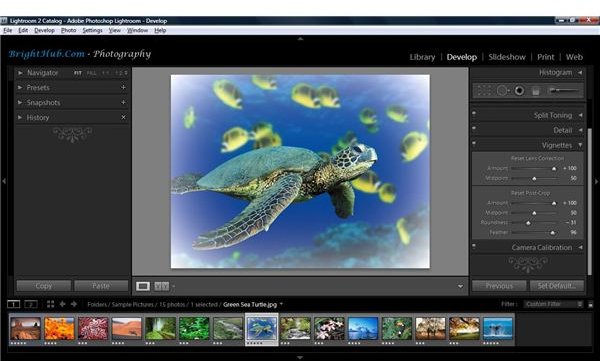
The sample image on the right shows how Vignettes can be used to advantage.
The Camera Calibration section can be used to modify how a camera “sees” images i.e. how a camera’s sensor view and responds to colours.
Summary
Different photographers use different tools to arrive at similar results. While the tools available in the Develop Module provide a variety of options for editing, some of my personal favourites are Snapshots (to re-apply commonly used sequence of edits), the Basic Section (to adjust Highlights, Brightness, Contrast and Saturation) and Vignettes (to frame images in post-processing).
Another useful tool while photographing people is Red-Eye Correction , although it has become a de-facto feature in most cameras these days.
Experimenting with the various tools within the Develop Module is in my opinion, the best approach towards becoming skilled at Lightroom and ultimately, a better photographer.
This post is part of the series: Beginner’s Guide to Adobe Lightroom
This article series is a beginner’s guide to Adobe Lightroom and the various modules within Adobe Lightroom. It discusses the Lightroom interface, the five modules and the various tools available within Adobe Lightroom and is a must-read for all photographers interested in using Adobe Lightroom


