With Paint Shop Pro’s Magic Wand, you can easily pick out objects in a digital photograph based on color, brightness, or a number of other factors. We’ll show how this tool can be used to select and edit specified areas in a digital photo.
The Magic of the Magic Wand
The Magic Wand in Paint Shop Pro is, by far, my favorite selection tool. While it may not be the perfect choice for every situation, it makes selective editing in digital photos so much easier.
What is selective editing? This is a term used when you want to make some change to a certain area or areas of a photo while leaving the rest untouched. An example of this is if you just want to change the color of an item in a photo . Other examples may include changing textures of particular objects, creating a depth of field effect , or brightening parts of an image.
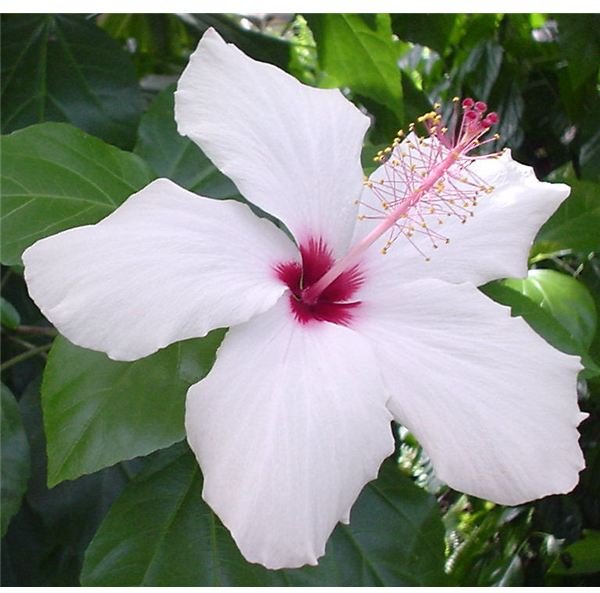
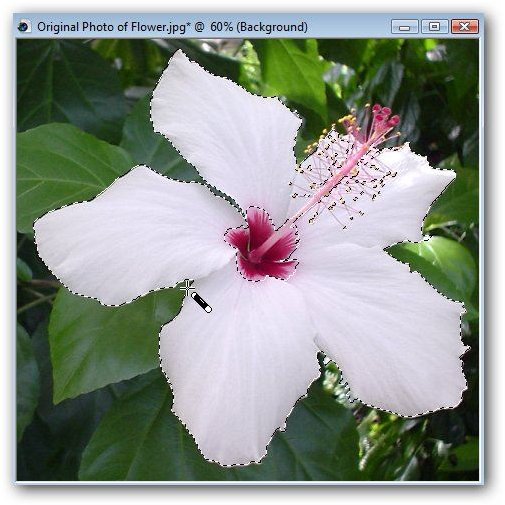
As a demonstration of how to use the Magic Wand, we’ll take the digital photo shown below and sharpen the details in the flower but leave the rest of the image as it is. (You can click any image in this article to see a larger view.)
First, we’ll need to pick the Magic Wand tool. It can be found with the other selection tools near the top of the left toolbar panel in the Paint Shop Pro interface.
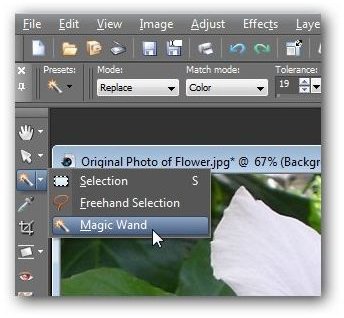
Once you select the Magic Wand, a new toolbar will become visible at the top of the interface underneath the main toolbar of the application.
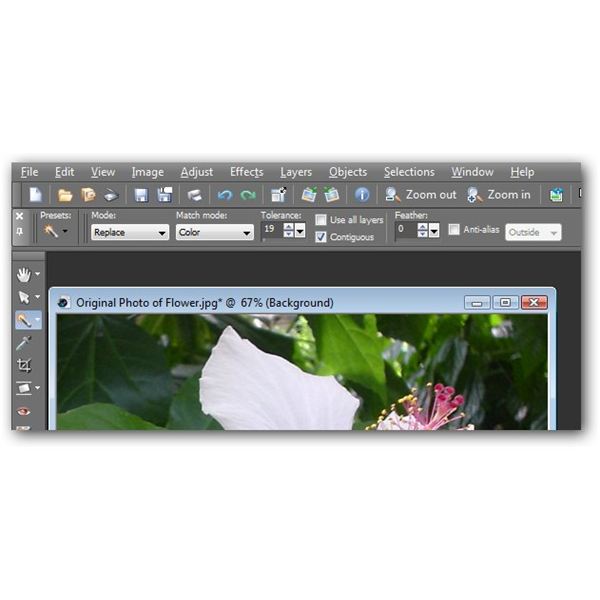
Here, you can define the settings for a number of options. Two of the most import settings here are Match Mode and Tolerance.
The Match Mode determines how you want the Magic Wand to make selections. That is, you decide if you want the tool to select similar pixels based on color, brightness, or some other attribute. In this example, since we want to pick out just the white part of the flower, we’ll select Color for Match Mode.
The Tolerance setting can be a little tricky, and you’ll often have to use a bit of trial and error to find the best value to use here. This setting lets you determine basically how “picky” you want the Magic Wand to be. If you choose a very low setting, the Magic Wand will only select those pixels that are extremely close in terms of the attribute you chose for the Match Mode setting. Higher Tolerance levels will cause the Magic Wand to include a broader range of pixels in its selection.
The best way to find the perfect Tolerance setting is to pick one that is fairly low – approximately 20 or 30 – and then apply the Magic Wand. If the Magic Wand doesn’t select a broad enough area, increase the Tolerance. If it picks up too many pixels, try lowering it a little a time.
In our example, I’m cheating a little because I played around with the Tolerance beforehand and found that 19 worked perfectly for this project.
Making the Selection
Since we’ve determined a Match Mode and a Tolerance setting, let’s go ahead and start making our selection. Click anywhere on the white area of the flower.
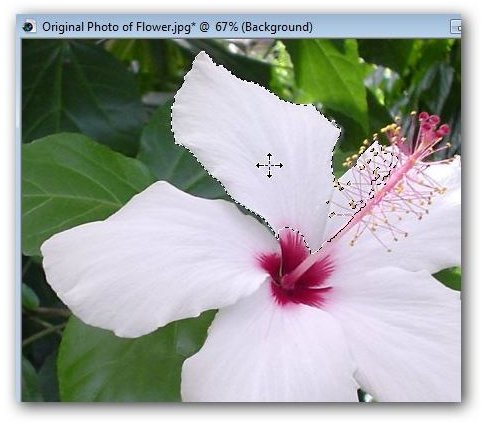
Note in the screenshot above that the Magic Wand did not select the entire white part of the flower. Instead, it only selected about one petal. Does that mean we should adjust our Tolerance? Not necessarily. In fact if we increase the tolerance any more, we may start picking up some of the paler magenta areas, and we’d like to leave them alone.
Instead, we can add to the selection by holding down the Shift key and clicking another white area of the flower. We’ll continue doing this until we’ve captured all the petals on the flower without selecting any of the magenta parts.
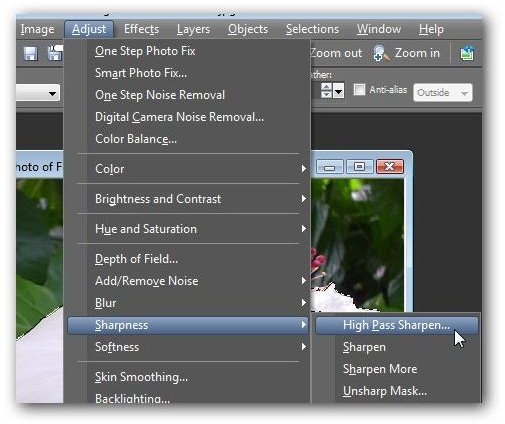
Now that we have our selection, we want to modify it so that the details on the flower petals stand out a lot more. With the flower still selected, open the Adjust menu and choose High Pass Sharpen from the Sharpness category.
When the High Pass Sharpen window opens, we’ll make some adjustments to the settings so that the creases in the flower petals really stand out. The exact settings chosen are shown in the screenshot below.
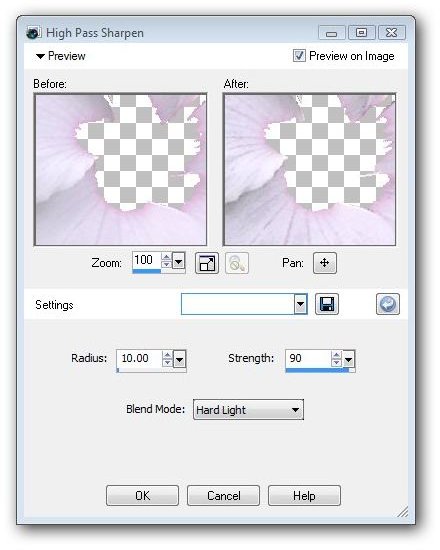
Click OK to apply the changes to the digital photo. Note that when we return to the photo, the selection area is still being shown. To get rid of those blinking dashed lines, just choose Select None from the Selections menu on the main toolbar.
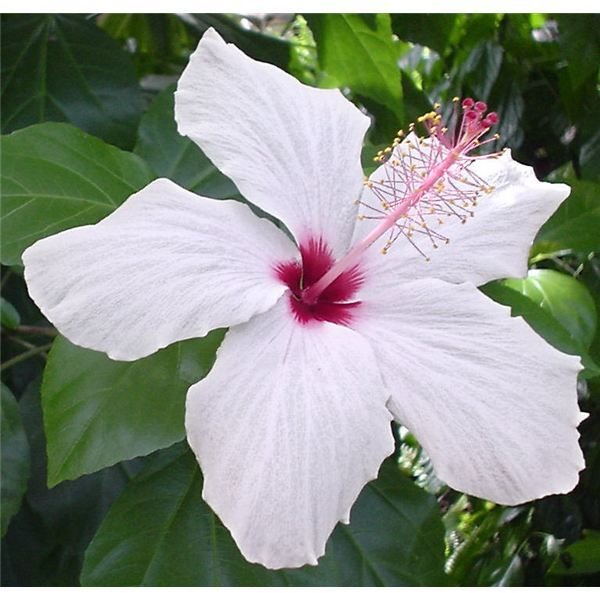
The results of these changes are shown in the image below.
If you want to make multiple changes to the same area (for example, sharpen details and change saturation levels), just leave your selection in place and apply the effects one at a time. While we didn’t use layers in this example, it’s generally a good idea to create a new layer each time you make a change to a photo, especially if making multiple changes. That way, you can always remove a change later on if you decide against it.
Additional Resources: For more tips and tricks, be sure to check out the other items in Bright Hub’s collection of Paint Shop Pro tutorials here on the Digital Photography Channel.


