Do you have a lot of photos that you shot and edited in raw format and need to convert into jpegs? There’s no need to buy a separate conversion program. Adobe Photoshop CS3 and CS4 have a powerful image processor that will automatically convert and export these files for you.
Launching from Adobe Bridge
Image processing would be an extremely time consuming task if you were to do it manually. Luckily, Adobe Photoshop has an image processor built in to do all of the labor for you! I like to start in Adobe Bridge, as my photos are organized and rated there.
First, you need to select all of the files that you want to convert from raw to jpeg format . You can select more than one photo by holding down the Command (Mac) or CTRL (Windows) button.
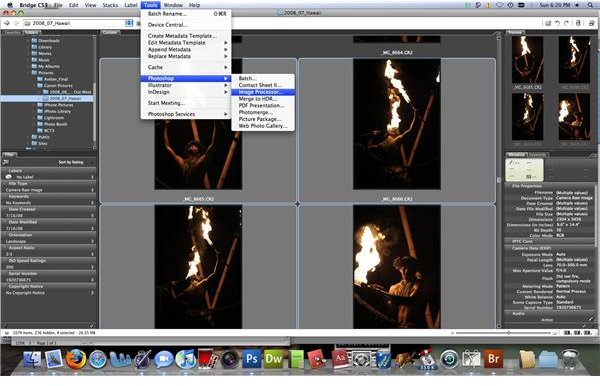
Once you have the photos you want to process, go to Tools, then to Photoshop, and down to the Image Processor. Adobe Bridge will then launch the Photoshop program and the window below will appear.
(Click on images to enlarge)
Image Processor Configuration
Once the Image Processor screen is open, there are four main steps to getting your raw files converted to jpegs.
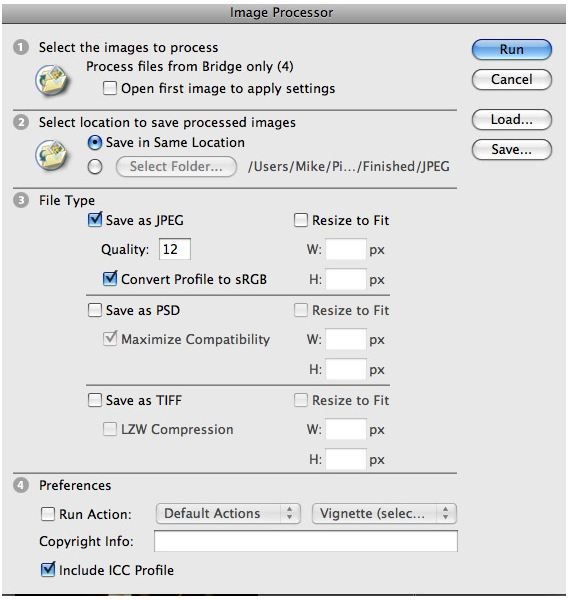
1. First, Photoshop wants you to select the images to process. If you started in Bridge, it is already set to process the image files that you selected in the previous step. If you launched the image processor from inside Photoshop, you will have to browse for the images that you wish to convert.
2. Next, you need to select the location where you want the new jpeg images saved to. Choose a folder that is convenient for you to locate and use. If you want them saved in the same location (in a folder named JPEG), then simply make sure the correct option is selected (see image to the left).
3. Then, you need to select the file type . I use this processor to convert my .CR2 (RAW) files into .jpg (JPEG) format, but you can also convert them into PSD or TIFF files. Under File Type, I check the box entitled Save as JPEG and choose a quality of 12. I always choose a quality of 12, except in certain cases of web production when I’m low on space, in this case, I will drop the quality down to 8 or 9, but if you have the space then definitely keep it at 12. If I’m planning to maybe print these photos (or send them out to have them printed), I check the box to Convert Profile to sRGB, which usually produces a better quality photo.
4. Under number four, Preferences, I usually don’t have much to do. If you want to use the Run Action script, you can automatically add frames, make vignettes, and make other alterations automatically to your photos. I leave the Include ICC Profile box checked so that the color profile information is kept within the photo, as it doesn’t take up too much space.
Click Run, and Photoshop will begin processing the photos. This may take a while depending on how many photos you’re converting, how fast your computer’s processor is, and how much available memory you have. These new jpeg photos are then deposited into the folder that you selected.
This post is part of the series: Learning Photoshop - Lessons for Photographers
These articles are part of a series of tutorials in Adobe Photoshop, geared specifically for the digital photographer. These articles will include how-to lessons, tricks of the trade, and useful shortcuts. Learn to utilize the world’s most advanced, powerful photo editing software.
- How to Crop a Digital Photo Using Adobe Photoshop
- How to Convert Your Photos to Black and White in Photoshop CS3
- How to Remove Red Eye Using Adobe Photoshop CS3
- How to Remove Blemishes using Photoshop CS3 & CS4
- How to Make a Web Photo Gallery Using Photoshop CS3 & CS4
- How to Convert RAW to JPEG Using Photoshop CS3 & CS4


