Once you’ve located and downloaded additional picture tubes to use in Corel Paint Shop Pro Photo X2 Ultimate, the next step is to figure out how to access them from the software. We’ll show you how in this step-by-step guide.
In Part 2 of this series, we listed a few sources, including Corel’s Creative Downloads, where you can find additional free picture tubes that are compatible with Corel Paint Shop Pro Photo X2 Ultimate. But, once you download these elements, how can you access them from within the software? In the following steps, we’ll describe how to make sure that your new “toys” can be easily found and used in Paint Shop Pro.
How to Add New Picture Tubes to Paint Shop Pro
Before beginning, it’s a good idea to create a special folder on your hard drive to store the new picture tubes. In fact, if you download any of the items from the Corel web site and try to run the self-extracting program that is supposed to “easily” install the new picture tubes, you’re going to run into a little problem. The extraction program is going to look for a folder that was present in older versions of Paint Shop Pro, but doesn’t exist in the Ultimate package. We can go ahead and kill two birds with one stone by creating a new folder to store the downloads, and give it the same name as the folder used in previous incarnations of the application.
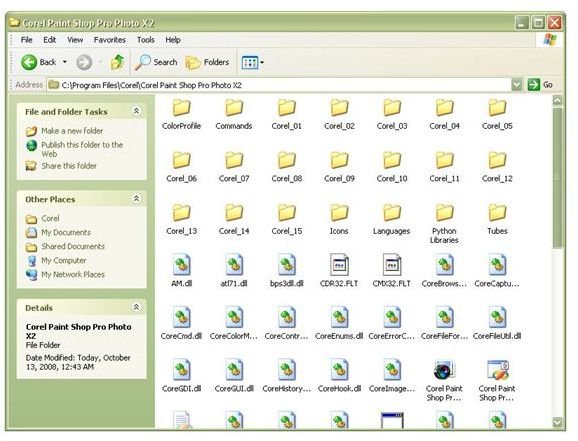
Step One: Locate the folder on your hard drive where Corel Paint Shop Pro Photo X2 Ultimate is installed. If you followed the instructions for a standard installation, this directory is probably C:\Program Files\Corel\Corel Paint Shop Pro Photo X2. Navigate to this folder using Windows Explorer or whatever other file management software you choose to use.
Create a new folder in this directory and name it Tubes. Normally, you could name this anything you wanted. However, if you will be downloading any of the free picture tubes from Corel, the self-extraction program will not operate correctly unless it finds a folder named Tubes.
Step Two: Download or move any downloaded files containing picture tubes to the Tubes folder. If you are downloading the files from Corel, you will also have to run the self-extracting program after the download. Files downloaded from other sources may be compressed by various means, but the most common form of compression creates ZIP files. To extract data from a ZIP file, you’ll need a utility such as WinZip 12 or 7-Zip.
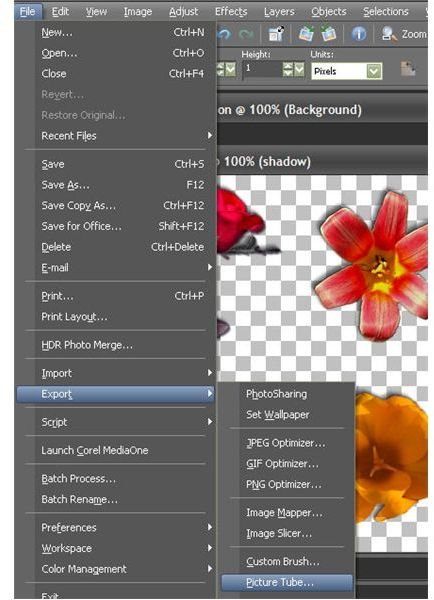
Step Three: Open the file containing the picture tube in Paint Shop Pro. This image file should look like a collection of items evenly spaced on a transparent background like in the screenshot below. (Click the image for a larger view.)

Step Four: From the File menu on the main toolbar of Paint Shop Pro, select Export and then Picture Tube.
Step Five: In the Export Picture Tube window that appears, you’ll have to enter some information for the file. In our example for the Spring Flowers picture tube, there are eight flowers – two rows with four flowers in each row. So, we would enter 4 in the box next to Cells across and 2 in the box next to Cells down. We also want to give the picture tube a name in the box next to Tube name. This will be the name that the tube will show up under when you click on the Picture Tube tool.

Click OK to continue and save the file. Now, when you browse through the selection of picture tubes available within Paint Shop Pro, the new file will also be present.
Be sure to browse through the other Paint Shop Pro tutorials found on Bright Hub’s Digital Photography Channel for more tips and tricks.
This post is part of the series: Picture Tubes in Corel Paint Shop Pro Photo X2 Ultimate Series
Ready to find out how you can use the picture tubes of Corel Paint Shop Pro Photo X2 Ultimate to jazz up your digital photographs? In this series, we’ll start with the basics and work ourselves up to learning how to create our own custom picture tubes for the photo-editing software.