FileMaker differs somewhat from MS Access when creating layouts and reports. After the first table is created, FileMaker generates a generic first layout or form-like “object.” To create a custom layout, FileMaker includes a layout wizard that is, however, similar to MS Access 2007.
How FileMaker Forms and Reports are Similar to MS Access
MS Access users know that forms and reports are the database objects that access, control and display the information in their database. FileMaker Pro 10 for Windows (hereinafter referred to as FileMaker) uses somewhat the same approach, except it employs the layout view that serves both as a data entry form and reports display.
Also, as in MS Access, the user can create the layout from scratch, or, as demonstrated in this article, use a handy wizard to create a specially designed layout. Experienced MS Access users will have no difficulty with the FileMaker layout wizard. Follow the steps the in this article to see how the wizard works to create a grouped report.
First, Our Final Product
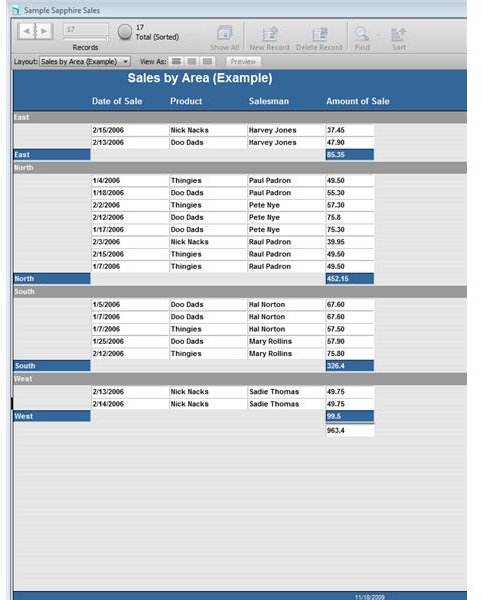
The screenshot below shows the grouped layout report that we will create by following the wizard steps below.
Do the Wizard Steps:
Step 1 - Create a new layout/report while the database is in Layout (design) view. The key is to select the table where the records reside. Our example screenshot is from a sample FileMaker database that has a table called “Sales by Area.” Follow the steps in the screenshot below to create a List/Report layout similar to an MS Access grouped report:

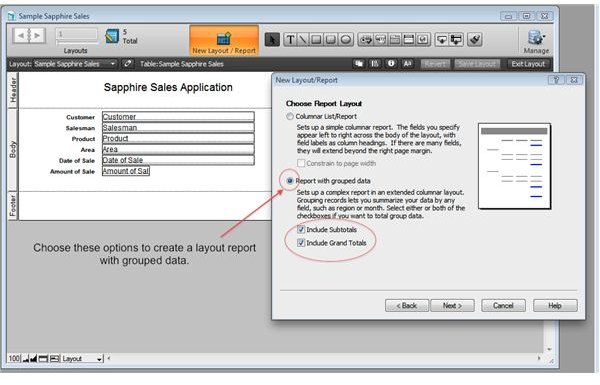
Step 2 - Select a “Report with grouped data” that will include Subtotals and Grand Totals.
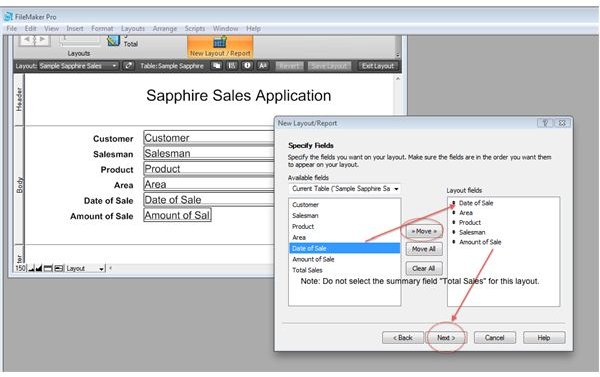
Step 3 - Choose the fields you want to be included in your grouped report. At this point, do not import any summary fields. Summary fields will be used in the calculations in later steps; however, including the summary field will clutter up your final layout.
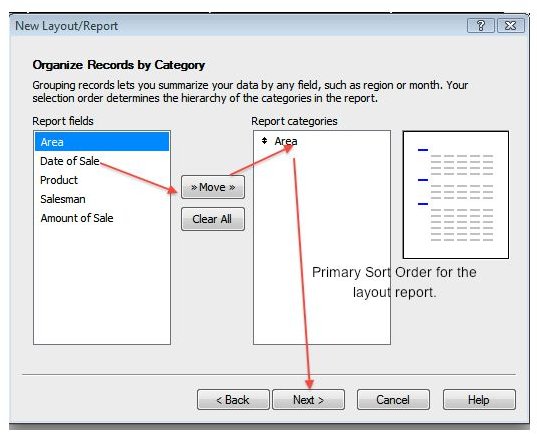
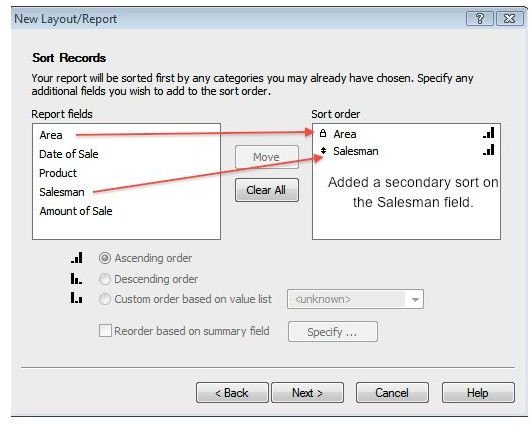
Steps 4 and 5 - Select how your records will be grouped. In our screenshot examples, we have chosen the sales Area field as our grouping field. In Step 5, we have chosen the Salesmen field to be sorted within the Area field.
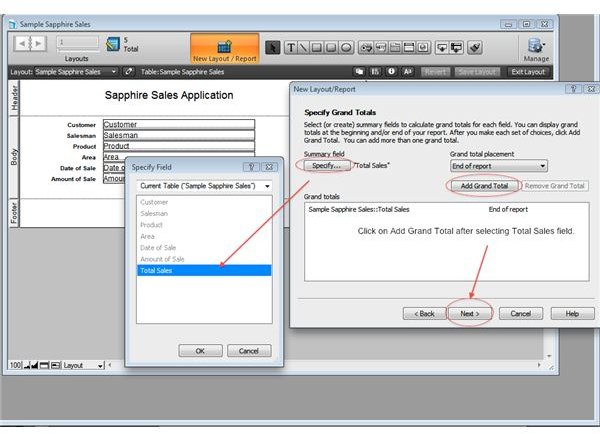
Steps 6 and 7 - In order to make our sales totals add for each Area, as well as to get our grand total at the end of the report, follow the examples in the two screenshots below.

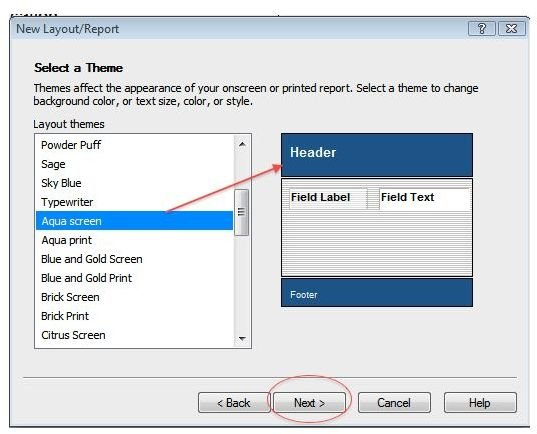
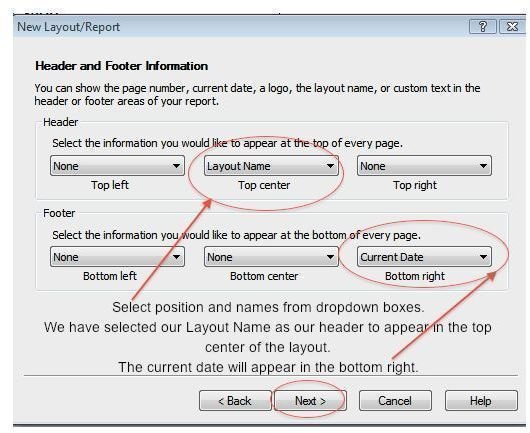
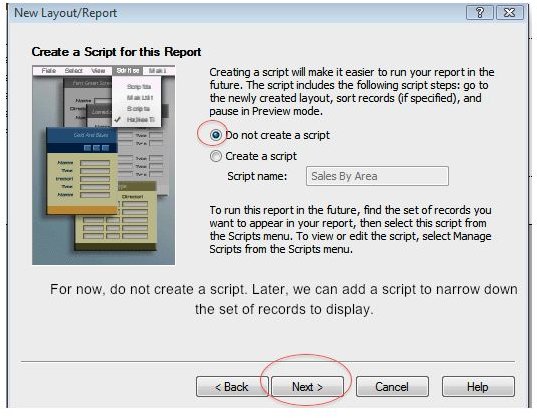
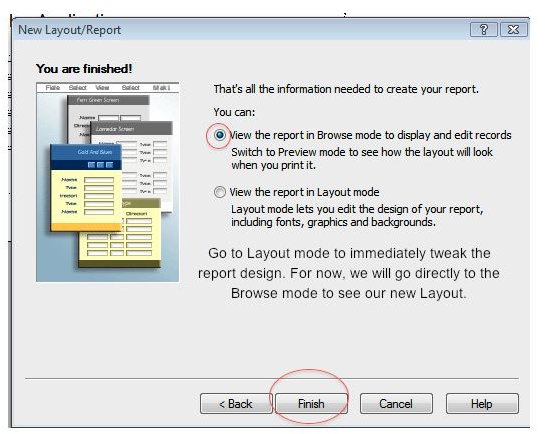
Steps 8 thorugh 10 - These are the last optional steps to add the finishing touches to our layouts. In our screenshots we have chosen a colorful blue layout, added a header and footer, and have opted not to include a script to the report at this time.
The “Semi-Final” Product
Now that your grouped report/layout has been generated, it is ready for tweaking. For example, we can align the number fields, format them to currency with two decimals, and even add subgroupings within our sales personnel to calculate their individual sales. We do this by changing our view from Browse to Layout (click on the Edit Layout button in the far upper right of the browse window). Techniques for making layout changes will be covered in an upcoming Bright Hub article.
More Information on FileMaker Layouts
Peachpit.com: Creating FileMaker Pro Layouts
FileMaker Pro 10: Beginner Tutorials
This post is part of the series: Using FileMaker Pro 10 for Windows
FileMaker Pro 10 for Windows is a database design application that works on the Windows and Mac computers. Microsoft Access users will have no difficulty learning FileMaker and will quickly learn to create robust database applications. This series presents FileMaker basics, from fields to layouts.


