
If you’re still sorting through spreadsheet data manually, it’s time to learn how some of the functions in Excel can increase your productivity. In this article, we’ll take a look at the IF function and give an example of how it can be used.
What is the IF Function?
The IF function in Microsoft Excel allows you to check a specific condition or set of conditions in your data, and then associate a result to your data based on the outcome of that analysis.
For example, an instructor may have a list of all student grades and want to assign a passing mark to those who answered at least 70% of the questions correctly and a failing mark to the others. Rather than going through the entire list one student at a time, it’s possible for the instructor to write one IF statement that will check each student’s grade and make that assignment for him.
An IF Function Example
In this article, we’ll start by taking a look at an example using the situation described in the previous section. This is one of the simplest types of IF functions to create since it only has two possible values. We will cover more complex examples of IF functions with multiple values later in this series.
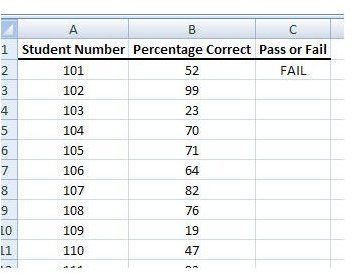
The screenshot below shows how our data has been entered in Excel. (Click the image for a larger view.)
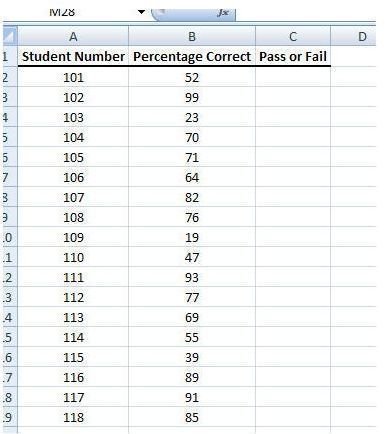
In the Pass or Fail column of this worksheet, we want to enter a formula that will perform the following tasks.
- Assign a value of Pass if the Percentage Correct is greater than or equal to 70.
- Assign a value of Fail if the Percentage Correct is less than 70.
In the following section, we’ll walk through the process of creating this IF function step-by-step.
Creating the IF Function
Step 1: Select the first empty cell in the Pass or Fail column.
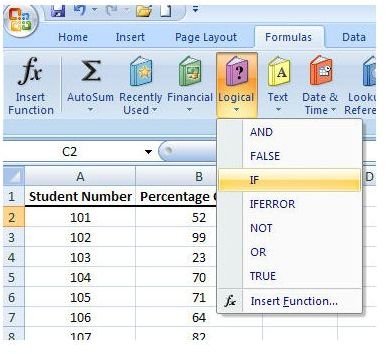
Step 2: Open the Formula tab on the Excel ribbon. Click on the arrow underneath Logical in the Function Library section to expand the menu. Select IF from the menu options.
Step 3: In the Function Arguments window that appears on your screen, you will be asked for three items: the Logical test, the value if true, and the value if false.
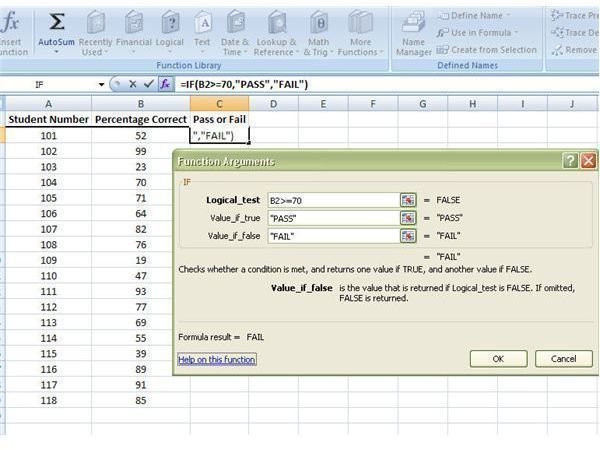
In our example, we are testing to see if the value of the number in the Percentage Correct column is greater than or equal to 70. In Excel terms, this translates to the statement:
B2>=70
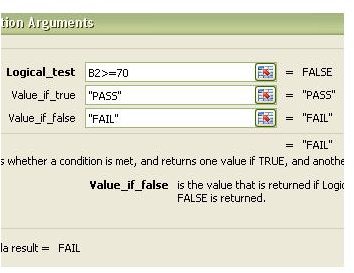
If this condition is true, we want the function to return the value “PASS”. Otherwise, we want it to return the value “FAIL”. A closer view of how this information is entered into the Function Arguments window can be seen below.
Step 4: Click OK after entering the information. The function will be immediately evaluated in the worksheet.
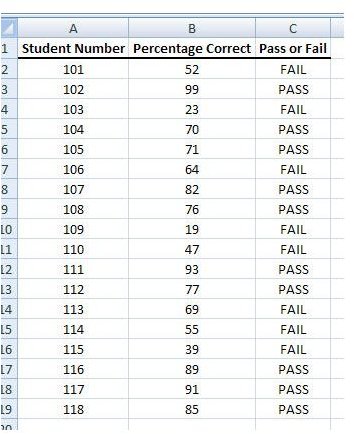
Step 5: Copy the formula just created and paste it into the other empty cells of the column.
Note: If for some reason the function is not evaluated or if it looks like it is being evaluated incorrectly, make sure that you have the Automatic calculations feature activated. To check this, click on the Calculation Options button in the Formula tab and see if there is a check mark next to Automatic.
Next in this series, we’ll take a look at how to create IF functions for conditions that have more than two possible values.
This post is part of the series: How to Use Logical Functions in Microsoft Excel 2007
The logical functions of Microsoft Excel 2007 are extremely powerful tools that be used for many applications. This group of articles takes a look at individual logical functions available in Excel and describes how they can be used to save you time and improve your project analysis.


