
Want to get rid of that pesky ribbon that takes up an inch of your work area in Microsoft Word 2007? We’ll show how you can personalize Microsoft Word to take care of this problem and a couple of other ones as well.
The default settings of Microsoft Word 2007 are not that bad, but sometimes I just get sick of seeing all that “blue” around the edges of the document. At other times, especially when I’m working on my laptop with a smaller display, I’ll wish that ribbon wasn’t hogging so much of my screen space.
As it turns out, these things aren’t too hard to modify at all. Here are a few settings that you can adjust as often as you like to make working in Microsoft Word a little more comfortable, no matter what your environment or document type is.
Tip 1: Minimize the Ribbon
If you find you need more working space on the Word screen, you can easily minimize the ribbon without losing any of its functionality. To do this, click on the arrow next to the Quick Access toolbar, and then select Minimize the Ribbon.
You can reverse this action at any time by performing the same sequence of steps. While the ribbon is minimized, clicking on any of the main tabs will temporarily bring it back into view so you can choose command options. It will disappear again as soon as you click back on your main Word document.
Tip 2: Change the Color Scheme and User Details
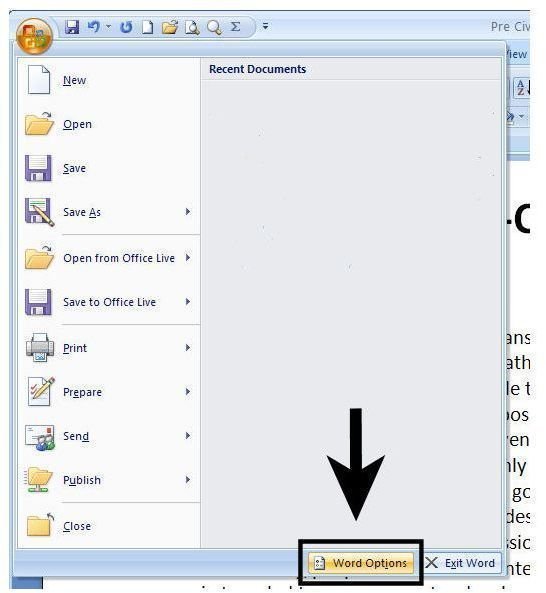
Click on the Office button in the upper left-hand corner of Word, and then select Word Options.
When the Word Options window opens, navigate to the Popular tab. From the Color scheme dropdown box, you can specify which scheme you want to use.
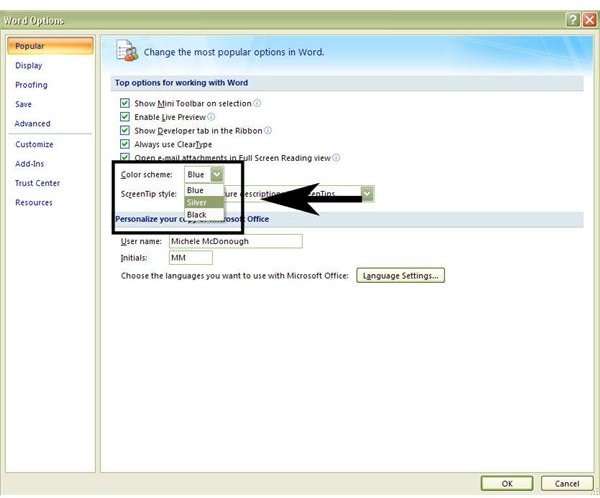
Before leaving this screen, you can also take a moment to make sure that your User name and Initials are showing as you’d like them to appear. Click OK when done, and you’ll be returned to the updated main window of Word.
Tip 3: View Selected Formatting Marks
Since most people do not want to see every formatting mark on a document, they usually completely turn off the option to view formatting. However, Word does offer the capability of only viewing select formatting marks. This can help greatly when working with special document types.
To customize this feature, return to the Word Options window that we visited in the preceding tip. Select Display from the left-hand menu, and you will find a section in the middle with the heading Always show these formatting marks on the screen.
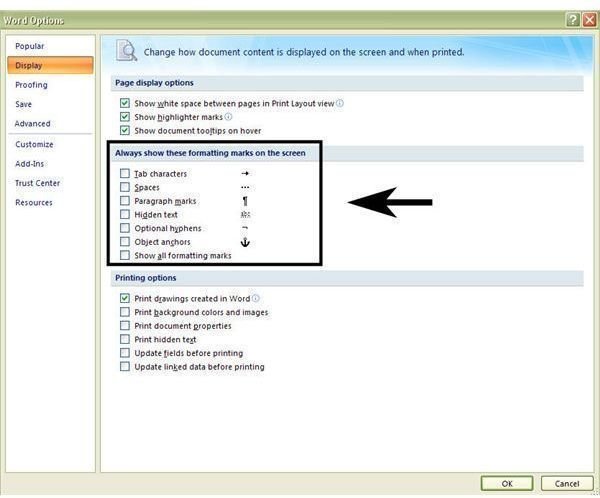
Put a check next to marks that you would like to be visible on your document, and click OK to exit the window.
This post is part of the series: Personalizing Microsoft Word 2007 Documents
In addition to taking a look at ways the Microsoft Word 2007 application can be modified so that it’s easier for you to work in, we’ll also show how to create some custom items that will make your documents stand out in a crowd.


