With the watermark feature in Microsoft Word 2007, you can insert company logos, personal photos, or text phrases as document watermarks. This option makes business documents look more professional and adds a nice personalized touch to letters and memos.
Step by Step Instructions
In Microsoft Word 2007, a watermark is a faint image of a picture or text that can be seen behind the main body of a document. This type of marking may be used for a variety of reasons.
If you are preparing a private company memo, you may choose to include the company logo or the word “Confidential” as a watermark for your document to remind readers of the memo’s nature. On the other hand, if your document is a personal letter, you may want to use a watermark as a way of personalizing the note, giving it the appearance of custom stationery.
How to Insert a Watermark
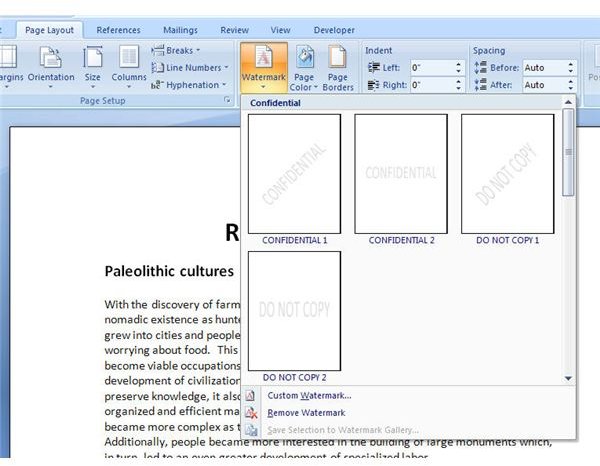
Step 1: On the Page Layout tab, click on the arrow under Watermark. This will open up a new window with several options. (Click on the image below for a larger view.)
Step 2: You can scroll through the list of predesigned watermarks and see if one there is a good fit for your document. If you find one, click on it and it will appear in your document.
Step 3: If you can’t find a suitable watermark in the list of predesigned ones, click Custom Watermark to begin creation of a new one.
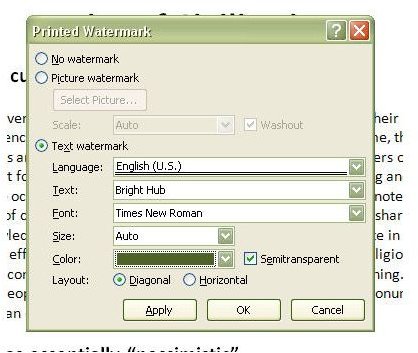
A dialog box will appear where you can enter specifications for your own watermark design. You can either select Picture watermark and browse through your personal collection of images, or select Text watermark and enter the word or phrase you want to use. If you choose this latter option, you can also modify the default settings, and pick your own font, size, and color. You are restricted to only having one watermark per page.
The watermark will appear on all pages of the printed document. Should you decide later on that you no longer want to use a watermark, you can get rid of it by choosing Remove Watermark from the same menu. You can also use this same process to change an existing watermark to a new one.
Adding Watermarks to Specific Pages
If you only want to add a watermark to specific pages in your Word document rather than have the watermark appear on every page, you’ll need to make use of Word’s section break feature.
Step 1: Go to the end of the last page for which you do not want the watermark to appear. Then, on the Page Layout tab, click on Breaks and choose Next Page under Section Breaks.

Step 2: Next, go to the View tab and make sure that Print Layout View is selected.

Step 3: Now, we want to insert the watermark in the header - don’t worry, the watermark will still appear in the main portion of the page. The header will just be a place to hold the watermark information for that section to ensure that the watermark is not printed on pages in other sections.
Double-click the top part of the page and you should see the header area as shown in the screenshot below.
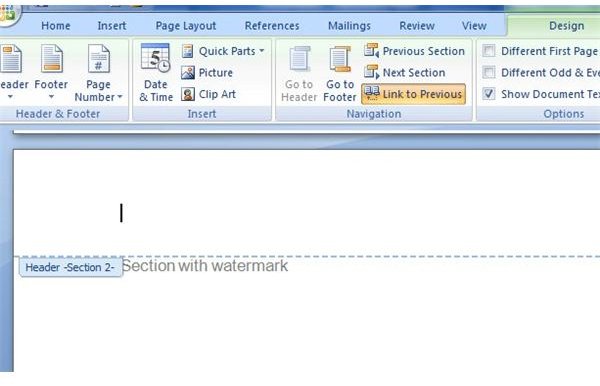
Step 4: With the header still selected, go to the Design tab in the Header & Footer Tools section as shown below.
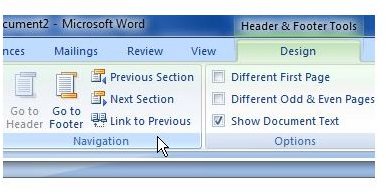
The Link to Previous feature will probably be highlighted, indicating that all headers and footers are linked. If it is, click it so that this feature is no longer highlighted and the headers will be unlinked.
Repeat this step for each section of your document.
Step 5: Go to the section of the document where you’d like the watermark to appear, and add the watermark as described in the previous section.
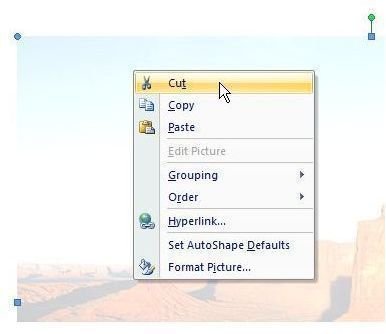
Note: If you’re adding a custom watermark, it may still appear on every page of your document even though you’ve gone through the above steps due to a problem with how Word 2007 handles custom watermarks. If this is the case, you can still remove it from the sections in which you don’t want the watermark to appear. Just go to each page for which you want to remove the watermark and select the watermark. Then, either hit the Delete key or right-click and select Cut.
More MS Word Resources
Interested in learning more Microsoft Word tips and tricks? Have a look at the collection of Microsoft Word user guides that are housed here at Bright Hub, and learn things like how to create your own template to save yourself from retyping the same information over and over or how to further save time using Word’s built-in macro creation tools . Keep checking back because more tutorials are being added all the time.
This post is part of the series: Personalizing Microsoft Word 2007 Documents
In addition to taking a look at ways the Microsoft Word 2007 application can be modified so that it’s easier for you to work in, we’ll also show how to create some custom items that will make your documents stand out in a crowd.


