Here is a step by step tutorial on how to rip a DVD using HandBrake to usable movie file.
Famous
Even though the digital video software HandBrake can do a number of different video conversion and video compression functions, it is mainly known for how it can rip DVDs. HandBrake gained quick popularity because it was a free program that could be used to rip DVDs to digital formats that could then be shared, used in video editing projects, authored to home DVDs , or eventually applied to portable media viewing devices like the iPod . Here is a step by step tutorial on how to rip a DVD with Handbrake.
How to Rip a DVD With HandBrake
If you want to learn how to rip a DVD with HandBrake you should start by putting the DVD into your computer, letting it boot up, and then closing out the program that is playing it. HandBrake will either immediately open up a prompt for you to find a source file for video, or you will just have to hit the Source button in the upper left hand corner of the display.
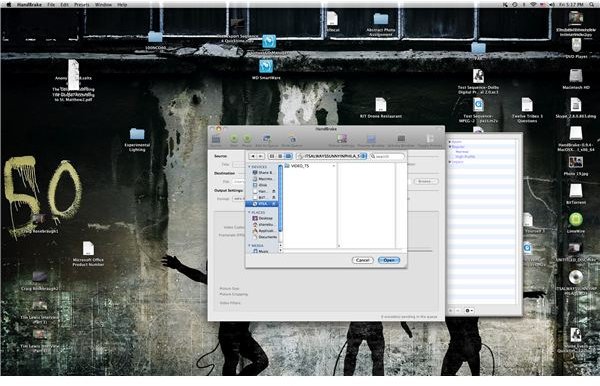
You will then select the DVD from your available areas, and then select the large available folder there. The folder on this DVD will likely be named VIDEO_TS. Once you have chosen this folder, HandBrake will begin scanning the source to identify all of its information. Once it is done it will have a complete profile that will list how much time it has to capture in terms of video playback, how many DVD chapter there are, and the angles. You will then set the Destination where you want the file to be outputted.
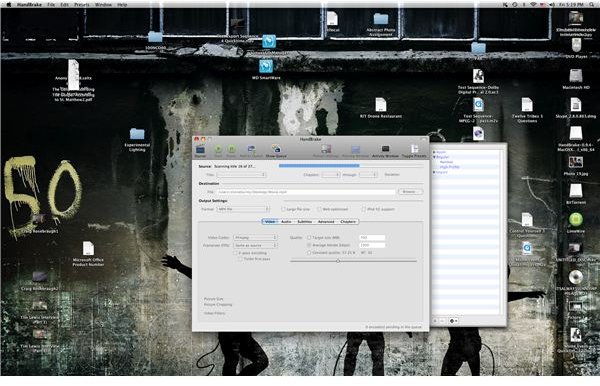
Below that will be the Output Settings, that you will then choose such as Format, Large File Size, Web Optimized, or iPod 5G Support. Format will usually be set at a default of MP3, and you may want to maintain that. Below this will be more detailed options such as Video Codec, Framerate, and Quality. If you want to keep things as close as you want to the original then you will want to keep Framerate at Same as Source and then actually increase the quality rate from what it is set at. The
video codec option is up to you, and it is usually set at H.264. You can then switch it to MPEG-4 easily.
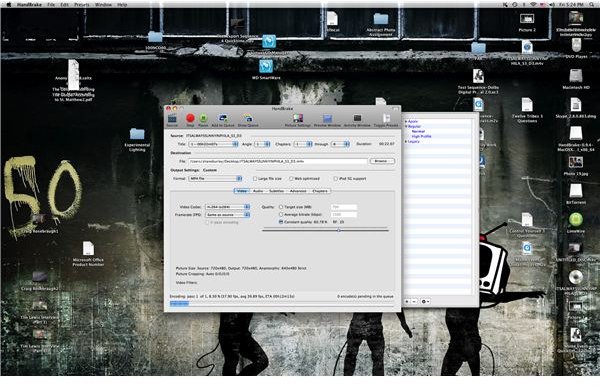
The next step in how to rip a DVD with HandBrake is to just hit the Start button, which is directly to the right of the Source button. You will then be able to watch the Encoding process at the very bottom in a progress bar that will give you a visual representation of the progress, the percentage, the average frames per second, and the estimated time it will take. Once it is finished with this process it will spit out an independent movie file at the location that you determined with the settings you wanted. The step by step process on how to rip a DVD with HandBrake is fairly simple, but you do not get as many options as you might with other video conversion programs.
This post is part of the series: HandBrake Tutorials
Here are some detailed tutorials for different functions in the video conversion software, HandBrake.


