Here is a tutorial explaining how to set Capture settings in your Final Cut Pro project.
Capture Me
Capturing video, in video editing terms, usually refers to the general recording to a digital format from another storage system. When you are shooting on DV tape you will then capture your footage onto your computer using capture software or your non-linear video editing software. This transfers it from a physical storage medium to a digital video file that can be used in your project. What capturing does specifically is takes the feed from a capture deck, or device that is giving out playback, through a connection cable and allows the software to imprint it as a digital file. In Final Cut Pro you can do this to bring footage directly into your project, and it is then saved for reference in your Capture Scratch. You have to properly adjust your Capture Settings so that the videos come in correctly, conform to your project settings, and head where you need them to.
Capture Settings
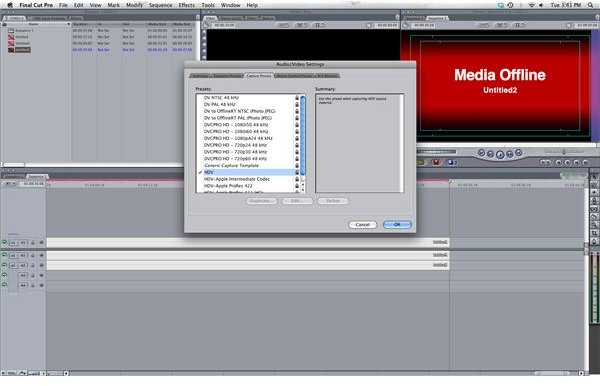
When you are in Final Cut Pro you can go to Final Cut Pro in the upper task bar and then go down and select Audio/Video Settings. From here you will then select the Capture Presets tab, which is in between Sequence Presets and Device Control Presets. It is from this list of presets that you must find the exact format that you filmed on, such as HDV or another specific platform, so that the capture option will then conform to the proper settings that will be needed to correctly capture your clip. If you do not choose correctly you may capture at the wrong resolution, disturb sequence settings and, in general, your clips will not appear as you recorded them.
Capture Now
When you are ready to actually capture your footage go to File and go down and select Log and Capture, which is the best option for the
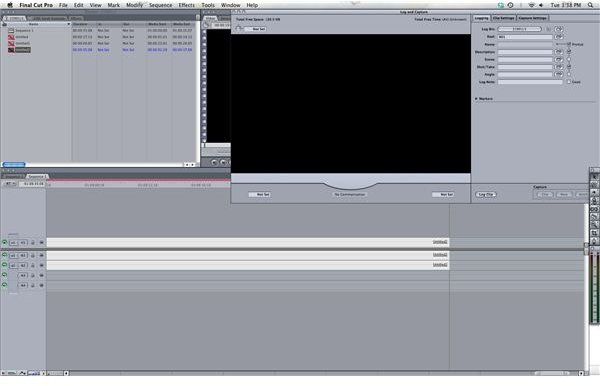
“capture now ” continuous capture from a source tape. It will then try to connect to a capture device, and if it cannot it will let you know. Once in here you should take a look at the options that you have. These options have been set ahead by the presets that you selected, and because of that preset decision you should be safe in most situations. What you will need to make sure you do is select a Scratch Disk locaiton in your Capture Settings tab, which is just standard to make sure that everything is in the standard location. In terms of organization the Logging tab, which is the first one, is where you are going to enter the clip information that will be used for reference and label. Here you can enter information for the clip such as name, scene, and other titles that can help it to be immediately classified in the Browser.
This post is part of the series: Final Cut Pro Troubleshooting
Here are a series of Final Cut Pro tutorials designed to deal with common problems.


