
Learn how to take your digital video project and share it with the world through Vimeo
Online Video Sharing
People have become very used to the self publish of videos online with the inclusion of YouTube . YouTube tends to have a lower quality for videos, includes ads at all levels, and is not always what proficient digital video producers want to use to publish and embed their videos. Vimeo, as the new kid on the block, is much better regarded by online video producers because of its great video playback support. With Vimeo you can easily embed videos onto your website, social networking pages, or create your own profile, all in the effort to share media and promote yourself. To get the video from your digital video editing program onto the Vimeo sharing service you can follow a few easy steps.
Vimeo Account
You have to begin by setting up an account with Vimeo, which is an easy process of only a few steps. At Vimeo you have a choice between signing up with the Basic service or the Plus service, which would give you extended features like better video quality, unlimited HD uploading, and the ability to have a 5 GB a week upload space. This costs $9.95 a month or $59.95 a year and few people actually pay for this type of service as the Basic Vimeo account is fine for regular video uploading. They will simply ask you to give a name, email, and password, and then your Vimeo account will be activated.
Preparing the Video
To start the process of uploading your video you have to export and compress it so that it will fit within the 500 MB restrictions. This will require close attention so that you can get the highest possible video quality while remaining on the acceptable side of this barrier.
Uploading to Vimeo
Once your video is compressed and ready you will begin the Vimeo upload process. In your Vimeo account go to the upper bar of options and
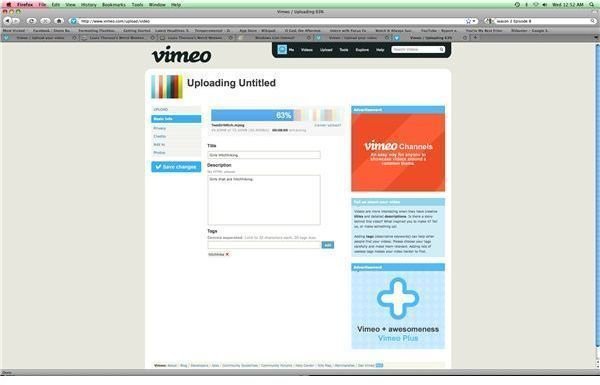
select Upload, which is in between Videos and Tools. This will bring your to the Upload Your Video screen that will give you a “choose a file to upload” button. Click this and you will be able to browse for a file that you want to upload. Once you select the file it will begin uploading, and during this time you can type in a title, a text description of what the video is, and any search tags that you want to add to help it be found. Once it is done uploading a sign will come up that says “Finished Uploading! Go to Video.” This is not always the end of the process as there is often a conversion that you have to go through, and as a Basic customer you will not always have this go quickly as you have to wait in line for conversion. The page for the video will be up and ready to go and Vimeo will email you once the conversion has been completed. Once it has you can return to that page, which is indicated by a number, and you can watch your video, especially embed the video onto web pages .
This post is part of the series: Vimeo
Articles that deal with the Vimeo web hosting service.


