To start your video, you will need to know how to open the videos and photos and add them to your storyboard. The tutorial below will show you how to open and add videos and photos.
In this tutorial I will show you how to open your videos and photos and add them to your storyboard. Your storyboard is where you will edit your videos and photos. You will first need to open the photos and videos that you want to use before you start adding effects, music, and all of the other stuff. So, let’s get started.
Opening Videos and Photos in Auto Movie Creator
When your program opens, an interface will pop up. Click Close on the interface and I will show you how to open the photos and videos using the menu. You should be seeing the Auto Movie Creator window. At the top of the program, you will need to click File > Import Media Files. You can also click the Green Plus Sign in the Videos and Collections panel. Either way you want to open it, is fine.
When you click the button a box will open. In this box, you will need to locate the photos and videos that you want to open. You can select more than one file by holding down CTRL while clicking the files. After you have your files selected, click the Open button. Your photos and Videos will open in the Videos and Photos Collection panel.
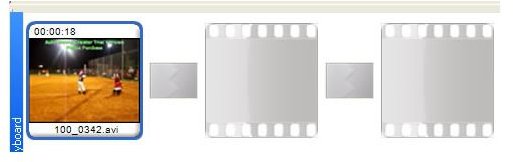
Adding the Videos and Photos to the Storyboard in Auto Movie Creator
The next step is to add the videos and photos to the storyboard. The storyboard is located at the bottom of your program. The storyboard is used to create your movie. Click the video or photo that you want to appear first in the movie. Drag that photo or video to the first slot in your storyboard. Click the next video or photo and drag it to the second slot. Continue adding the videos and photos to the slots in the storyboard until you have them all added. You can rearrange the videos and photos in the storyboard at any time by clicking the video or photo and dragging it to another slot.
The next part of this series will focus on applying effects to your videos and photos. Please go to the next part to continue with the creation of your video.
This post is part of the series: Auto Movie Creator Tutorials
This series will show you how to create videos using Auto Movie Creator.
- Auto Movie Creator Tutorial – Introduction Article
- Auto Movie Creator Tutorial – Adding Videos and Photos
- Auto Movie Creator Tutorial – Applying Effects to Videos and Photos
- Auto Movie Creator Tutorial – Applying Transition Effects to Videos and Photos
- Auto Movie Creator Tutorial – Managing the Advanced Options of Transitions
- Auto Movie Creator Tutorial – Adding Titles and Credits to your Video
- Auto Movie Creator Tutorial – Adding Music to Your Video
- Auto Movie Creator Tutorial – Adding Narration to your Video
- Auto Movie Creator Tutorial – Exporting your Video
- Auto Movie Creator Tutorial – Creating, Saving, and Opening Projects


