Welcome to the two part series on using measurements in InDesign. In part 1, you’ll learn the different units of measurement that InDesign supports, how to set them locally or globally, and how to use and move rulers on the fly to streamline your work.
Units of measurement seem like such a minor thing, but understanding how measurements work in InDesign is a powerful little bit of knowledge. In this article, the first in a two part series, you’ll learn not just the different measurements InDesign supports, but keyboard shortcuts for using them and a few ruler tips.
Measurement Units Supported by InDesign
InDesign offers several measurement schemes for your use. The web designers among you might notice that “pixels” isn’t offered. This is because InDesign is a tool for print, not online.
Inches, picas, and millimeters are the most commonly used systems. Inches is the most common system used for laying out documents in the United States, with picas a shrinking second. Picas are old school, historically used by printers. A rough equivalency is 6 picas to an inch. Additionally, there are 12 points to a pica, so 72 points to an inch. And if we want to get really deep here, a font’s point size corresponds roughly to its physical height. 72-point type will be about an inch tall.
But I digress. Millimeters is used in Europe and many other areas of the world. Paper sizes such as A4 are based on the metric system, so when creating documents for papers such as A4, it’s simpler to just use millimeters — the measuring unit that works best.
Changing Measurement Units in InDesign
You set the measurement system you use in InDesign in the Preferences dialog (keyboard shortcut: command-K). Here’s an interesting tip, and it applies to all InDesign preferences:
-
To change units of measurement globally (for this and all new documents), set the new preference without any documents open.
-
To change units of measurement for the current document only, set the new preference with the document open.
Advertisement

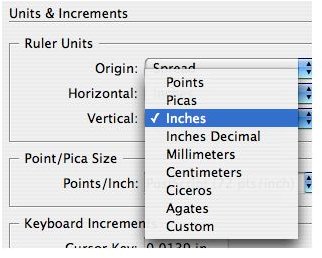
Simply open up the Preferences dialog, click “Units & Increments,” and set the measurement system in both the “Horizontal” and “Vertical” dropdown menus. InDesign allows you to use different measurements for horizontal and vertical axes, so it’s necessary to set both.
Notice the “Origin” dropdown menu. InDesign can measure across a spread (default), per page, or from the spine. If you’ve recently migrated from Quark you’ll be more comfortable setting Origin to measure each page separately, as that’s what Quark did by default.
The Ruler and Measurements In InDesign
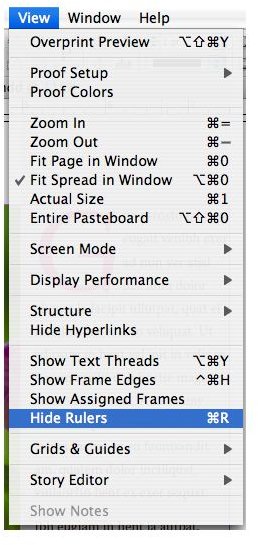
Show and hide the ruler using the View menu or by toggling with the keyboard shortcut command-R.
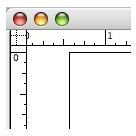
Those little dotted lines in the upper left indicate that the ruler can be moved. You can click and drag the ruler’s starting coordinates to anywhere on the page. This can be useful when setting up guides, switching from spread to page view without changing preferences, or when you want to measure from a particular item on the page.
We’ve learned about the different units of measurement available in InDesign and their uses, where to set them, and how to make use of InDesign’s ruler.
In part 2 of this series, we’ll go over how to override InDesign’s default measurement settings and learn how to make InDesign do math for you. Who needs a calculator, anyway?
This post is part of the series: Understanding Measurements In InDesign
Welcome to the two part series on using measurements in InDesign. You’ll learn how to set different units of measurement, how to use and move rulers on the fly to streamline your work, and some nifty tips for making InDesign do some math for you!


