
Traditional artists know the pain related to drawing a sphere by hand. Fortunately for all of you digital artists and budding graphic designers, you’ll be glad to know that recreating this technique in Photoshop is a simple and fun process that you’ll be able to master the first time you try.
Creating a sphere in a traditional artistic sense has always been something relatively difficult to do. Trying to create something that is three dimensions without the help of hard edges and tell-tale corners has left many traditional artists baffled. There’s the light source which you have to pay attention to, then there’s the proper amount of shading. Then there’s adding a shadow to give the object a sense of physical orientation. By the time that you’ve finished drawing your sphere on paper, you’ve likely gone through half an eraser, broke a few pencils in frustration, and you’re covered in graphite.
So, naturally you can only expect the same frustration from creating a sphere in Photoshop, right? Wrong! Fortunately, creating this nifty little three-dimensional geometrical object can be done in a matter of seconds and leads to a fantastic effect. This tutorial utilizes Adobe Photoshop CS4, but should work perfectly well with Photoshop 7.0 upward to the current version.
Simple Sphere Creation
If all you’re looking for is the most basic of spheres, you’ll be happy to know that it is primarily a three step process. I’ll show you how you can create a simple sphere with an incredibly realistic three-dimensional feel to it.
Start Photoshop and open a new document. It really doesn’t matter what size you start with, but as always it’s so much easier to start with something too big and scale it down rather than trying to scale up something too tiny. So here I’ve got a simple 800x800 pixel document with a 50% gray background. Do you need your background to be 50% gray? Not at all, but it does help to make the highlight on the sphere brighter.
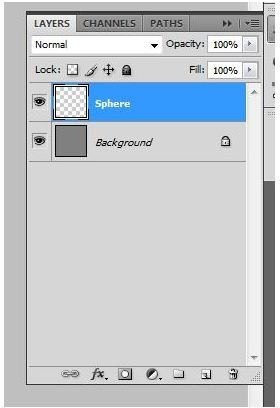
Create a new layer and name it “Sphere.” Pretty simple so far, no? What if I told you we’re already 50% of the way done? Well, we are!
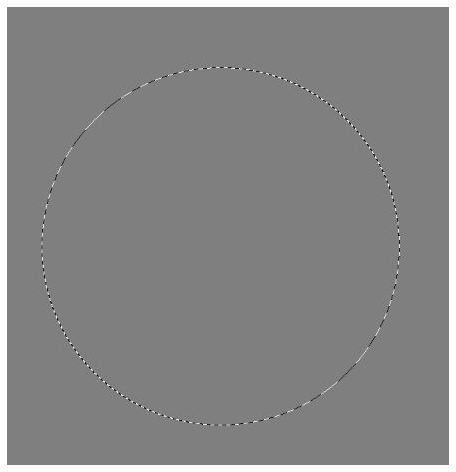
Grab your elliptical marquee tool and hold shift and drag yourself out a large circle in the center of your canvas. It should look something like this:
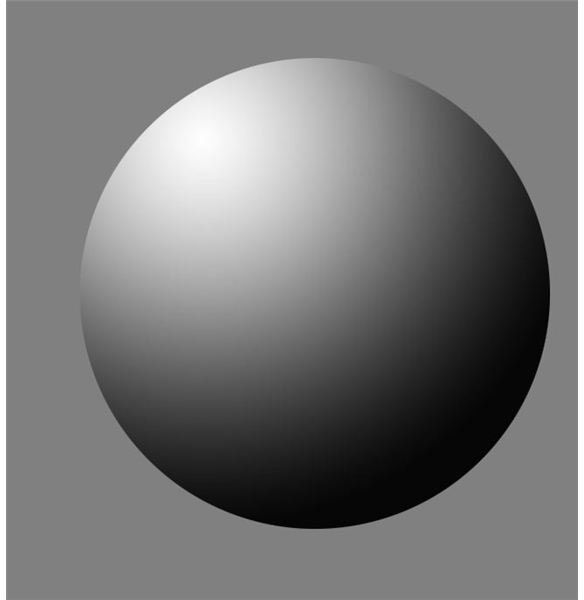
Now comes the fun part! Select your gradient tool, and in the gradient window find the gradient that goes from black to white. It should be right here:
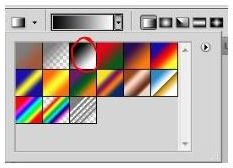
Now we simply turn this empty space into a sphere by placing a radial gradient in the space. Click your radial gradient option, as well as your “Reverse” option:

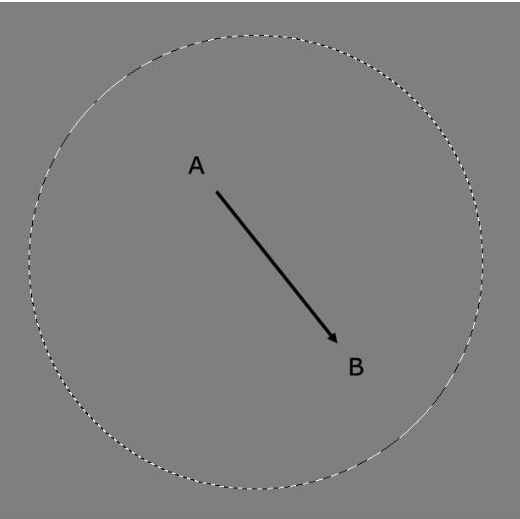
Now starting at point A on your sphere, drag your gradient line to point B:
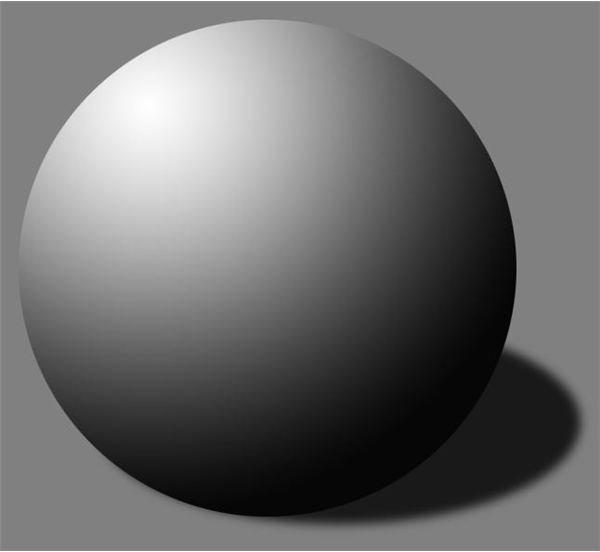
The end result will be a fantastic and very realistic basic sphere. And look, you did it without breaking a single pencil in frustration.
Of course, this sphere could be quite a deal more impressive, you know.
Adding Shadows
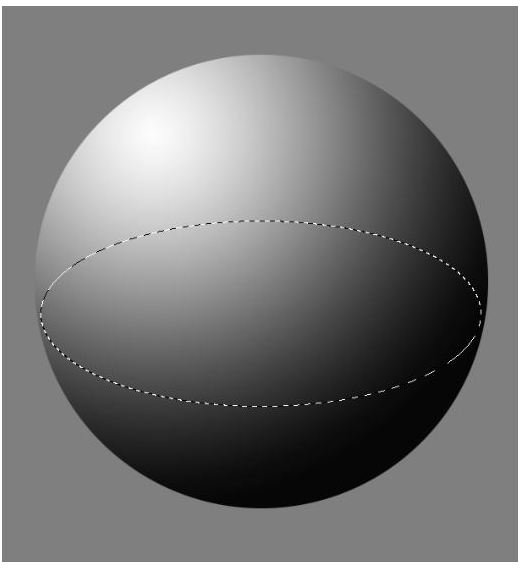
Because you don’t want your sphere floating around in some grey netherworld, we can give this sphere a sense of placement by adding a simple shadow. Create a new layer in Photoshop and name it “Shadow.” Make sure it is over your background layer, but under your sphere.
Grabbing your elliptical marquee tool, create an oval shape that spans across the center of your sphere, like I’ve done. The reason we start out doing this is because it gives you a fairly accurate size of shadow rather than just eyeballing it. Of course, as anyone can tell you, shadows are entirely dependent on lighting and therefore you could easily eyeball where they should go.
Now, using the paint bucket tool, fill the oval with black. If you don’t want your shadow to be too dark, you could fill it with a dark gray right now, or you can simply adjust the opacity later on. I generally prefer to adjust the opacity later on, as it just seems to be quicker this way. (Image below is shown with the sphere layer hidden, not removed.)
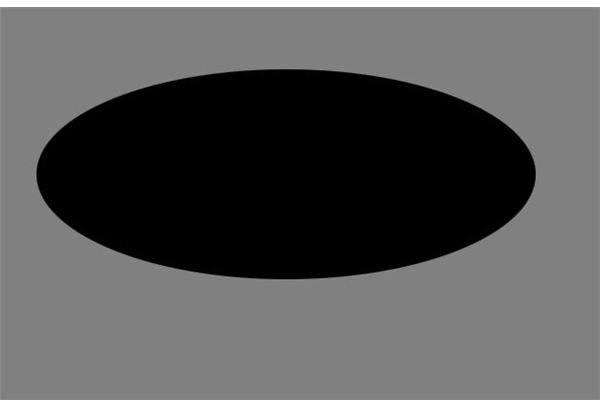
Move your shadow with the move tool so it’s under your sphere like so:
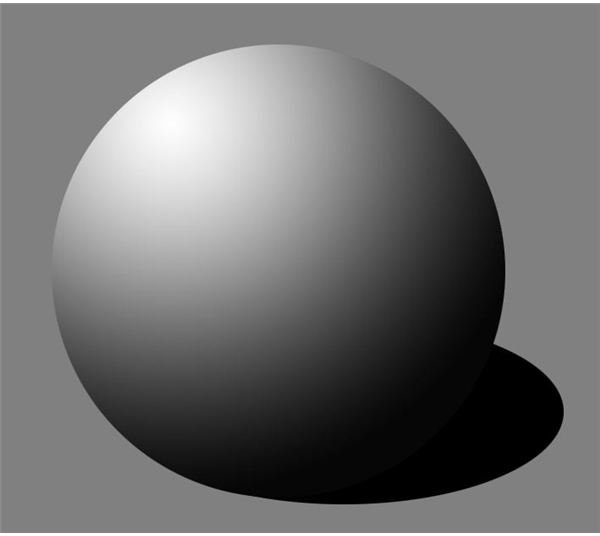
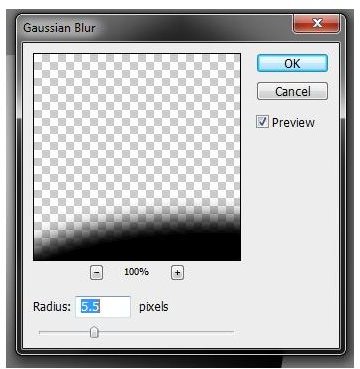
Seems a little harsh for a shadow, doesn’t it? We can fix that. Go to Filter > Blur > Gaussian Blur. Play around with the settings until you soften the edges of your shadow to the point that you like. For example, my setting is 5.5px.
Now, doesn’t that look nice? Just make sure that your shadow falls in the same line as your highlight, but directly behind it. That’s one of the most important things about creating a 3D object, after all. You’ve got to make it believable.
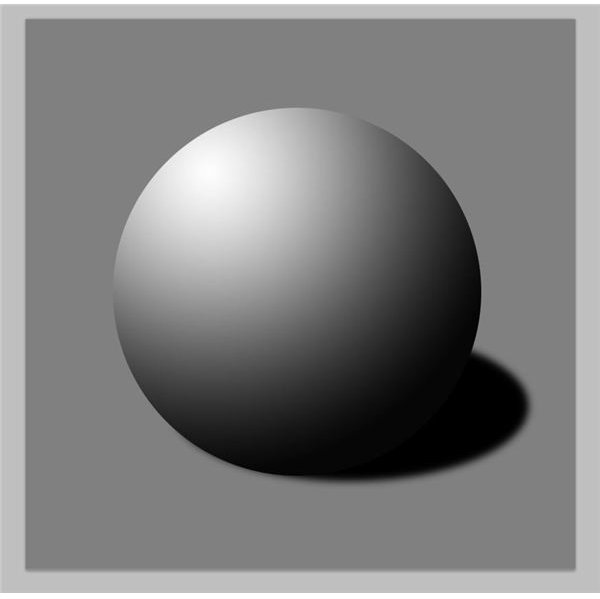
I decided that I thought my shadow seemed slightly too dark, so I lowered the layer opacity of my shadow layer to 80%. Here’s my finished result.
Resources
All images and information were provided by Amber Neely.


