Whether you’re starting your own business or simply trying to expand your networking possibilities, you may have thought about printing your own business cards. Photoshop can help you make quick work of the process, and this article will show you the way with helpful tips and tricks.
Setting Sizes
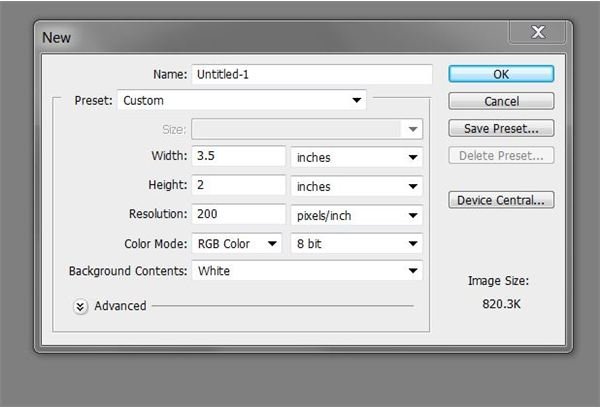
The standard size of a business card is 3.5 inches wide by 2 inches high, so when printing your own business cards with Photoshop, be sure to select “inches” from your dropdown setting before you enter your numbers. Another important thing is to remember to choose a good print quality setting, somewhere around 175-250 DPI. This will insure crisp, clean lines and great readability. If you want to learn more about DPI settings and how to edit them, check out some of our articles on printer DPI, such as How to Edit Print Resolution in Photoshop Elements .
The Font Formula
Business cards are incredibly small, so be mindful of the font you use. You’re going to want to use a sharp, clean looking font for all your important contact information, such as your name, email, website, and phone/fax numbers. If you’re still unsure of what to look for, why don’t you check out or article on Free Business Card Fonts ? It includes four great fonts to help you get started on your perfect business card. While you’re at it, maybe you should take a peek at our Adobe Photoshop: Change Font Color tutorial.
Logo Design - Getting the Most Out of Your Hard Work

When designing a logo for a business card, it’s always wise to be aware of the advantages and disadvantages of using certain image formats . A vector image or custom Photoshop shape will easily be resizeable both upwards and downwards without degrading your image quality.
If this is not possible, try to design your images and save them as PNGs which are far less likely to have artifacts around the edges like JPEGs and will not compress colors as much as a GIF image will. If you’re worried about how you can create interesting text effects, you should check out these tips for using the Photoshop Text Tool , where it will teach you how to position, warp, align, and even transform your text.
And don’t forget to take the time to properly align your information, logo, ane extras in an eyecatching way! Here’s a quick guide that will easily teach you how to align objects in Photoshop: Align Objects in Photoshop .
Save Money!
Be aware of your cost of production. While you may be trying to save money by printing your business cards yourself, be aware that it still costs money. This isn’t a specific Photoshop trick, but one that is worth mentioning. You’re going to have to buy a heavier paper to ensure that your business cards are not crumpled within wallets or pockets, and remember that per ounce, printer ink is more expensive than gold. After all, you don’t want to spend forever designing your perfect business card only to find that you cannot print it in a cost-effective manner. Here are a few tips for saving money when you print your own cards:
-
Watch for sales! Watch your local office supply store for sales on specialty paper . This can be anything from standard-sized cardstock to matte photo paper. Stay away from semigloss, glossy, or lustre paper as it tends to be a bit “sticky” and is easily scratched or damaged by moisture in the air. Also remember that it is often better to buy in bulk, preventing future trips to the office supply stores and a less cost per sheet of paper.
Advertisement -
Minimalism is still in style. Instead of wasting your ink on an incredibly complex design, take a minimalistic approach. Keep logos small and simple, and don’t waste ink by printing elaborate backgrounds for your card. This will stretch your ink supply, allowing you to print more for your dollar.
Paper Problems
Make sure you use a good quality paper, but make sure your printer can handle it. The paper cannot be too thick, lest you damage your printer and waste your money. You might even be able to find business card stock, which offers you the ability to use carefully pre-perforated cards, eliminating the need for a paper cutter afterward.
If you’re printing specifically on business card stock, make sure you allow a 3-4mm gap between your text or images and the edge of the card, allowing you to easily avoid printing too close to the perforations and ruining your cards. The Photoshop ruler tool (Photoshop Shortcut: R) can easily help you make sure you’ve got the perfect distance.


