Windows Photo Gallery is no longer included as a pre-installed application in Windows 7. However, it is still available as a free download. We’ll show where and how Windows 7 users can obtain Windows Photo Gallery.
Where is Windows Photo Gallery?
If you’ve upgraded to Windows 7 from a previous version of the Microsoft operating system, you may be wondering where Windows Photo Gallery is hiding. Don’t spend too much time searching, because it just isn’t there.
With the release of Windows 7, Microsoft has decided not to bundle the operating system with as many applications as it has in the past. In addition to Windows Photo Gallery, other utilities such as Windows Movie Maker and Windows Mail are also no longer part of the standard installation process.
That doesn’t mean that Windows Photo Gallery is gone completely, though. You can still download the software from Windows Live.
Downloading and Installing Photo Gallery
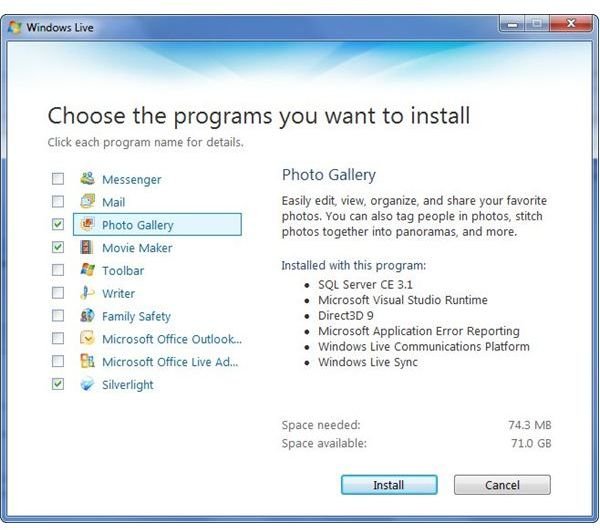
To get Windows Photo Gallery up and running in Windows 7, you first have to download the application from the Windows Live Essentials download center . After clicking the Download button, you’ll be presented with a window asking which Windows Live applications you want to install. By default, all of the applications will be checked, but you can uncheck any of the boxes and only install those utilities that you want on your PC. (Click any image in this article for a larger view.)
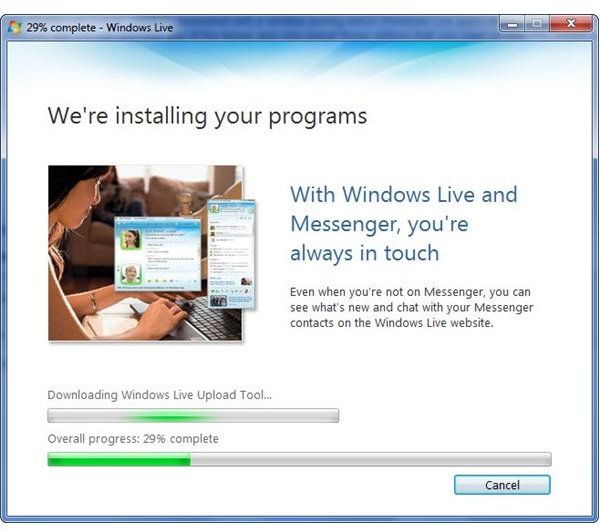
The downloads are completely free, so there’s no need to worry about that matter. The length of the download and installation process will depend on which selections you chose to install, but a progress window will keep you updated as you wait.
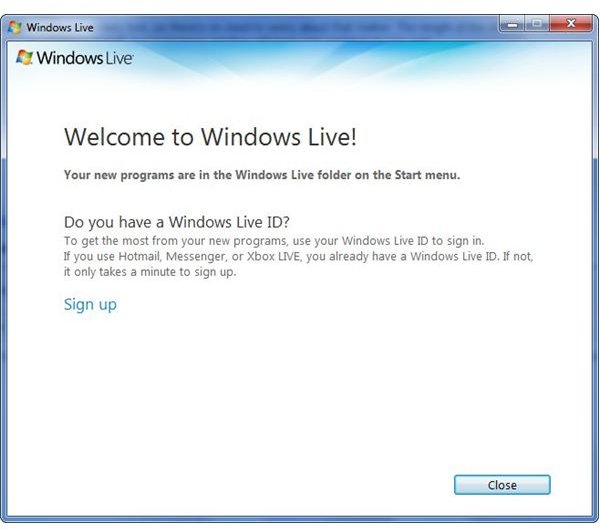
You don’t need a Windows Live account to download, install, or use Photo Gallery, but if you do have one, additional sharing and online storage options will become available. At the end of the installation process, you’ll be able to create a Windows Live ID if you don’t have one already. This extra is also free, so it’s a nice thing to take advantage of – especially with the free 25 GB of online storage available through SkyDrive .
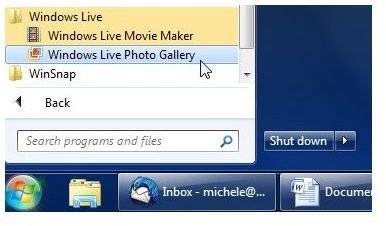
After installing Photo Gallery, you can locate it by clicking on the Start button, selecting All Programs, and then scrolling down the list until you find the Windows Live folder. From here, you can expand the folder and select Windows Live Photo Gallery.
Running Photo Gallery
When you first start Windows Photo Gallery, you’ll be asked if you want to sign into Windows Live so you can create and share your photos online. If you don’t want to do this, just click the Cancel button and go directly into Photo Gallery.

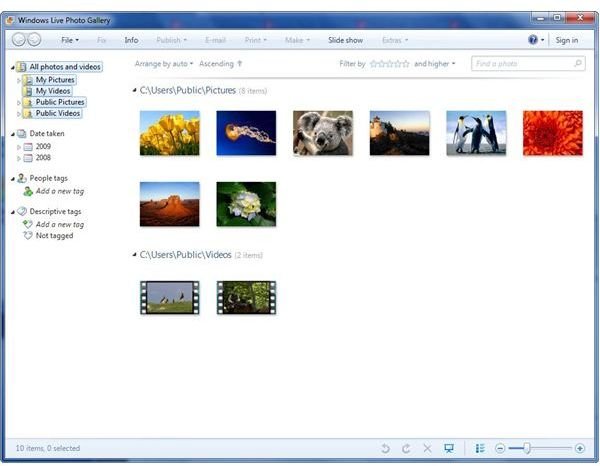
When Photo Gallery first opens, you’ll only be able to see the photos and videos stored in Windows 7’s default media locations.
To add other file directories, click on File and then select Include a folder in the gallery.
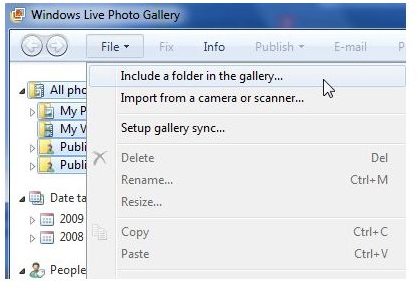
Then, just navigate to the folder you want to add and select it. If you add a lot of photo directories, it could take a bit for Photo Gallery to catalog them, and, in general, it might make Photo Gallery run slower. That’s nothing new to Windows 7 though.
If you’re not happy with the default photo viewer or the Windows Live Photo Gallery, you may want to check out some of these other photo viewers and management systems compatible with Windows 7 . These applications offer a lot of additional functionality, and many of them are free.


