
Windows Live SkyDrive may let you store up to 25 GB of files online for free, but it can be annoying to have to log in to the service through your web browser every time you want to use it. However, there are some ways you can map SkyDrive as a network drive, making it much easier to access and use.
Overview of Skydrive
If you’ve been looking for a free, reputable site to store and share files online, Windows Live SkyDrive is a great choice. To access SkyDrive, all you need is a Windows Live ID, which is easy enough to create if you don’t already have one. Once you have an account set up, you can store up to 25 GB of data on SkyDrive with a limit of 50 MB for each data file.
One downside to SkyDrive is that the Windows Live browser-based interface can be a bit annoying if you want to be able to easily access your files on a regular basis. However, you can work around this problem by mapping Skydrive as a network drive and setting up the folder on your desktop so that you can access your files the same way you would for any file stored on your personal hard drive.
There are a few different ways that this can be done, but we’ll focus on two of the simpler ways, both of which take advantage of a free utility that can be downloaded and installed on your system to help you manage files stored in SkyDrive. The first method uses a tool developed by Gladinet, and the second uses SkyDrive Explorer.
Using Gladinet to Map Skydrive
First, we’ll walk through the process of using Gladinet to set up SkyDrive as a network drive.
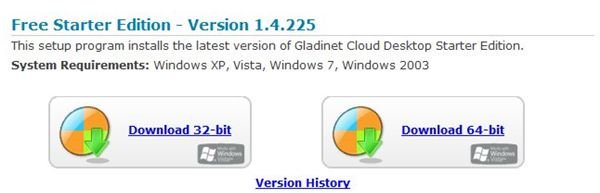
Step 1: To get started, you’ll need to download the Gladinet Free Starter Edition that can be found at this link . Click on either the 32-bit or 64-bit download button, depending on which version operating system you are using. (Click on any image in this article for a larger view.)
The installer will walk you through a series of steps. You should be just fine if you accept the default options for each question asked.
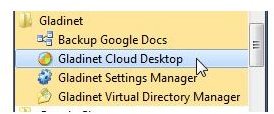
Step 2: At the end of the installation process, you can choose to immediately launch Gladinet Cloud Desktop by making sure there is a check in the appropriate box. If you decide to wait until later to set everything up, you can access the application from the Start menu.
Step 3: The first time you run the Gladinet application, you’ll have to enter some basic information starting with license information. If you just plan on using the free starter edition, make sure the corresponding radio button is selected.
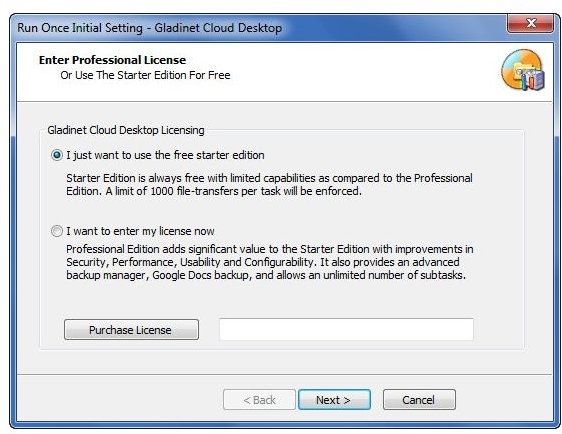
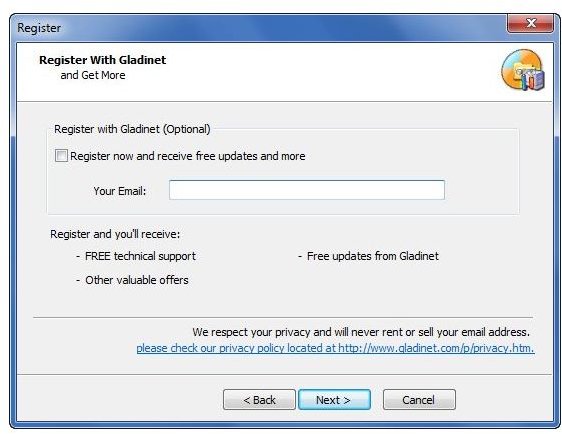
Step 4: After selecting the license option, click Next to continue. Enter your email address if you want to register the software – this step is optional. When done, click Next again.
Step 5: On the next screen, you’ll be given a list of options that you can add as a virtual drive. Put a check in the box next to Windows Live SkyDrive. You can also check any of the other services if you use them and want to set up drives for them now.

Click Next to continue.
Step 6: The next screen will show the settings assigned to your general Gladinet drive. You can either accept the defaults or customize the settings.
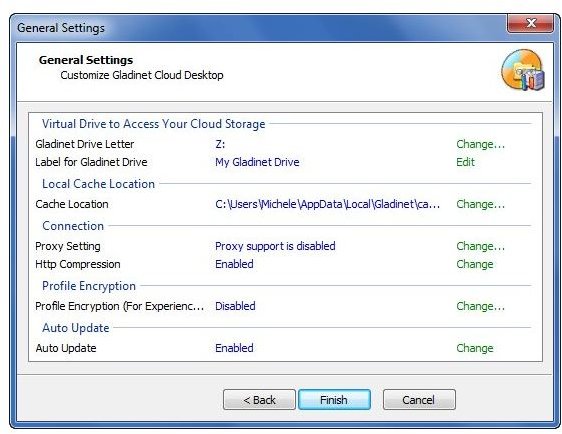
Click Finish when done. Now, you’ll need to finish following the rest of the steps to set up your Windows Live SkyDrive for easy access.
Step 7: Go to either My Computer or Windows Explorer and locate the newly mapped Gladinet Drive.
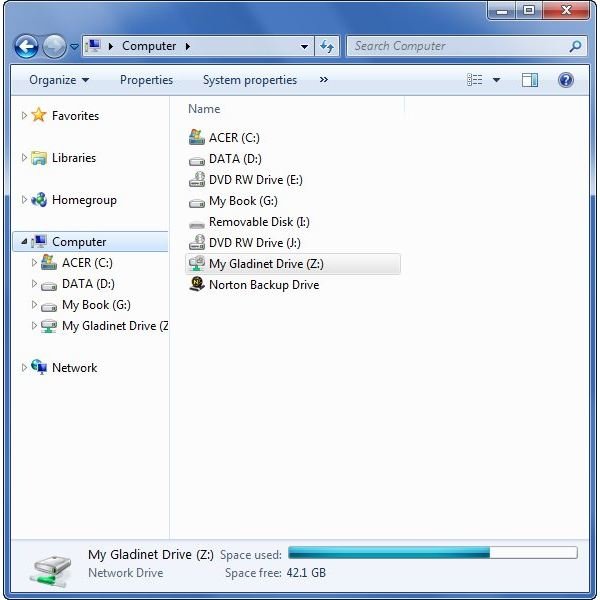
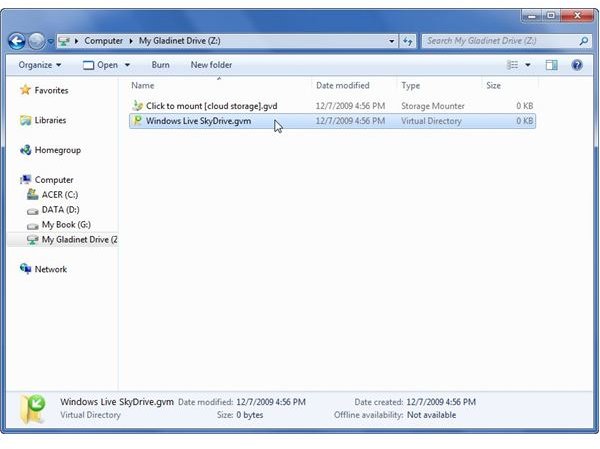
Double-click on the drive to open it in Windows Explorer. Now, you will see a selection labeled Windows Live Skydrive.gvm. Double-click on that selection.
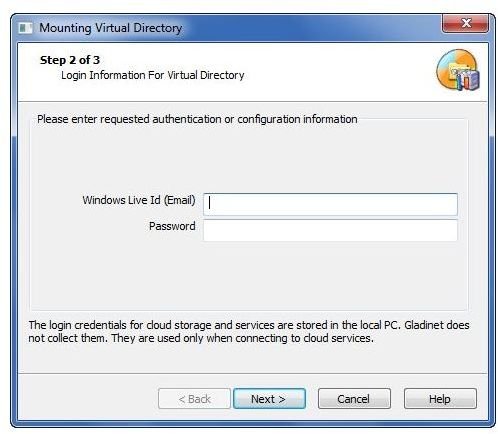
Step 8: A window will pop up asking for your Windows Live ID and pass word. Enter this information and click Next to continue.
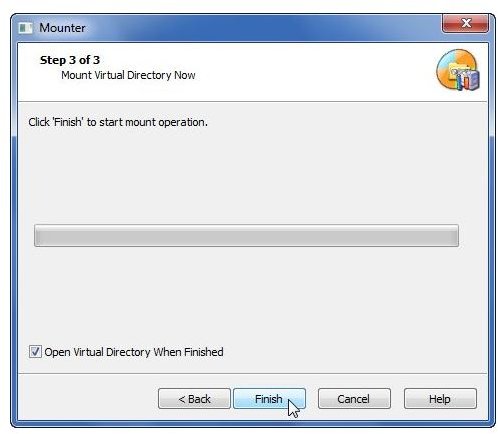
Step 9: In the next window, click Finish and wait for the drive to be mounted.
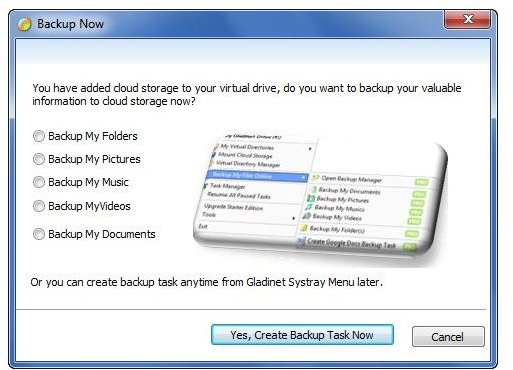
During this process, a popup will appear asking you if you want to backup your data. If you do, make the appropriate selections. However, if you just want to finish setting up the network drive for SkyDrive, just hit the Cancel button to continue with the process.
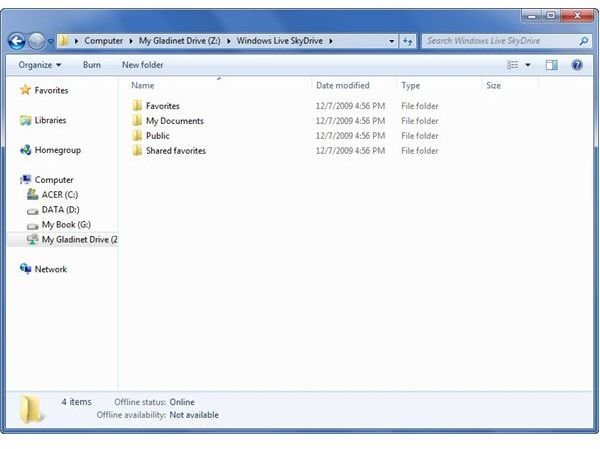
Now, when you return to your newly mapped drive, SkyDrive will show up with its full directory structure, allowing you to use the drive in the same manner you would access any folder on your computer’s hard drive.
Continue on to the next page for a second method you can use to access SkyDrive files directly from your desktop.
Alternative Method - Using SkyDrive Explorer
If you’re not a fan of Gladinet or if you’d rather just not have reminders about upgrading to the professional edition, you might want to take another route and use SkyDrive Explorer to access and organize your SkyDrive files. SkyDrive Explorer may not be as robust as Gladinet Cloud Desktop, but it has a very simple setup and should be enough to take care of the needs of most users.
We’ll walk through the steps of SkyDrive Explorer’s installation process here.
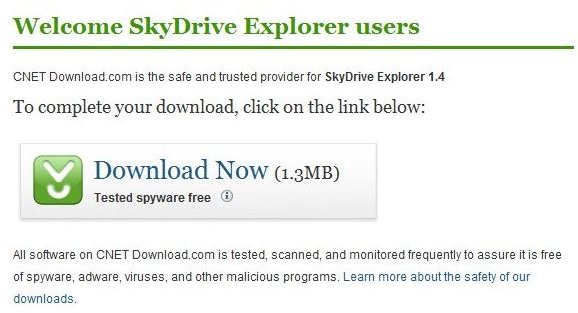
Step 1: First, download SkyDrive Explorer from this link at CNet’s Download.com .
Step 2: Next go to My Computer and you’ll see SkyDrive Explorer listed there along with your other drives.
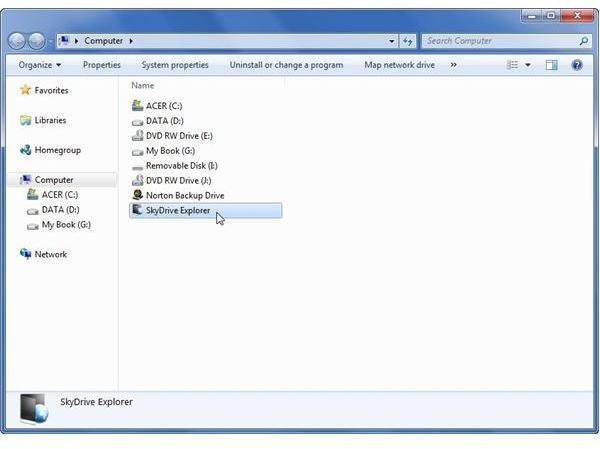
Step 3: Double-click on SkyDrive Explorer. This will open a window asking for your Windows Live ID and password.
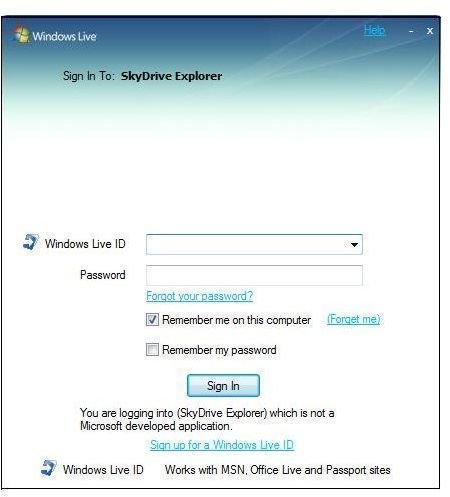
If you are using your personal computer and don’t want to have to sign in each time, check the appropriate boxes in this window. When done, click the Sign In button. Now, your files and folders will show up just as they would for any other drive.
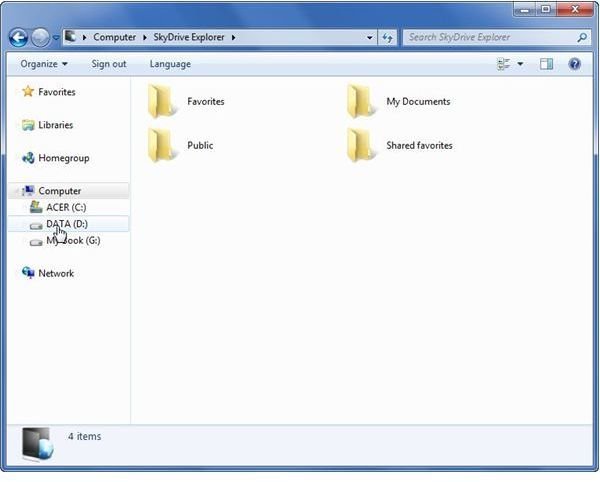
Now, anytime you want to access SkyDrive files, you can return to My Computer and just click on the SkyDrive Explorer link. If you want to make it even easier to access your SkyDrive files, right-click on SkyDrive Explorer and choose Create Shortcut to place a shortcut right on your desktop.
Which is Better - Gladinet or SkyDrive Explorer?
SkyDrive Explorer may be just a little easier to install, but the Gladinet tool currently offers a lot more functionality. One big difference is that the Gladinet application lets you save documents directly to SkyDrive from within the application you are using. This way, you can work totally online without having to first save the file on your PC and then transfer it to SkyDrive. For that reason, I prefer Gladinet, since it removes a step from the workflow process. However, if you plan to store a copy of the file on your personal hard drive anyway, this benefit may not matter much to you.


