Having trouble making selections in Paint Shop Pro, no matter which selection tool you use? With the Edit Selection feature, you can quickly and easily modify your initial selection to make it perfect in no time. This tool can also be used to create some beautiful artistic effects.
Editing Selections
The Edit Selection feature is one of the most underrated tools found in Paint Sho Pro . After making any type of selection in a digital photograph, you can enter Edit Selection mode and refine several aspects of that selection by using various painting tools or filter effects. So, not only can you use this feature to “clean up” objects that you are trying to extract, but you can also use it to create some very interesting new effects based on the original selection made.
In this tutorial, we’ll walk through the steps of using the Edit Selection mode and show just a few of its many capabilities.
Locating and Using Edit Selection Mode
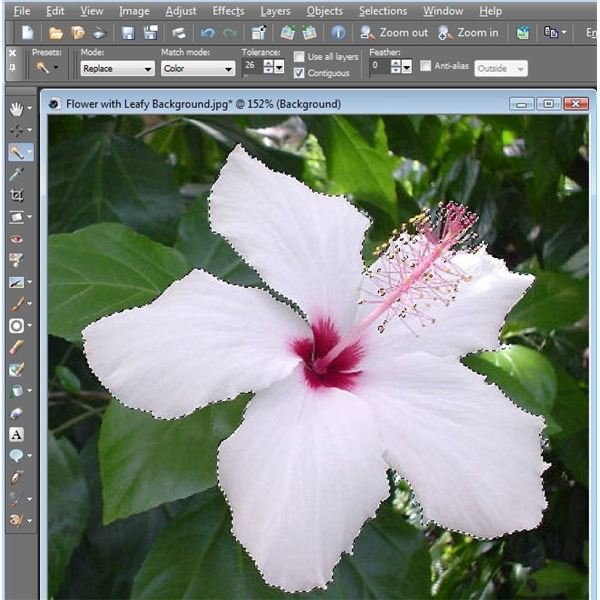
Step 1: Before you can actually enter Edit Selection mode, you first have to make some type of selection in the digital photo using any of Paint Shop Pro’s selection tools. In the screenshot below, I’ve used the Magic Wand tool to select “most” of the flower in the photograph. (Click any image for a larger view.)
Now, I’d like to go into Edit Selection mode so that I can easily select the rest of the flower without having to spend half an hour or more trying to click and add all the various “holes” that are left in the flower.
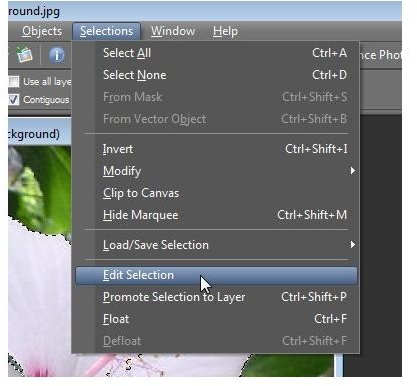
Step 2: Enter Edit Selection mode. There are two different ways to do this. In the first method, you can choose Edit Selection from the Selections menu on Paint Shop Pro’s main toolbar.
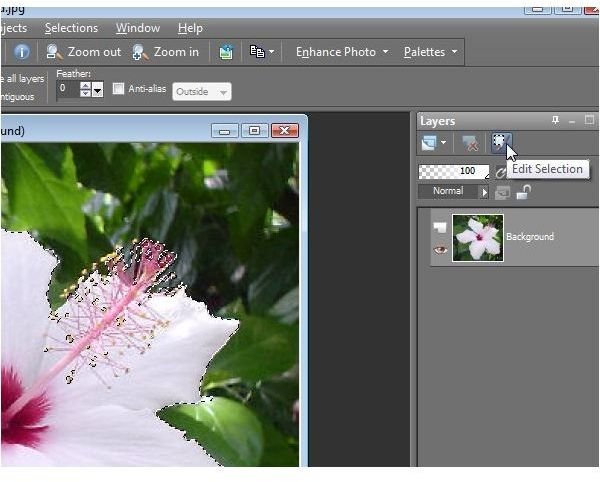
Alternatively, you can click on the Edit Selection icon found near the top of the Layers palette. To learn more about the Layers palette and layers in general, see this series on working with layers in Paint Shop Pro .
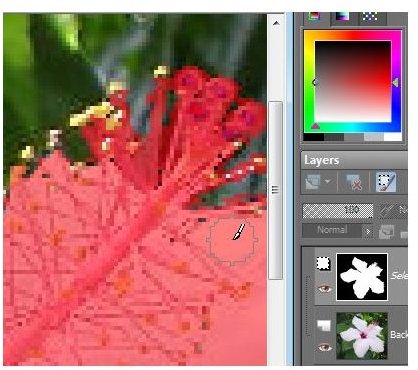
Once you’ve opted to enter Edit Selection mode, your selection will be covered with a red semi-transparent color, making it easier to see and work with. The screenshot below shows how the current selection looks.

Looking closely, it appears that our selection process did a good job of not picking up any of the greenery in the background. However, there are still some small patches of white around the edges of the petals as well as a number of yellow spores that the selection is missing. Here’s where the beauty of Edit Selection mode comes into play.
Step 3: Zoom in, if necessary, to make it easier to see the portions of the selection you wish to modify. Then, select the Push brush from the side tool panel. Use the Push brush to either “push out” or “push in” the selection, whichever is needed to cover exactly the areas you want to include in the final selection. As you’re working, you may need to change the diameter of the Push brush several times, depending on the size of the area that you want to modify.
Note that you don’t have to use the Push brush here – you can use any of the raster brushes or tools that you prefer. I tend to like the Push brush best for situations like these, because it allows me to add or remove area from the selection without switching back and forth between different tools. However, if the areas you want to add are not connected to the original selection or if they are unusual in shape or size, you may want to select the Paint brush tool instead and literally paint in the “holes” of the selection.
Step 4: When done, choose Edit Selection again, either by selecting it from the Selections menu or clicking the icon on the Layers palette. The red opaque mask will disappear, and you’ll be able to see the boundaries of your modified selection.

Read on to the next page to learn how you can use the Edit Selection mode to create new effects for your digital photo editing projects.
Using Edit Selection Mode to Create New Effects
Now that we’ve taken a look at one of the main technical uses of the Edit Selection function, let’s look at one of the more “fun” ones. We’ll start right where we left off in the last section with the white flower selected.
Step 1: After the selection is made, enter Edit Selection mode again.
Step 2: From the Effects menu, select Effect Browser.
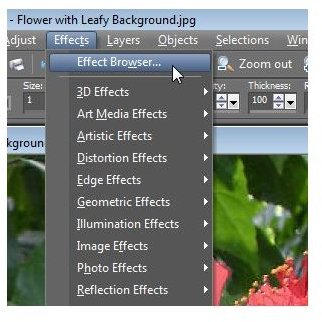
Step 3: Scroll through the effects until you find one you like and one that is possible to apply to your current selection. In this case, I’ll choose Average Blur Medium from the Blur category.
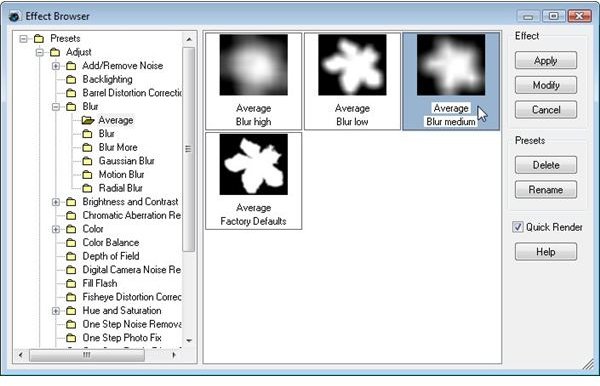
Click Apply and you’ll be returned to the main Paint Shop Pro interface with your selection altered.
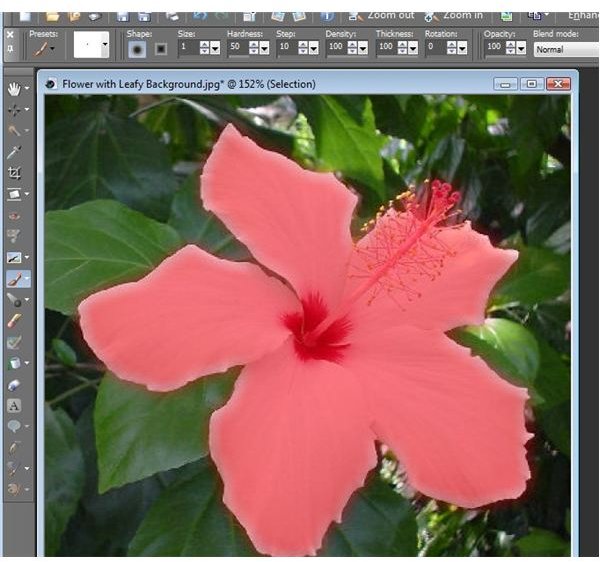
Step 4: Choose Edit Selection again to exit that mode. Your results should appear as in the screenshot below.
Not impressed? At this point it’s hard to see what the effect did to the selection because it’s still part of the original photograph. In order to see the result of this effect, try the following.
-
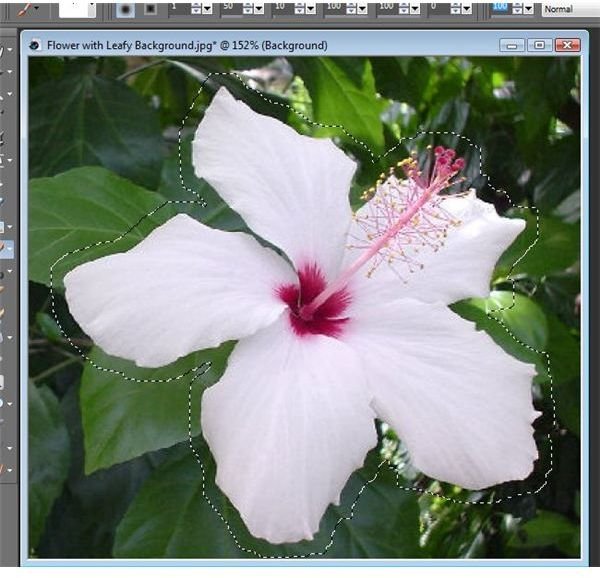
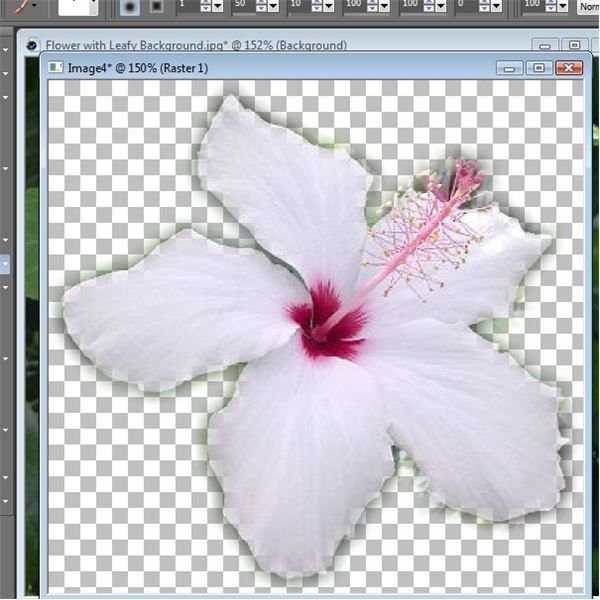
From the Edit menu, choose Copy.
-
Next, return to the Edit menu and choose Paste As New Image.
Now you should be able to see more clearly what happened in this process. The blur effect actually created what looks like a shadow for the flower using the color scheme found in the background of the original digital photo.
This can be a great trick to use when you want to take an extracted object and insert it into another photograph, letting the blur effect cause the edges to blend in. To get a perfect blending in such cases, you’ll need to play around with different effects and their settings. But, once you find the perfect combination, you can save it as a custom configuration and apply it to any future selections in which you want to achieve the same effect.
For more tips and tricks, be sure to browse through the other items in Bright Hub’s collection of Paint Shop Pro tutorials . Wondering how Paint Shop Pro stacks up to other leading photo editors? Check out our comparison of Paint Shop Pro, Photoshop Elements, and PhotoPlus and see which application really deserves the title of Best Photo Editor.


