Once you have created your audio loop in Ableton by way of recording a live loop as its playing perhaps, you can easily save it or export it as audio. Read the article to find out how to save an audio loop in Ableton Live.
Once you have created your loop in Ableton you may want to save it in order to easily re-use it in your next set, or simply to use it in another sequencing program. The easiest way of saving a loop is exporting it to audio. This results in a WAV file you can easily import into the program again. Exporting loops this way saves processing power, particularly if you are using multiple effects or processor heavy VSTs or Midi plug-ins.
Continue reading if you have had trouble with the export function, or if you need help with how to save an audio loop in Ableton Live.
Save Your Loop
So you have your loop playing, you’ve already set both start and end markers, and the loop button is yellow, indicating it is on. Perhaps it is a four-bar chord sequence, or an eight-bar 4/4 drum loop. You have already set all the effects you need, assigned all virtual instruments and mixed your work accordingly. Now, of course, you want to save your work so it is reusable.
The easiest way to save is by exporting the loop you have created, and subsequently re-importing it into your next session. This saves valuable resources, particularly RAM and CPU power, which you will need for your next session. The export function saves the loop you’ve created as one single audio-block, preferably a WAV file, so on your next session you can re-set your markers to whatever they were and re-import it.
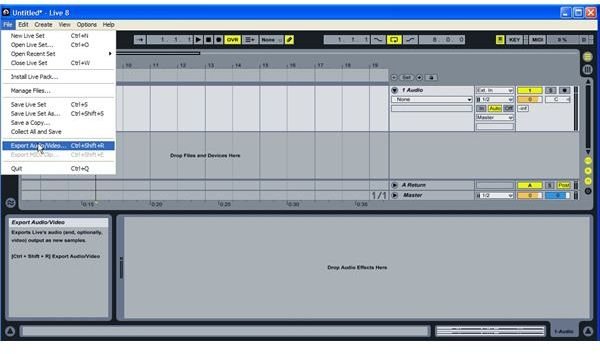
To get started with the export, go to File, then Export Audio/Video, and click ok at the bottom. You can choose various options, such as bit-depth or sample rate if you require a higher quality output. Generally, the options given are fine unless you are working on a particularly demanding project, i.e. using a bit-depth of 32 and a sample-rate of 96,000. Otherwise, your loop is now exported to whatever destination you chose to save it to.
Importing Your Audio Loop
The simplest way of importing audio into Ableton is to just drag and drop your WAV, AIFF or similar file into your arrangement window. Once you have done that, set your markers to your original sample and select loop.
Another easy way of looping your audio is to just duplicate it until you reach the end of your track. This is a method often used in other sequencing software, (e.g. Nuendo or Cubase), but it likely will not be necessary in Ableton since its primary purpose is for it to be used in a live set or as a DJ tool. To duplicate your audio simply select the sample you have, by left clicking on it, then right-click on it to see a drop-down menu. From the drop-down select ‘Duplicate’. Repeat as often as you need.
This post is part of the series: Ableton Live Tutorials
Learn some great ways to use the audio mixing software to your advantage.


