
Since Android 1.6, new screen resolutions are supported, how do we adapt our application to this new feature? Lets have a look!
Introduction
I have been working with Android since the first beta release of the SDK. At that time there was no more than one Android device on the market, the HTC Dream, with a screen size of 3.2 inches and a resolution of 320x480. Since then Android devices have started to grow. Both devices with small screens like the HTC Tattoo , with a screen size of 2.8 inches and a resolution of 240x320, and almost-laptop devices like the Acer One . It was easy for us, developers to create applications that looked fine in an Android device. Now, we have to be careful, our good looking application can be transformed into a badly formatted application with missing icons and odd views.
So, from now on, if we are developing using the Android SDK 1.6 +, we have to take care about the size of the screen, if we want to run our application in multiple devices!
First of all let’s see some concepts we need to know before taking care of our images, views and pixels.
Some concepts
*Resolution. Well, this is not a very difficult concept, we are all very familiar with this word. So, the resolution of the screen, is the size (width x height) in pixels. As I said before, and the HTC Dream device has a 320 x 480 resolution screen.
*Screen size. This is normally measured in inches. Its the diagonal size of the screen. 4 inches is the screen size of the Sony Ericsson X10 (Rachel) .
*Density. In the base of the Resolution, we have the Density of pixels in the screen.
Now, with these concepts in mind, lets see what Android can offer us to work with in terms of screen sizes.
In Android, we work with the screen size and its density. To simplify we can check all the screen configurations available in Android by looking at the following table:
(Source: Android Developers Home Page).
So, we have:
Screen Sizes: large, normal, small
Density: high (hdpi), medium (mdpi), and low (ldpi).
Here are some of the techniques we can use to create a screen-size independent application.
Resources folders
So, thinking a bit about screen elements, sizes, densities… we can arrive at the conclusion that the size of the screen affects the views, and the layouts we create, and the density of the screen affects the images we set in the layout.
One of the things we can do (there are many) is create layouts, views and images for every specific size and density. So, the resources directory could be something like:
res/layout/layout.xml
res/layout-small/layout.xml
res/layout-large/layout.xml
res/drawable-ldpi/icon.png
res/drawable-hdpi/icon.png
This way, in the “layout” directory, we put the layouts that are going to fit in a “normal” screen size, “layout-small” stores the same layouts but modified so they display on small screens properly. The same process is done in the “drawable” folders. In the “drawable-ldpi” and “drawable-hdpi” folders we store the images we use in our application, changing its density.
Manifest
In Android SDK 1.6, we have a new element in the manifest, the
This is a piece of the manifest:
<supports-screens
android:largeScreens=“false”
android:normalScreens=“true”
android:smallScreens=“true”
android:anyDensity=“true” />
What are we saying here? The android:largeScreen with the false value, we are saying that our application doesn’t support large screens, but supports normal and small screens, these are the ones with the true value.
And what about the android:anyDensity” parameter? Here is the meaning:
-If we put this value to true we are disabling the Android internal way to manage densities, and we are saying to the system that we manage the icons and their densities (so it’s good to have the drawable folders and its density options enable, like I explained in the last section)
-If we put false, we are enabling the Android internal way to manage densities. What is this? Android auto-scales the icons and elements given to adjust them to the screen density.
Device Independent Pixels (dip)
This is another interesting resource we can use in our “screen-independent” application: when we add an element to our view, we can set the width and the height of the element.
<Button android:id="@+id/myButton"
android:layout_width=“10px”
android:layout_height=“10px”
android:layout_gravity=“center”
android:textStyle=“bold” />
This button has a height and width of 10 pixels. What would happen if we run our application (the app that contains this element in one of the views)…
…in a device with low density?
Because we have less pixel density in the screen, this button will appear bigger than the same element in a “normal density” device.
…in a device with high density?
The button will be smaller to the user’s eyes, because we have more pixel density in our screen.
So, what can we do to make our element look the same in all devices? We can do it using the dip (Device Independent Pixels) instead of px
android:layout_width=“10dip”
This way, the element will appear to be the same size in all devices.
Some advices
After going through all the resources we can use in our application to create the most “screen-size” independent, I’m going to give you some advice.
Don’t use AbsoluteLayout in your views. With AbsoluteLayouts you can place the elements in the screen given by an absolute position: Place this button in the position x= 100px, y = 150px. This is DEPRECATED. Use instead RelativeLayouts. With RelativeLayouts you place the elements inside the layouts according to relative positions to the parent-view or other elements in the screen. Something like “Place this button below this image”.
If we use AbsoluteLayouts in our application, the User Interface will be an absolute mess when you run the App in other devices.
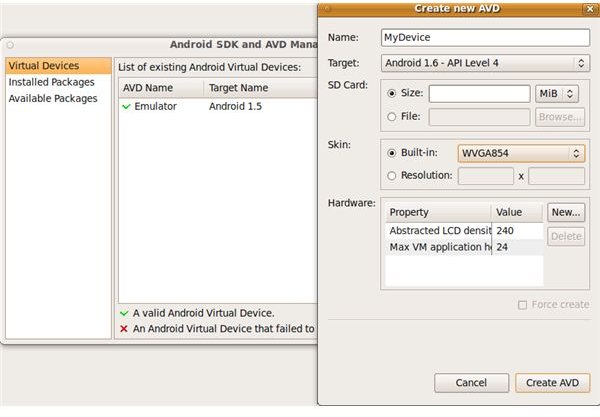
To test our application with multiple screen sizes and densities we can use the emulator. We can create a AVD (Android Virtual Device) with different resolutions.
Ask, comment, interact!
Ask any questions you have about the article, I will try to answer as fast as I can. Comment on my code, my writing, maybe there is something that is missing or is not complete, just let me know!! In other words, interact!!
Follow up
If you want to know when new articles are released, subscribe yourself to the Google Android RSS. Otherwise, you can follow my research, articles and work in my professional twitter: jbeerdev
This post is part of the series: More Android Elements!!
More information about Android and its programing environment.


