Learning how to make a login page in Dreamweaver is a great skill if you would like to develop a secure portal for your website visitors to enter a members-only section of your website.
Members Only
Learning how to make a login page in Dreamweaver is a useful skill to possess as login pages are a common section of many websites. In order to use the login page, you will need to have a DB server running, such as MySql. This Dreamweaver tutorial will provide step-by-step directions to allow users to enter their username and password and be redirected to a members-only area of your website. This information will be stored in a database in an administration section.
Set Up User Table and New Login Page
The first step to creating a login page is to make a table of users. To create this table, use the follow phpMyAdmin code:
Create Table users (username varchar(20) NOT Null default “,password varchar(20) NOT Null default “);
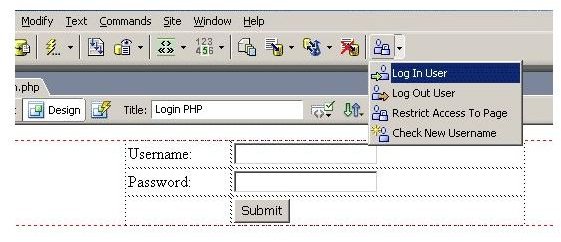
Next, open up Dreamweaver and open a new HTML page, titled “login.php”. Connect this page to your database. If your connection is successful, the application window should show the details of your table. While you are still in the “login.php” page, locate the word “Common” on your top navigation bar. When “Common” is clicked, a drop down menu will appear. From this menu, select “Application”. Next, select the last icon on the navigation bar and click “Log In User”.
Complete Login Table Fields
When “Log In User” is selected, a pop-up box will appear that allows you to fill in the details of your website login form. The first
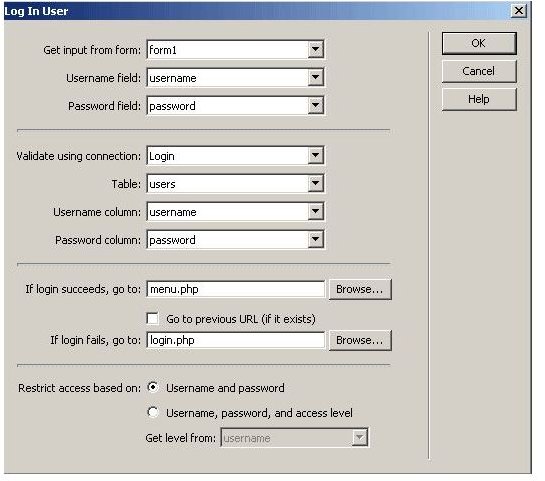
section of the pop-up box will have you fill in basic information about your login page . The second section will have you fill in details about your database. The third section will act as a redirection based on the table structure of your database.
If a successful connection is made between your login page and database, this information will be displayed in the “Validate using connection” area. The last section of the pop-up box titled “Restrict access based on”, should have the choice “Username and password” checked only. Once you are finished completing the form, click “OK”.
Check the Script and Save to Computer
To check to see if your script is in the proper place, go to “Applications” and then click the link titled “Server Behaviors”. Your script
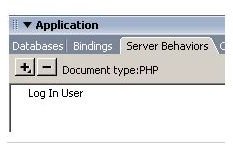
name should be found in this panel. To edit this script anytime, simply double click. Save the “login.php” file to your computer, then upload to your website. Re-check the database to be sure that all information entered was correct.
Dreamweaver Login Page
If you want to make a login page in Dreamweaver, you will need to have basic knowledge of how to connect your login page to your database. Obtaining these skills can help to make your login page secure and free of spam and hackers. Private members of your site will be able to easily and securely access their account with the use of a username and password that you have selected.


