One of the Spry widgets in Dreamweaver CS3 is for a menu bar. It includes some interesting enhancements for horizontal or vertical menus on web pages. Instead of a cluttered menu appearance, the Spry widget lets you create options accessible from a main menu with two levels of submenus.
Inserting the Spry Menu
Create a new HTML page (or use an existing one without a menu) in Dreamweaver CS3. Save the file before you try to do anything else. Then click on “Insert,” “Spry” and select “Spry Menu Bar.” Choose a layout, either horizontal or vertical. The widget inserts a default, four-item menu bar at the top or left of the screen depending on this choice. The properties box at the bottom of the page includes a number of ways to define basic settings. In the menu item list you can add, delete, insert text and links for each menu item. The plus (+) and minus (-) boxes at the top of three columns of menus take care of adding or deleting items. Arrows next to these boxes allow reordering of the menu items.
Format the Spry Menu Bar
By clicking on the “Customize this widget” in the properties box, you will get an explanation of how to add various formatting options. These are:
- Change text style of a menu item
- Change the background color of a menu item
- Change the dimension of menu items
- Position submenus
The first two items above are controlled by the CSS style attached to the tag. The ul.MenuBarVertical or ul.MenuBarHorizontal rule controls the dimensions. Changing the width and white space properties as well as float rules, provides all the enhancement of this section anyone could need. The margin settings in the ul.MenuBarVertical ul or ul.MenuBarHorizontal ul rules control the positions of the menus. The other option in the properties section is to “Turn Styles Off,” which turns off the formatting in the Design window but does not affect a browser display. Only do this if you want to get into editing the CSS styles generated automatically.
Results
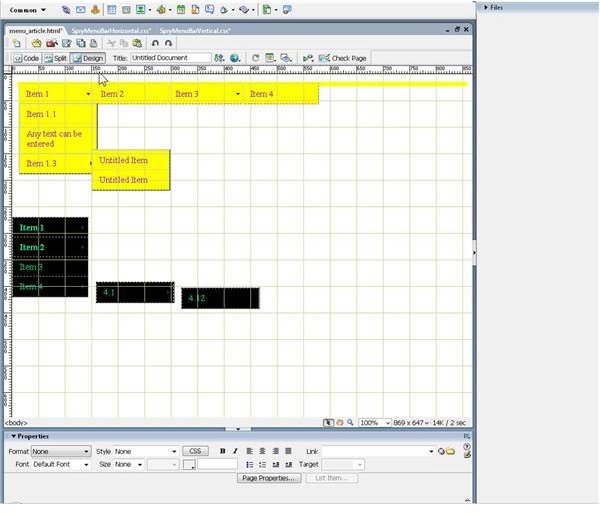
The attached image shows how some different styles can dramatically alter the appearance and utility of a simple menu system. This particular example shows just some menu background and text changes, but you can set the text colors to change when a particular menu is on focus or even when the cursor hovers over it. The design can become as complicated as you wish to make it since inserting a Spry Menu widget generates at least 12 different CSS styles. All you have to do is expand each basic CSS style to see all the options for customization.
For the best flexibility, insert these Menu Bars in a column or APP Div panel. Menus can also appear in a frame if you use these. This particular Spry widget for menu bars is one of the most useful in Dreamweaver.
This post is part of the series: Using Spry Widgets in Dreamweaver CS3 to Add Verstility to Your Web Design
Spry widgets can enhance otherwise drab displays as well as offer options that would otherwise require convoluted codind or in some cases not even be possible without using additional programs. This series describes how to use some of these widgets.


