Many people find it useful to integrate Google Maps on their blog or website for many different reasons. Fortunately, Google Maps provides different gadgets, each one satisfying a different kind of need. Today we are going to learn how to integrate Google Maps on blogger.
There are three different ways to integrate Google Maps on your Blogger blog. Each type of gadget has different functions; therefore, you must choose the most suitable one for your blog.
Integrating Google Maps on Blogger is very simple and just about anybody can do it.
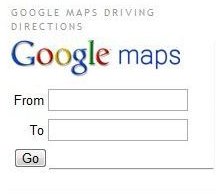
Integrating Google Maps driving directions
This gadget will allow your readers to find driving directions from one place to another directly from your blog. Once the user has entered their “From” and “To” locations, a new window will open with their Google Maps driving directions. Alternatively, you can set up a default end destination so that your visitors can find their way to your business.
To set up this gadget go to the design page of your blog’s dashboard and click “Add Gadget,” then type “Google Maps driving directions” in the search bar and click on the “+” to add it. Then, choose the gadget’s title, its height, your location and the default “End destination” if you wish to. Then click on “Save.”
You can start using your widget now.
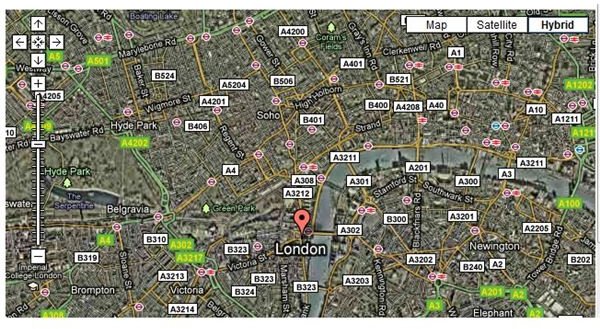
Integrating Your IP and Google Map location
This gadget will display the visitor’s IP address and will load their location on Google Maps as shown below. This gadget is very popular in Blogger, I have seen it being used several times.
It is a good idea to place this gadget on a wide section, so that the information provided can be easily seen.
To set up this gadget, go to the design page of your blog’s dashboard and click on “Add Gadget,” then type “Your IP and Google map location” in the search box. Once you can see the gadget, click on the “+” symbol to add it. After that, choose the gadget’s title and height, and click on “Save.”
Now, you are ready to view and use this gadget on your blog.
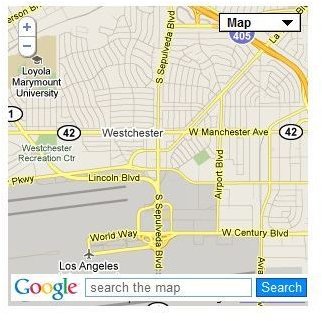
Integrating Google Map Search
This gadget will allow visitors to search for an address, place, etc. on Google Maps directly from your blog. I have never placed this gadget on my own blog, but I have used it on other websites, especially when trying to figure out how to go to a particular branch office or something like that.
To set up this gadget, go to the design page of your blog’s dashboard and click on “Add gadget,” then type “Google map search” in the search bar and click on the “+” symbol once the gadget is visible. Enter the title and height you wish the gadget to have and click on “Save.”
Now, your ready to start using your gadget.
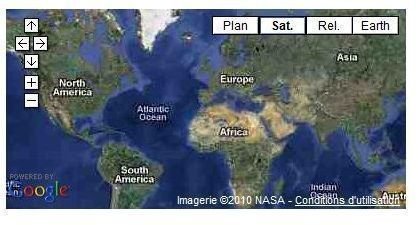
Integrating Google Maps
This gadget will allow visitors to see the world map projection and will let them zoom in on any location they wish to check out. It’s great especially if your post or blog is related to geography, archeology and tourism, among others. I placed this gadget on my blog to try it, and it looks quite good, I might leave it there permanently.
To set up this gadget, go to the design page of your blog’s dashboard and click on “Add gadget,” then type “Google Maps” in the search box and once you are able to see this gadget, click on the “+” symbol to add it. Then, choose the gadget’s title and height and click on “Save.”
Now you can view and use this gadget.
Warning
Do not share your personal home address details with strangers, some of them could have wrong intentions toward you.
Similarly, according to BBC News “The danger with Google Maps is that third parties may end up building rich, complex information services on the back of what is, at its core, a marketing ploy by a very large public corporation.”


