Now that you’ve created your SketchUp house, it’s time to start making it look more like a home. Use SketchUp’s wide library of components to enhance your house. When you’re done, create a presentation to show off your masterpiece.
Making It Pretty
The final step in creating your house is to beautify it. You need to paint the walls and the roof, and embellish the surroundings. You also need to show off your house to others. How do you do this with SketchUp?
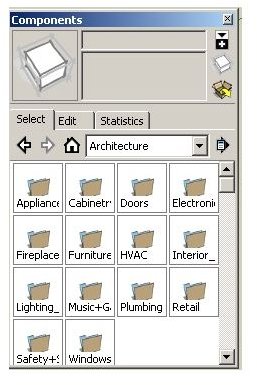
Fortunately, SketchUp makes it simple to beauty your house. With the Components window, you have access to various design elements, including furniture, paint colors, and wall textures. You can create a photo realistic look easily with the large default library that comes with your free version of SketchUp, but if that’s not enough, you can get more component packages from SketchUp’s home page.
To get more components, select Get More from the Components window. You’ll be taken to a web page which allows you to download extra components for free. Installation is automatic, and there’s no need to restart SketchUp.Close and reopen the Components window, and your newly downloaded package is now available for use. Alternatively, you can search SketchUp’s 3D Warehouse or LandscapeForms.com for a wide variety of user-created components.
To paint your walls click the Paint Bucket tool (“B”). The Paint Bucket tool automatically opens the Components window. Select the desired color or texture and click the surface you want painted. You can alter the hue by clicking the Edit tab in the Components window.
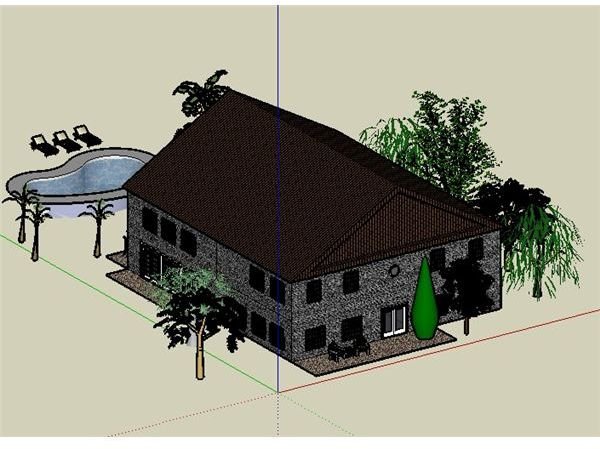
Add landscaping from the same components window. Return to the Select tool (“Space Bar”), and drag trees and shrubs into the scene. An optimal way to insert landscaping is to change your camera view to top. This creates an aerial perspective, and allows optimal control of the landscaping.
Presenting Your Creation
After you’ve finished with landscaping, you’ll be interested in creating a final presentation. The free version of SketchUp does not allow 2D presentations, so you’ll have to create one manually. You have a couple of options. You can export your house as a 3d model or as a 2d graphic. Alternately, you can create a series of screen shots and create a slide show.
To create a slide show, hide the axis. Go to View from the menu bar, and deselect Axis from the drop down menu. Use the Orbit tool (“O”), and start creating screen shots by clicking the Print Screen button on your keyboard.Save the image into your favorite image editor. Depending on how thorough you’d like to be, change the angle of your house by using the Orbit tool. You can hide the walls and ceilings by right clicking each, and selecting Hide from the drop down menu. After you’ve created a series of images, create a slide show in a presentation editor of your choice.
Congratulations!
This post is part of the series: Creating a House with SketchUp: Start to Finish
A basic tutorial series for you to create a dream house with free 3D modeling Google SketchUp. Learn what you need to know, to get you started quickly!
- Preparation: The Basics of Designing Your House with SketchUp
- Getting to Know the Tool Bar in SketchUp Part 1
- Getting to Know the Tool Bar in SketchUp Part 2
- Creating Your Floor Plan in SketchUp
- Google SketchUp: Raising the Roof and Erecting Walls to your 3D Dream House
- Beautifying and Presenting Your House Using SketchUp


