How can you use Microsoft’s popular Office Document Imaging tool with MS Office 2010 when it isn’t included in the package?
Looking for Microsoft Office Document Imaging in Office 2010?
One of the most popular tools since Microsoft Office 2003, Document Imaging was used my many to scan documents as well as view and print them.
If you have just installed Microsoft Office 2010, you will probably have found that Microsoft Office Document Imaging is no longer available.
This seems like a shortsighted move by Microsoft, which has again been accused of failing to provide appropriate support for applications that they declare obsolete.
However, there are ways around this problem, from reinstalling the Microsoft Office Document Imaging component from Office 2003 or Office 2007 to using alternative functions already built in to Windows.
Install Microsoft Office Document Imaging from Previous Versions of Office
If you have a previous version of Office, you can install the Microsoft Office Document Imaging tools by inserting the installer disc, and running through the wizard until you come to the choice between Install Now and Customize installation.
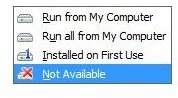
Here, choose Customize Installation, and on the next screen go through every single parent option to choose Not Available. Finally, under Office Tools, find Microsoft Office Document Imaging and select Run from My Computer. Proceed with the installation, which will ignore the entire Office suite in favour of installing this single application.
How to Use Microsoft Office Document Imaging
If you have successfully installed Microsoft Office Document Imaging, you can use this by launching it from Start > All Programs > Microsoft Office.
With a document placed face down in your scanner, you will be ready to use the scanning utility, Microsoft Office Document Scanning.
Here you can select from a series of preset scanning options such as Color (ideal for scanning colour photographs and artwork) and Black and white (suitable for scanning text). Meanwhile multiple pages can be scanned into a single file, and all of your completed scans can be viewed in Start > All Programs > Microsoft Office > Microsoft Office Document Imaging.
Plenty of options are available with Microsoft Office Document Imaging - you can even use it to open previously created TIFF files and run OCR scanning on them.
Alternative Tools to Microsoft Office Document Imaging
If you wish to scan documents, you can use the alternative Windows Fax and Scan tool, available in Vista and 7 by typing scan in the Start > Search box.
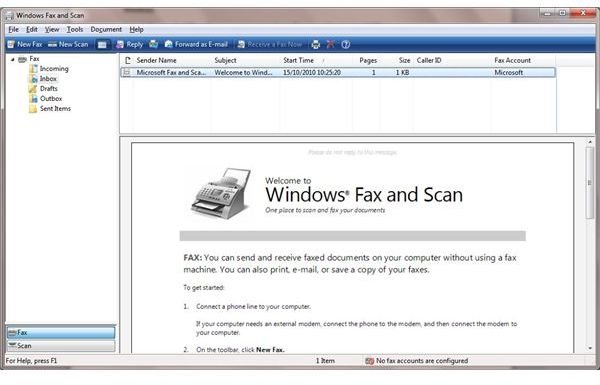
This can be used to create a fax from scratch or by scanning a document, and also allows you to forward your scanned document as an email. Fax accounts can be configured to enable use as a fax machine, although of course no OCR (optical character recognition) features are available.
Meanwhile, OCR is available via Microsoft OneNote 2010. To copy text from a scanned document, in OneNote go to Insert > Picture and insert your scanned document.
Right-click the picture and choose Copy Text from Picture in the context menu; to use the text, simply paste it into a new location.


