
The ability to add both standard and custom animations to objects in a PowerPoint slide is one of the most versatile special effects offered by the software package. Find out how these animations can be employed to make a one-of-a-kind presentation.
In the first part of this series, we talked about how a PowerPoint animation can be applied to slide transitions to give your presentation a bit more flair. It’s also possible to add animation to specific objects such as images and text blocks on your slide. There are two ways to do this, which we’ll describe below.
Adding a Standard Animation to an Object
Select the object on your slide that you wish to animate, and then click on the Animations tab. Click on the Animate drop-down menu and you’ll be presented with five choices: No Animation, Fade, Wipe, Fly In, and Custom Animation. We’ll come back to the Custom Animation selection in a moment.
Holding the cursor over the Fade, Wipe, or Fly In selection will give a preview of the effect on the slide. Click on the animation you wish to apply, and it will take effect immediately. (Click the image for a larger view.)
Building a Custom PowerPoint Animation
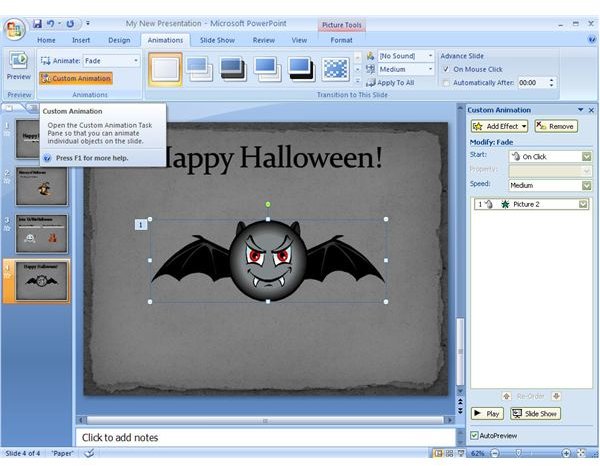
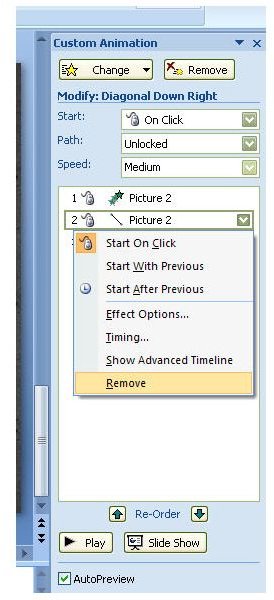
Click on the Animations tab after selecting the object you wish to animate. Next, click on Custom Animation. This will open up the Custom Animation task pane in the right panel of the main window. In this pane, you can build a custom animation using a variety of effects.
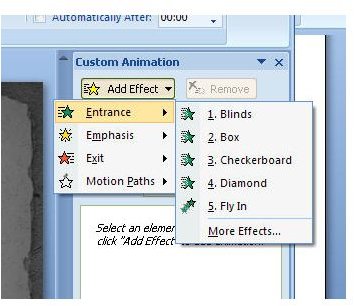
To begin, click on the Add Effect button to display the different categories of animation effects. Within each category are several more options. Unlike standard animations, you won’t be able to preview these effects simply by hovering the cursor over the selection. You can still test them out by applying them and then using the Undo option if you don’t like what you see.
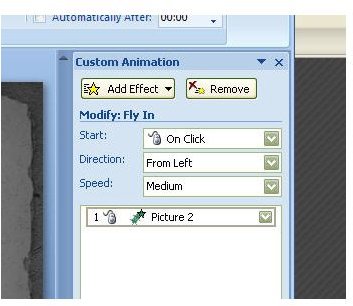
After selecting an effect, there are a series of other options that you can modify pertaining to that particular animation. This list will vary depending upon the animation you choose. For instance, if we select the Fly In animation from the Entrance category, we’ll be offered the chance to modify the Start, Direction, and Speed of the animation. This is something else that you probably want to play around with a bit in the beginning to see what types of results different combinations of choices will yield.
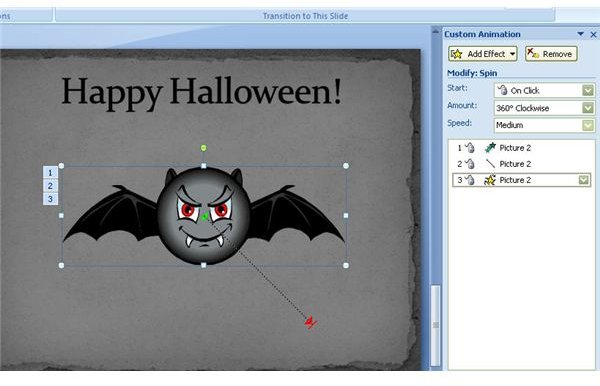
You’re not just limited to one effect here. In fact, you can build up a whole series of animation effects for a single object. As you add different effects, click the Play button located at the bottom of the Custom Animation pane to see how all the animations are flowing together.
If you decide you want to remove one or more of the effects from the series, just right-click on the effect you wish to get rid of and select Remove from the list of options. You can also change the sequence of the chosen effects by using the Re-Order arrows located at the bottom of the Custom Animation pane.
Building the perfect custom animation can take a little time at first, and it might start to seem like you’re hitting that Undo button way too frequently. But, that’s what the Undo option is there for! Have some fun experimenting, and see what kind of neat combinations can be put together with this feature.
Additional Resources: For more tips and tricks, be sure to take a look at the other Microsoft PowerPoint tutorials and user guides found here on Bright Hub’s Windows Channel.
This post is part of the series: PowerPoint Special Effects
In this series, we take a look at the different types of special effects that come packaged with PowerPoint 2007 as well as offer up some information where you can find more resources to add to your creative arsenal.


