
Have a folder you need to share with Microsoft Windows Vista Home Edition? Windows Vista Home can share files and folders to other users on your network. Learn how to share files and folders securely with Microsoft Windows Vista Home Edition in this tutorial.
Why Share Files and Folders?
Computers were created to store data. In today’s world, pictures, music and other data are taking up most users’ hard drive space. Home users can set up a network share in order to share these forms of data. By setting up a user on the Vista Home computer, the guest user can log in through the network to look at or use the data in the shared folder.
By setting up shared folders, users can also backup their data ensuring their critical files are saved. This process can be used in homes to backup more than one computer to more than one computer.
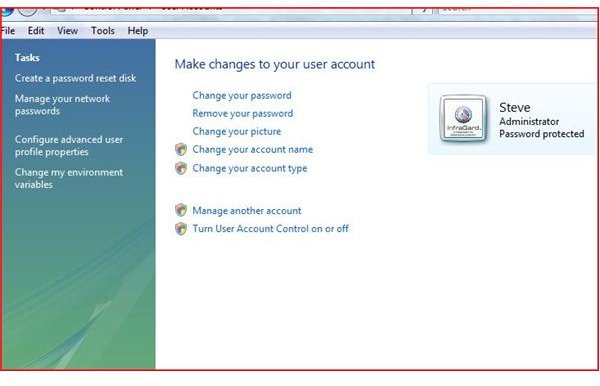
Creating a User
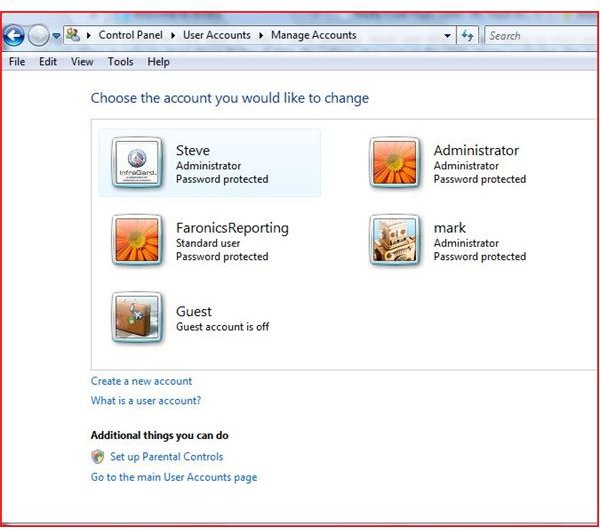
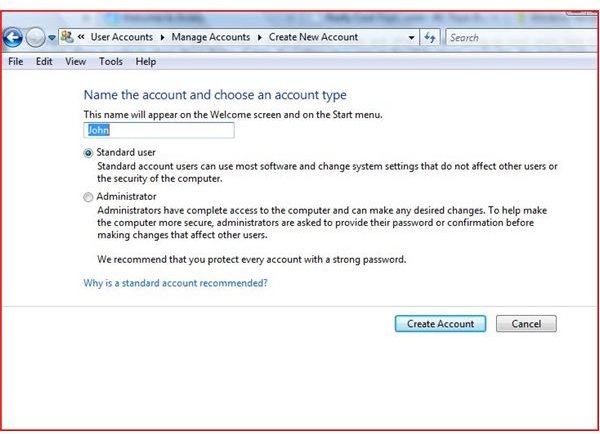
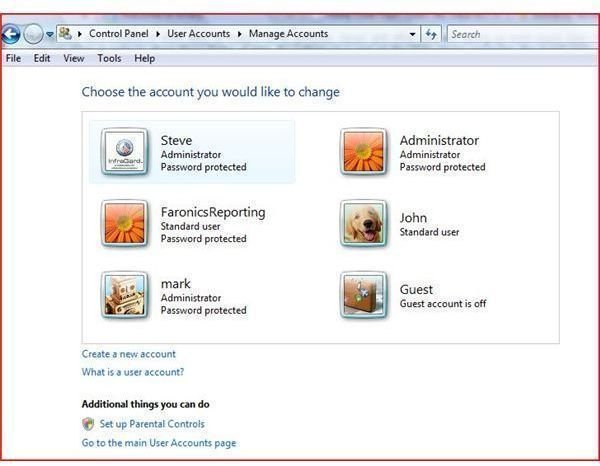
In order to create a new user, click on Start (Windows Logo), Settings and then the Control Panel. (This may vary depending on your Window’s visual preferences). In the Control Panel, select Users. Under the Users screen, select Manage Another Account. You will now see the users of your computer. Select Create an Account. Create an account for the person who will be sharing files with your computer. You can select how the user will use the computer. Typically, this will be a standard user, which will prevent the user from using your computer locally and making changes.
How to Create a User
Sharing a Folder
Today, there is no reason not to share files. Sharing files allows pictures, music and any form of data to be shared among users in a home. A well-organized home network can share a folder on their Microsoft Window’s Vista Computer and drop all of their pictures and documents into this folder allowing all of the users to share this information.
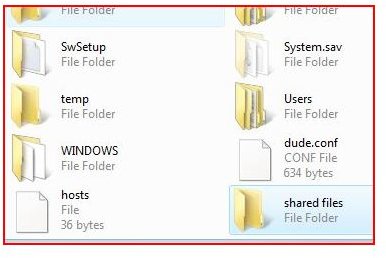
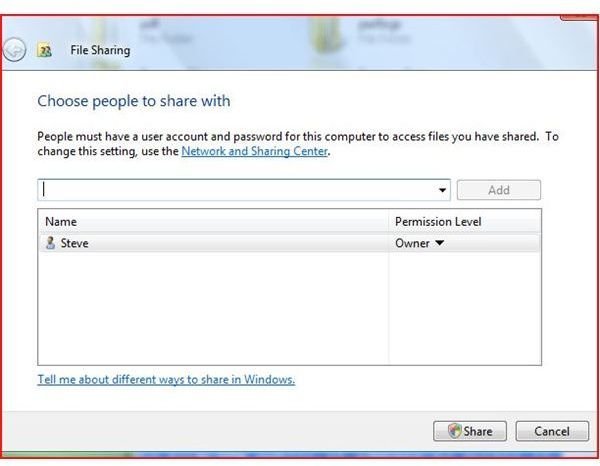
In order to share a folder, double click Computer and then double click your hard drive. Right click, point to New and create a new folder named Shared Files (or whatever you want). Right click the folder and select Share. Select the user you want to share the folder with. You can then assign rights to each individual. The permissions are reader, contributor and co-owner. A reader can only view files, a contributor can view and change files and a co-owner can do anything with the files.
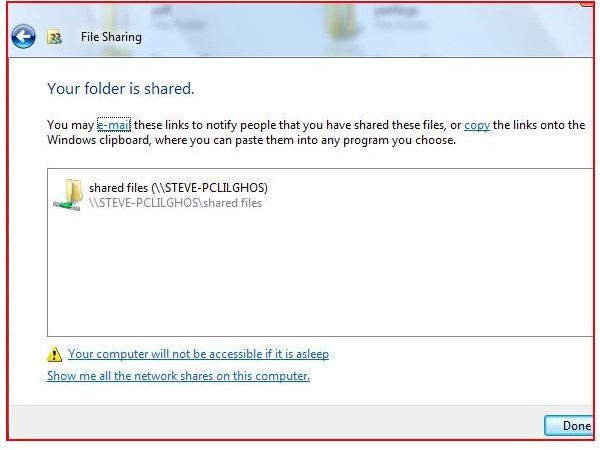
Once you select the permissions, click Done and the UNC (Universal Naming Convention) path to get to the files from another computer will be displayed.
At the guest computer, type \\thecomputername\thesharedfilename and you should see the files you are sharing.
Sharing a Folder

Firewalls and Security
It is important only to share files and folders to users that should have access to them. Keep the latest Microsoft updates and patches on your computer along with application updates. Both computers should have firewalls to protect your data. Firewalls in Microsoft Windows Vista home should allow file and print sharing, and the Network and Sharing Center should also allow files to be shared.
After you setup a folder to start sharing files, can go to the computer you are sharing with. Set up an identical folder, to which you can backup files you are sharing. Many programs such as FBackup or Comodo Backup (both free) can ensure your computer’s files are backed up to a shared folder.


