The Form Wizard found in Microsoft Access makes basic form creation fast and simple. Read on to find out how to use this powerful tool to make your own customized forms in Access 2007.
Forms in Microsoft Access
A form in Microsoft Access is an object that allows users to easily add and view data in a table. While you can always perform these tasks directly in the table, that method of doing things can get fairly cumbersome, especially if the table is quite large.
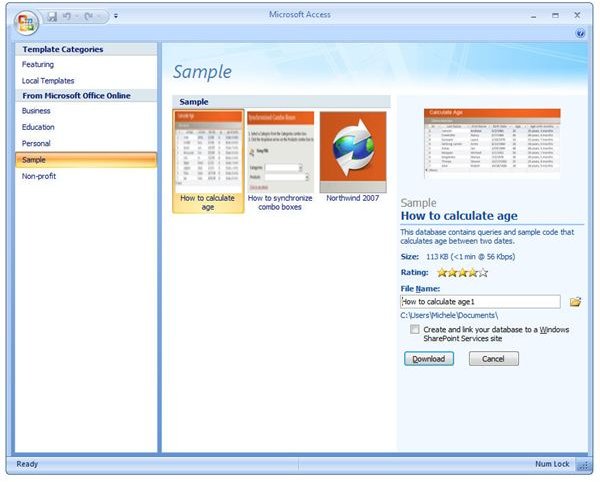
In this guide, we’ll show how to create a basic new form using the Form Wizard found in Access 2007. Rather than create a new database to illustrate the steps in this process, we’ll work with one of the sample Access databases from Microsoft. To open one of these databases, select Sample from the left panel of the Access welcome screen. This will bring up a listing of available sample databases. (Click any image for a larger view.)
We’ll pick the database How to calculate age to use as our example in this guide.
Using the Form Wizard to Make a New Form
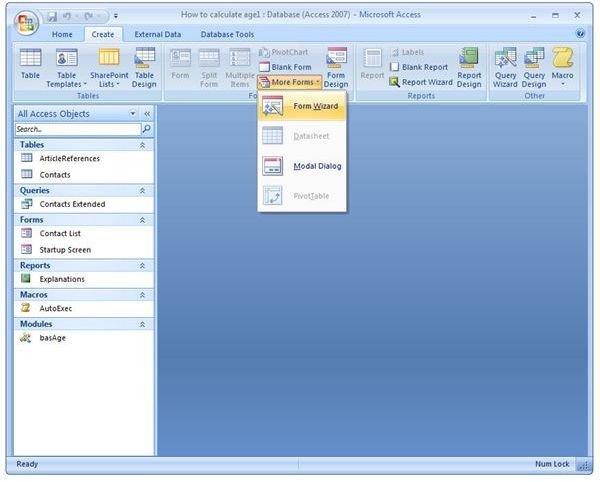
Step 1: Open the Create tab on the Access ribbon. Click on More Forms and then select Form Wizard.
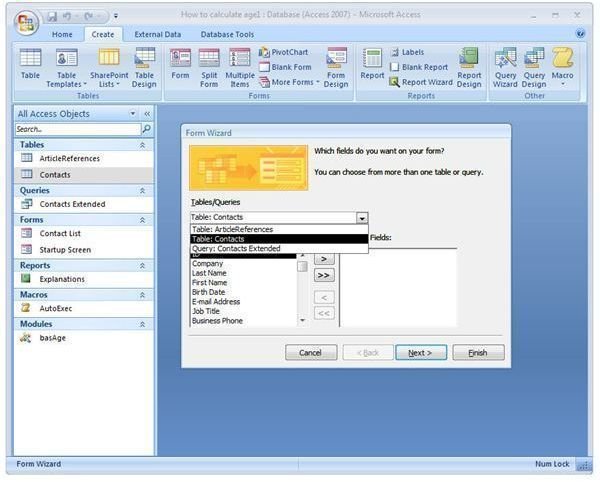
Step 2: From the dropdown box for Tables/Queries, select the table or query that contains the fields that you want included in your new form. In this example, we’ll choose the table labeled Contacts.
Step 3: Select each item from the Available Fields column that you want to include in your form and move it to the Selected Fields column by clicking the “>” button. If you want to add every available field to your form, you can use the “»” button instead to save the time it would take to add each field individually.
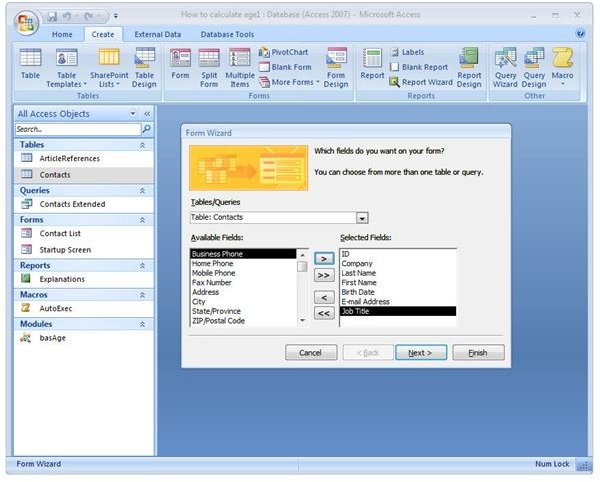
We’ll just select a few of the fields listed here for the purposes of this example. When you’ve finished selecting all the fields you want to use, click Next to continue.
Step 4: Next, decide whether you want to use a Columnar, Tabular, Datasheet, or Justified layout for your form. If you’re not sure which type you want to choose, you can select the option and get a rough idea of how the final form will appear in the preview section of this window.

For now, we’ll choose the Columnar layout. Click Next to move to the next screen.
Step 5: Now, select a style for your form. As in the previous step, you can click on any style listed in this window and see a preview of the style before deciding which one to choose.
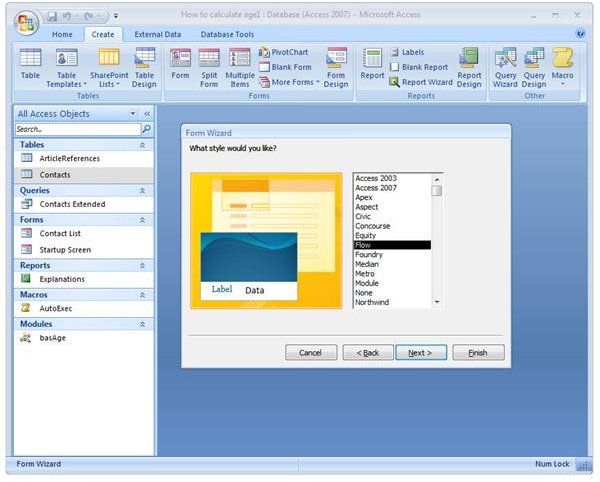
We’ll pick the Flow style for this example. When done here, click Next to move on.
Step 6: In the next screen, you can specify a name for the new form. By default, Access will assign it a name, but that designation usually isn’t very descriptive. Still, you can choose to keep that default title or type in one of your own.
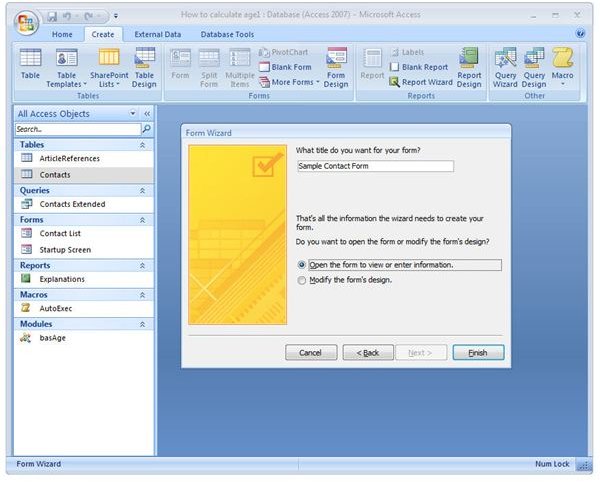
Make sure that the radio button next to Open the form to view or enter information is selected. Click Finish and the new form will appear in your Access work space.
This post is part of the series: Working with Forms in Microsoft Access 2007
In this series, we’ll take a look at the different ways you can create new forms and modify existing ones in Access 2007.


