Need to create your own custom macro in Microsoft Word 2007, but don’t know where to start? This guide will walk you through the steps.
Accessing Macro Creation Tools
Although you can access a couple of basic macro tools from the View tab in Microsoft Word 2007, you gain a lot more control over the utilities from the Developer tab. If the Developer tab currently isn’t visible in your copy of Word, it can be easily added by following these steps.
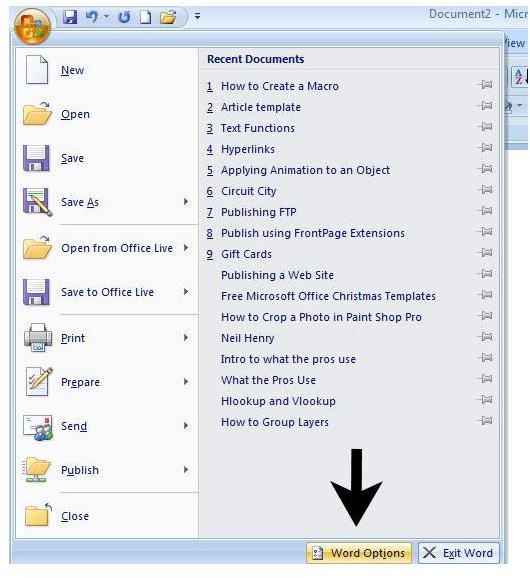
Click on the Office button in the upper left-hand corner of Word and select Word Options as shown in the screenshot below. (Click the image for a larger view.)
In the Word Options window, make sure Popular is selected and then put a check in the box next to Show Developer tab in the Ribbon.
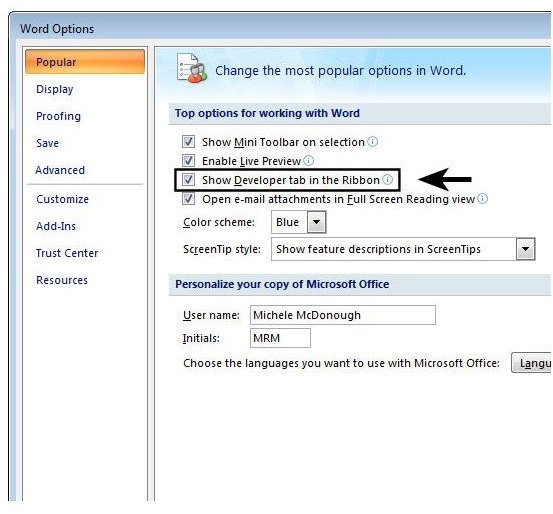
Click OK when done to return to your Word document. The Developer tab will now be visible on the Word ribbon.
How to Create a Macro in Word 2007
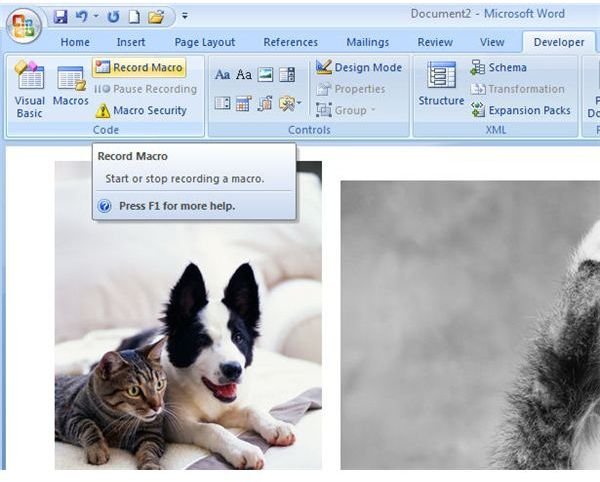
Step 1: Open the Developer tab. Click on Record Macro in the Code section of the tab.
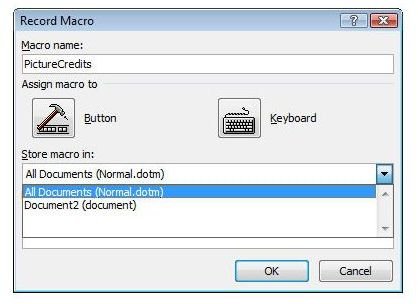
Step 2: Pick a name for your new command and type it into the Macro name field in the Record Macro dialog box. Note that the macro name must begin with a letter, and it cannot contain any special characters, symbols, or spaces. Also, while this is optional, it’s a good idea to go ahead and type in a description for the macro. You can leave this field blank if the name of the macro makes the function of the command obvious, but it never hurts to include a short description.
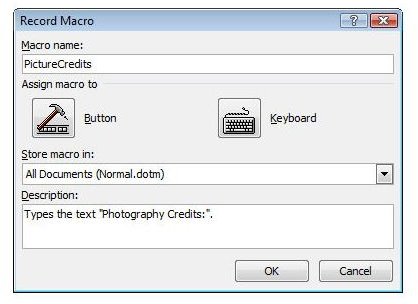
Step 3: Decide where you want to store the macro. If you choose to store it in All Documents, it will be stored in the global template and accessible from any document you create later on down the line. If the macro is really only intended to be used for the current document you are working in, you can choose to store it there instead so as not to clutter up the global template with an unused macro.
You can also create a shortcut for the macro here if desired. We’ll wait and discuss how to do that in Part 2 of this series.
Click OK to continue to the next step.
Step 4: Perform the set of actions that you want the macro to include. It’s important to note here that you need to use your keyboard when performing these tasks since most mouse movements and actions will not be recorded.
If you need to type in anything that you don’t want the macro to include, click on Pause Recording in the Developer tab. When you are done and want to start recording actions again, click on Resume Recorder.
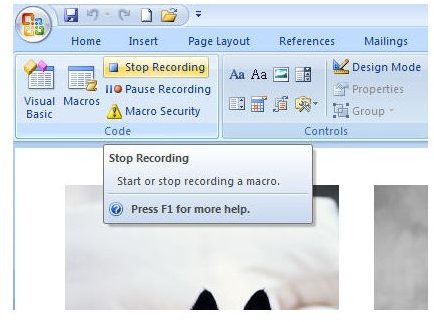
Step 5: When you’ve finished executing all of the commands that you want the macro to include, click on Stop Recording.
How to Run a Macro
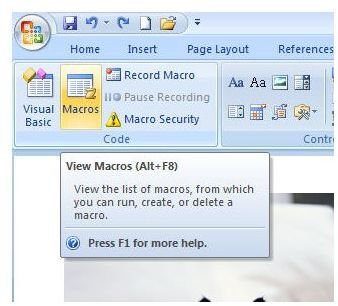
Once you’ve recorded a macro, there are two basic ways to run it. One way, which we’ll discuss in the next part of this series of articles, is to use an assigned shortcut. The other way is to open the Developer tab on the Word ribbon and click on Macros.
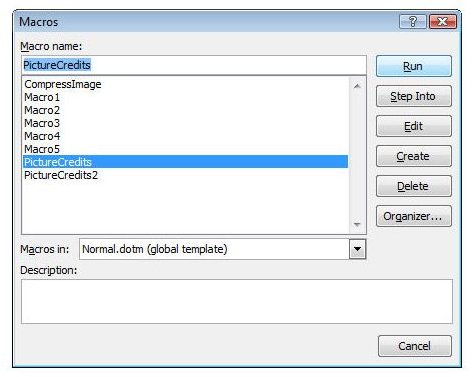
The Macros window that appears on your screen will give a listing of all macros available for your current document whether they are in that document or the global template. Just be sure to pick the proper item from the Macros in drop down list. Select the macro that you wish to execute and click the Run button.
For more user guides and tutorials, be sure to take a look at the other items in Bright Hub’s extensive collection of Microsoft Word tips and tricks .
This post is part of the series: Macros in MS Word 2007
One way to improve efficiency and increase productivity in Microsoft Word 2007 is to utilize custom macros. This set of articles will give several tips and tricks for creating and using these powerful tools.


