
Many Windows XP based image viewing applications offer you a flexibility to associate certain image file formats with them right at the time of installation, or after that. This ensures whenever you try to open images with that file format, your favorite image viewing application opens them for you.
Let the application choose image files it will open
In the previous article in this series, we came to know how Windows XP assigns some default applications for viewing image files with certain extensions such as JPG, BMP, GIF etc. We also learned how we could change the default application for our Windows XP based PC for viewing images corresponding to a particular image format through the direct method, by right clicking the image file icon and following the “Open With” menu.
In this article, we will learn how we can associate a particular image file format with a certain image viewing application right from within the application, which can be done right at the time of installation of the application, and also after the installation.
For our purposes, we have chosen IrfanView 4.10, a popular image viewing application supporting Windows XP that is totally free of cost for the users, and which can be downloaded from their website without charge. The beauty of this application is the myriad number of image as well as video and audio formats that it supports for opening, which makes it a very good image viewing application for you, and free!
Configuring IrfanView while installing
Download a free copy of IrfanView 4.10 setup from the website, https://www.irfanview.net .
Double click the setup file to run it, and follow the instructions to indicate the directory where it will be installed.
After two initial screens, you will come across a third screen with a caption on the top stating “Do you want to associate extensions with IrfanView? (optional")”. Right below the caption you will find a window pane displaying a list of small checkboxes followed by various image and video file extensions and their full names.
Choose any or all the image formats that you would like to open with IrfanView after it is installed. Remember, choosing the format right now will make IrfanView the default application for opening that particular image format, although you can change it whenever you wish to do so.
Click “Next”, and follow further instructions to install the application upon your Windows XP based PC.
The image formats selected by you at the time of installation have now been associated with IrfanView 4.10, which becomes evident by all those image files being displayed by IrfanView’s icon.
Configuring IrfanView after installation
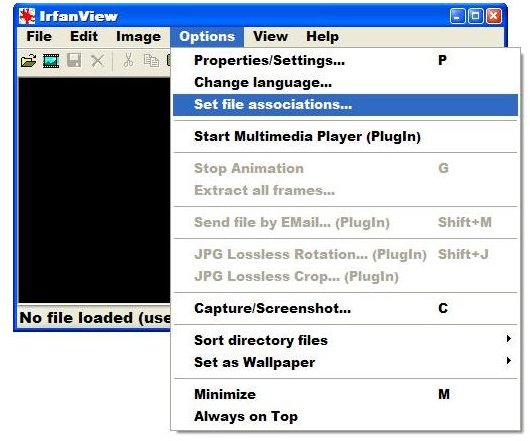
Open IranView, and click “Options > Set file associations”.

A window entitled “Properties/Settings” will pop up before you, with the “Extensions” tab opened . Within the tab, you will see a caption “Associated file extensions with IrfanView”, and just below that a window pane similar to the one that appeared at the time of installation, featuring various image and video file formats, their names and checkboxes before them.
As you did while installing the application, just select the image file formats you would like to be opened with IrfanView, and click “OK”.
Likewise, if you want to prevent any image file format from being opened in IrfanView, just uncheck the checkbox before that extension and click “OK”. The file format will be associated with the default Windows XP application used to open it.
This post is part of the series: Changing default applications for viewing images in Windows XP
At times you want to view your pics and images within a particular image viewing application upon your Windows XP PC, but by default, the images are opened in some other application you don’t like. Want to change the default application for viewing your images? Read on.


