Have you ever rebuilt your PC only to find the media you’ve got to reinstall Windows is the base package with no service pack installed? It’s going to take a while to get Windows back up and running with all of the service packs and patches available. Why not streamline the process for next time usi
Overview
Windows comes with a handy utility called “update” that allows you to slipstream a service pack into your installation files, but a more powerful, user-friendly package is available called nLite. nLite is a free tool to help you create a customized Windows installation CD by allowing you to apply service packs and patches to the CD, remove Windows components and other general customizations. We’ll use nLite in this article to slipstream the latest Windows XP Service pack.
An article covering Vista slipstreaming will be made available shortly after this article is published.
What you’ll need:
- Windows XP installation disc
- nLite (available here )
- Latest XP Service pack (SP3 is available here )
- .NET Framework 2.0 (available here )
Installing and Using nLite
After you’ve downloaded nLite and the other necessary components, start off by installing the .NET Framework. You can follow the default prompts and do a reboot after the install completes. After the reboot, start the nLite installer keeping all of the defaults.
-
Start nLite by going to Start, Programs, nLite, nLite.
-
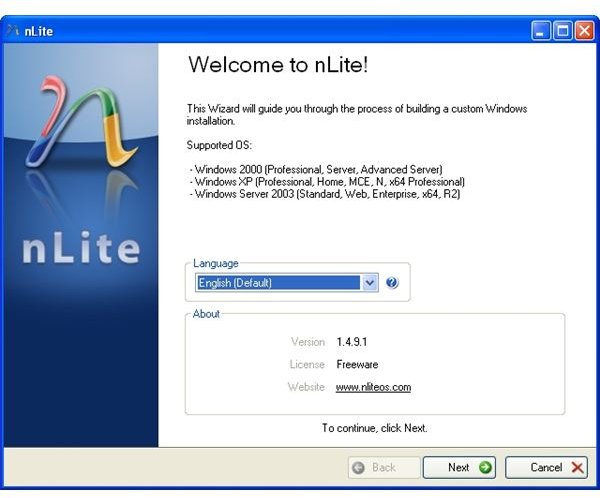
On the main screen, select your language and press Next (Figure 1).
Advertisement
-
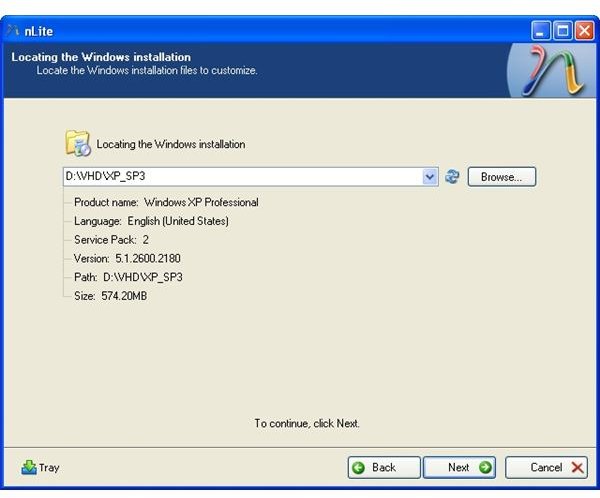
You will now need to insert your Windows XP CD or point to a location where your installation files are located. Click Browse and select the location of your installation files. If you do use a CD, nLite will first copy the files to your hard drive before continuing (Figure 2).
-
The next page will let you load some “presets” or templates. You can skip this step by clicking Next.
Advertisement -
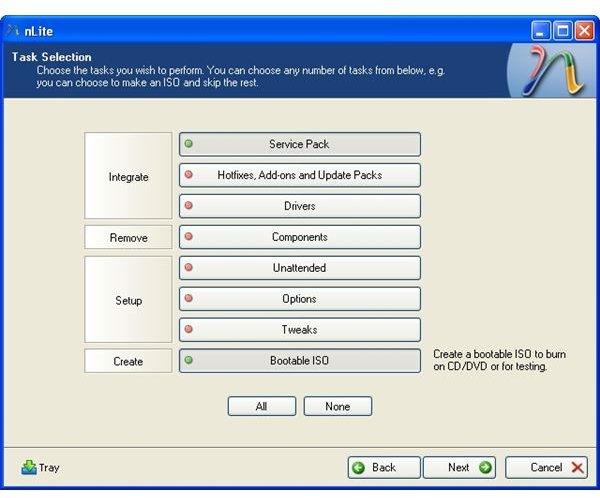
The “Task Selection” page is the bread and butter of nLite – allowing you to determine just how much you want to customize your installation. For the purpose of this article, click on “Service Pack” and “Bootable ISO” (Figure 3). Click Next.
-
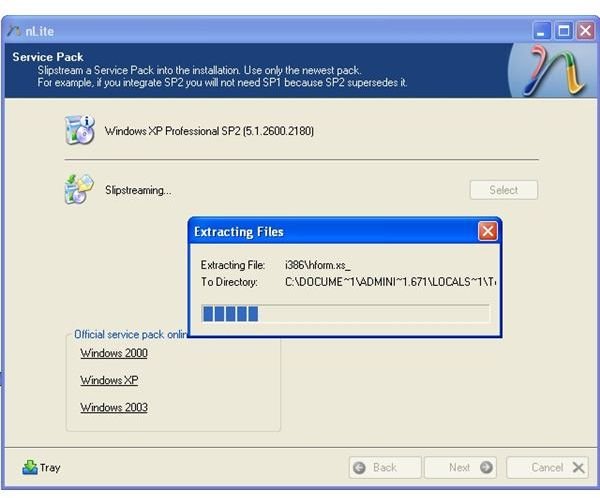
On the Service Pack page, browse to the Service Pack you downloaded. nLite will start streaming the pack (Figure 4). When the process is done, you will receive notice. Click OK on the pop up window and click Next back in nLite.
Advertisement -
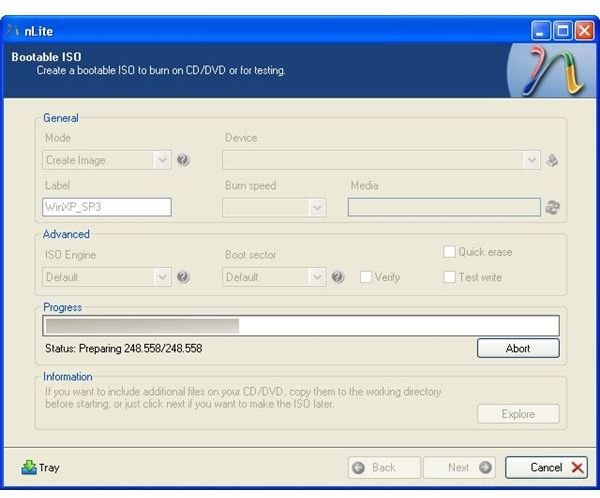
On the Bootable ISO page, select whether you want to create an ISO image (to burn later) or to write directly to a DVD. Click “Make ISO” to begin (Figure 5).
You now have a Bootable image (or DVD) with the latest service pack integrated. Keep in mind nLite can do much more than just integrate service packs!
Images
This post is part of the series: How to Slipstream Windows Service Packs
This series of articles will show you how to use free utilities - nLite and vLite - to install the latest Windows service packs into both Windows XP and Vista base images.


