Nearly every version of Windows has had some form of file level backup and recovery built into the system – Windows 7 is no different. How does the new version of the backup and restore center shape up? Part one will cover Windows 7’s File based Backup and Recovery.
Overview
The Windows 7 Backup and Restore center has a few new features compared to versions past. File level backup is still present and is wrapped in a user friendly wizard-driven interface. A big addition to the tool is the ability to perform image based backup and restores. This will be covered in Part 2 of this series.
Here are some of the high level features:
- Windows 7 Backup supports backup to optical media, USB devices such as thumb sticks and external hard drives and network locations.
- Backups are created as a set noted by date and time taken. Each backup set can be recovered from by selecting the entire set or select files or folders.
- Backups can be scheduled to run at specific dates and times.
From the time I’ve spent with the Windows 7 Backup and Restore Center, I can easily say this is the best version of the built-in tool Microsoft has built yet.
Performing File-Based Backups
You can perform a file based or image based backup by going to the Backup and Restore center. This section covers performing a file based backup.
- Click the Start menu and type “backup” in the search bar.
- Click on “Backup and Restore”.
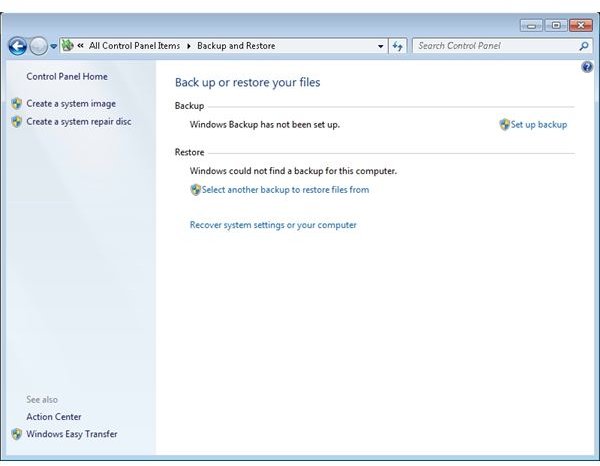
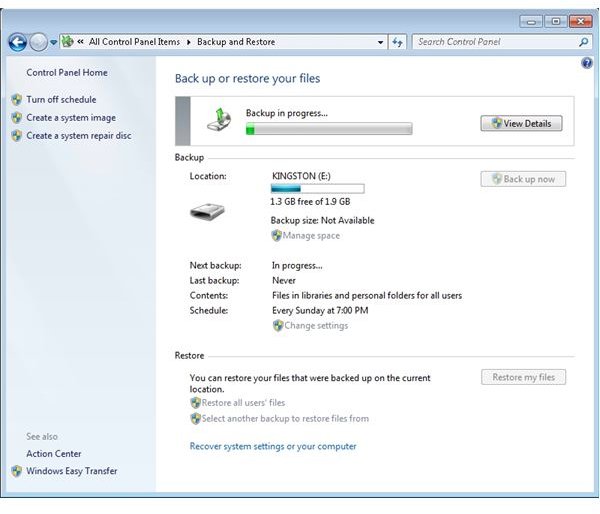
- The Backup and Restore center will open (Figure 1). Click on the “Set up backup” button.
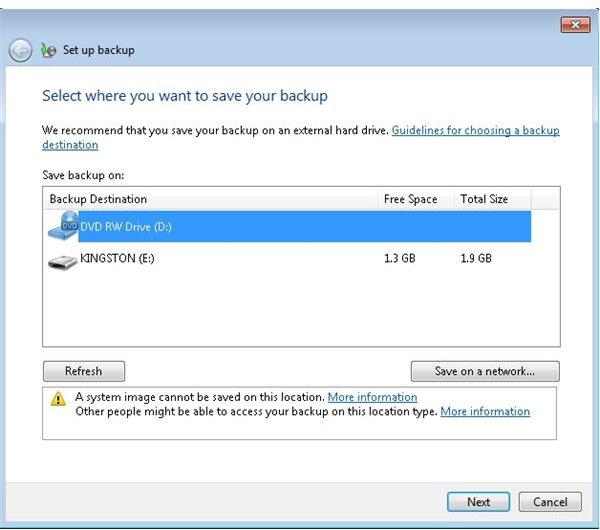
- Select the location you want to back up to and click Next (Figure 2).
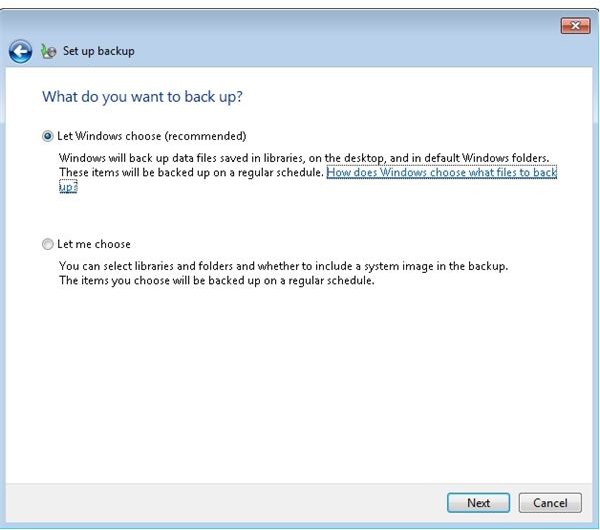
- You have two options for what to backup – let Windows choose or manually select. Windows will back up any libraries and custom app data, downloaded files and favorites. It’s a safe bet, but if you want, you can select your own files to back up (Figure 3). Click next when you’ve finished.
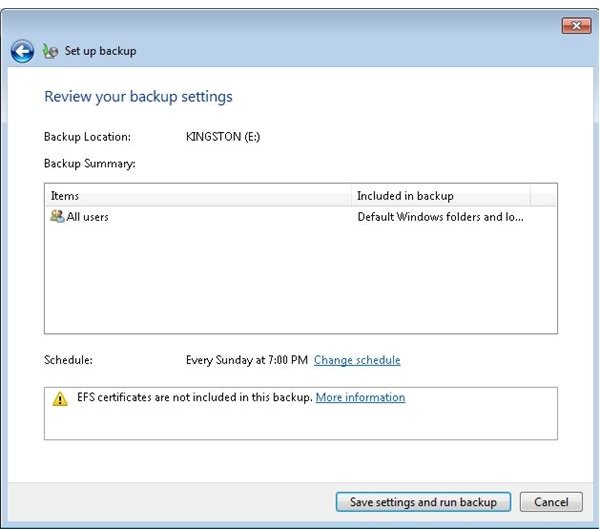
- The next screen lets you schedule your backup on a regular basis and to review what will be backed up (Figure 4). Click “Save settings and exit” when you’re ready to perform your first backup.
- The backup will now begin. You can follow the status in the Backup and Restore center (Figure 5).
Performing a File-Based Restore
Performing a restore of your files is relatively painless using the Backup and Restore center.
- Open the Backup and Restore center as outlined above.
- Click the “Restore my files” button.
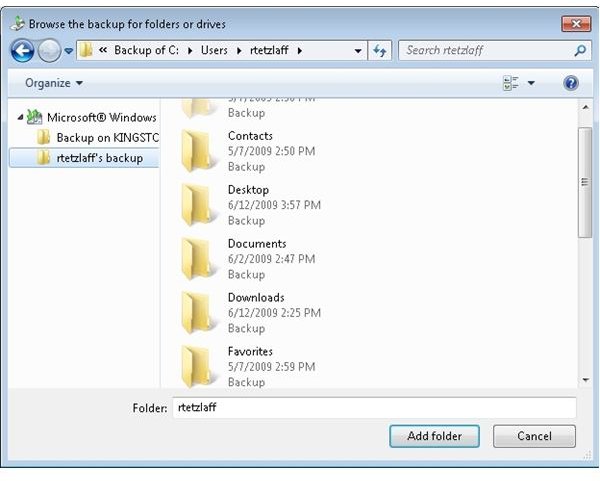
- You now have the option of searching for files to restore or browsing for files or folders. By default, you will be restoring the newest version of a file or folder. Note that if you’ve backed up the same file multiple times, you can select which version you wish to restore (Figure 6). Click Next.
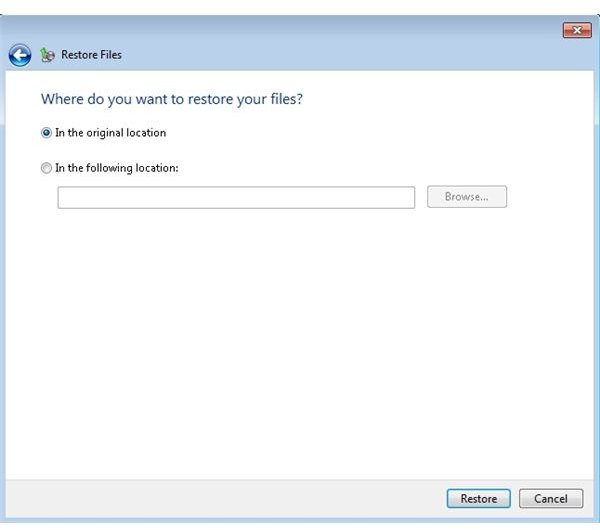
- Next, you can specify the location you wish to restore to – the original location or an alternate location. I generally recommend restoring to an alternate location – just to be sure you don’t accidentally overwrite a good file (Figure 7). Click Restore.
- The restore process will finish and you will be given the opportunity to view the files you restored.
Summary
As you can see, Windows 7 Backups and Restores are performed easily, yet have some powerful additions to realistically allow you to use this as a practical replacement for a 3rd party Backup tool.
In part 2 of this series, I will cover Windows 7’s ability to perform image based backup and restores.
Images
This post is part of the series: How to use Windows 7 Backup and Restore Center
This two part series will cover how to use the new Windows 7 Backup and Restore center. Part 1 discusses file based backup and recovery while part 2 discusses image based backup and recovery.


